Rumba Earrings

Difficulty: 3
TECHNIQUE: Sewingsewing (the peyote and herringbone stitch)

Costume jewelry set with PRECIOSA seed beads

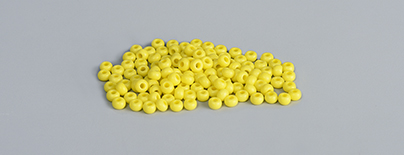
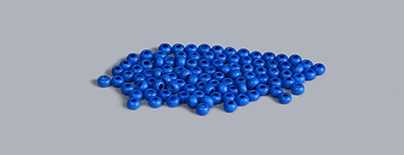
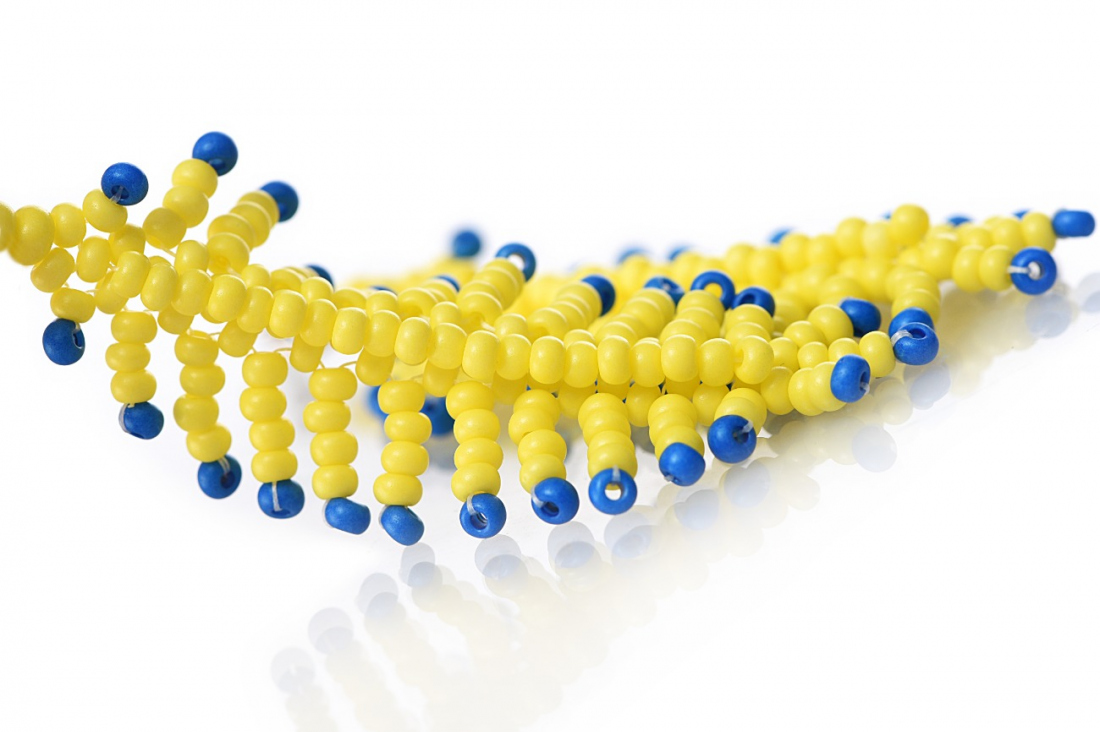
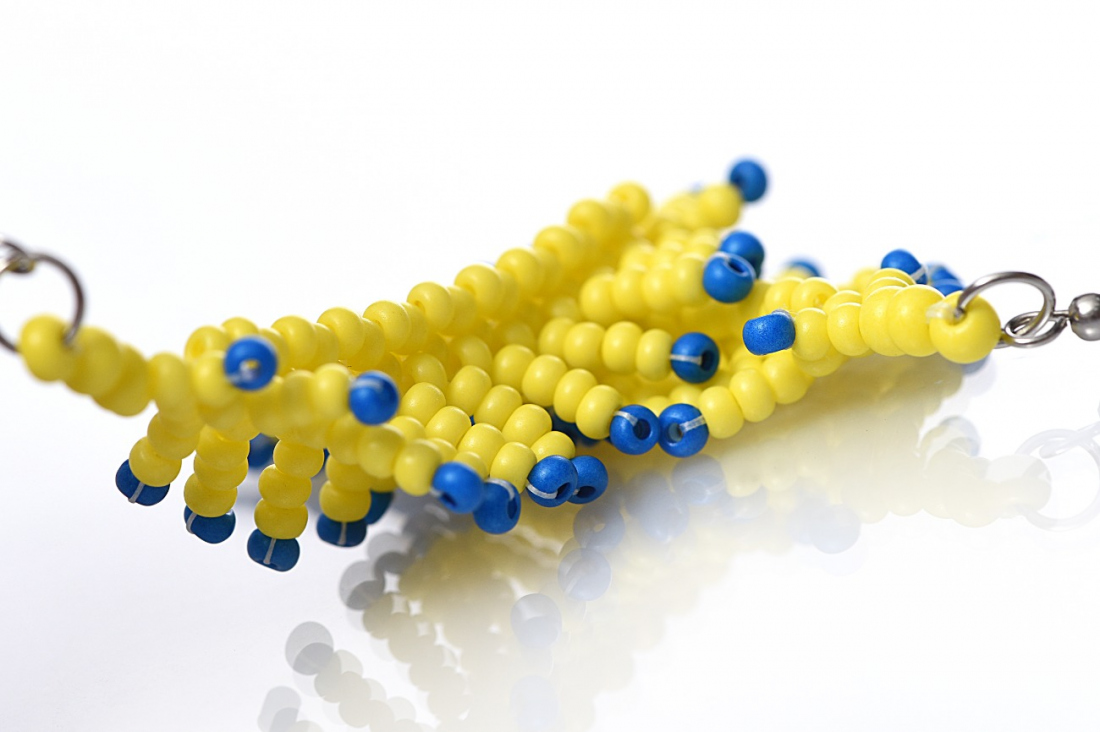
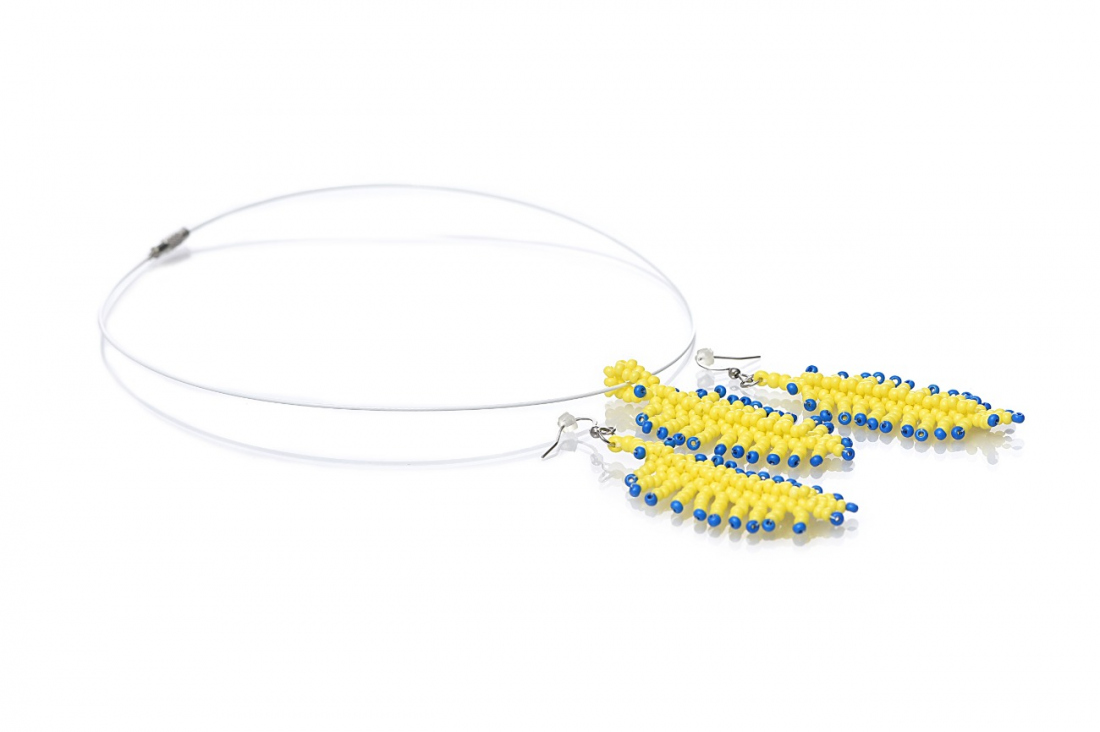
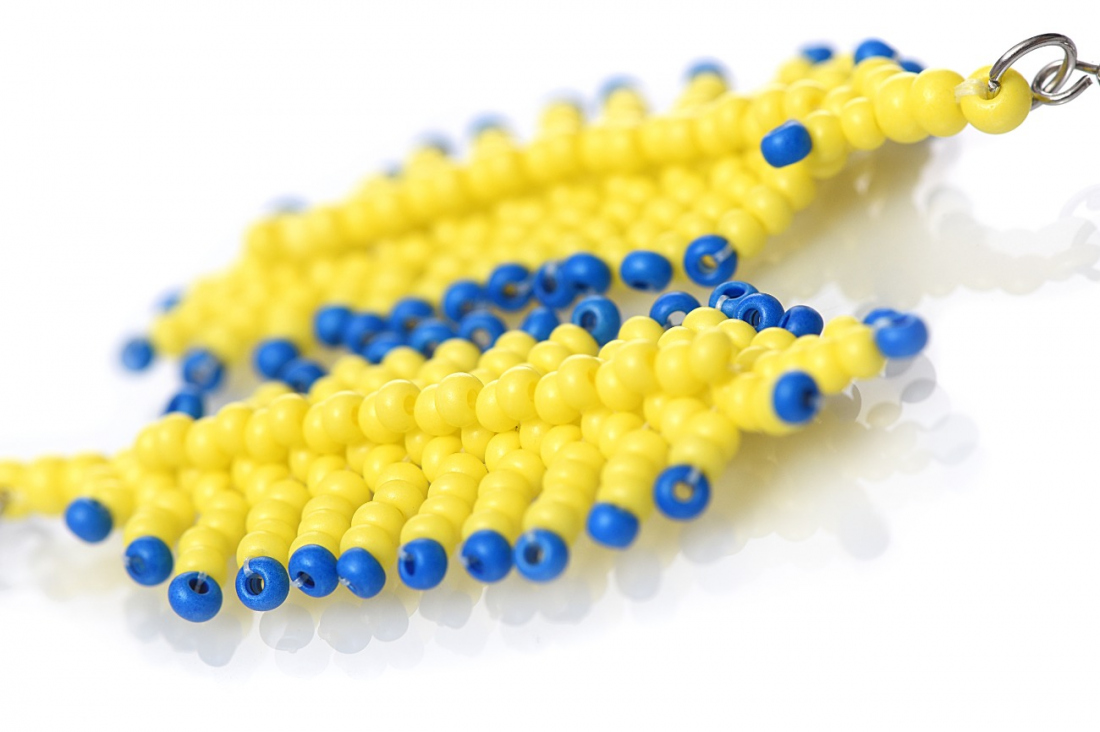
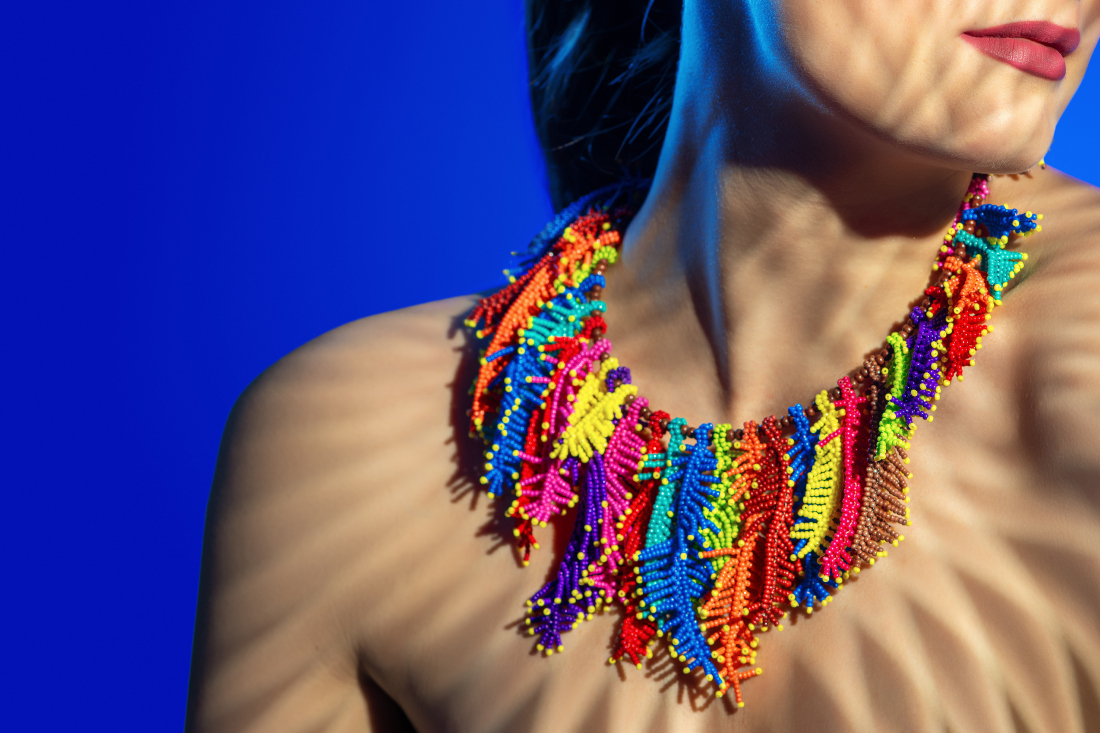
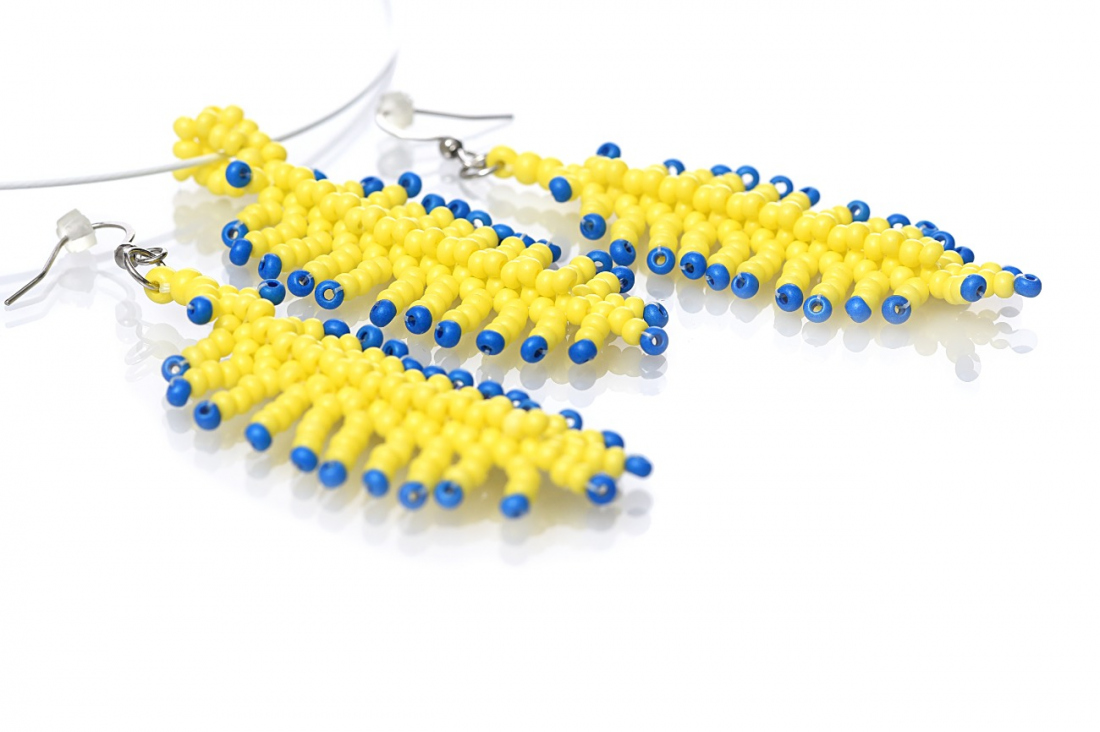
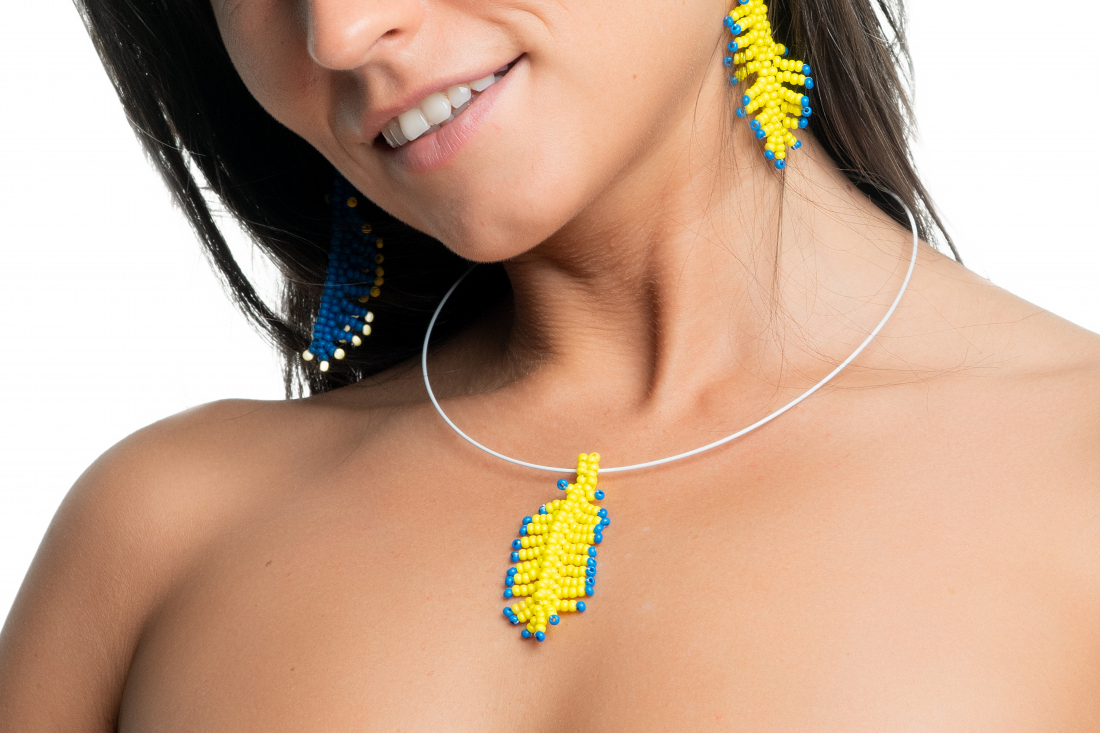
Are you looking for original jewelry in vivid colors that cannot be found in any shop? We have a tip for you on how to make just such a piece of jewelry! Use PRECIOSA Terra Intensive seed beads in vivid colors ranging from bright yellow to chocolate brown to easily create brightly colored feathers which you can then use as part of an unmissable piece of jewelry in the form of earrings, a necklace or even a pendant for your handbag or mobile phone.

Ambassadors

Hana Černá

"I work with beads, therefore I am." The Czech designer Hana Černá, nicknamed Hanule, works with beads and seed beads because she loves being creative. She also teaches others who share her enthusiasm and she does it all with her own type of blacker than black humour. She established the Beads on Facebook (Korálek na Facebooku) group which provides inspiration, encouragement and advice in the area of beadworking.
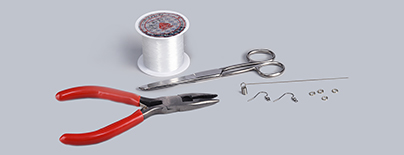
Learn More

Material and Tools

Tools

A ring; a large earring hook; Fireline no. 17 thread or a nylon line; a needle; scissors; pliers; a stop bead

Tools

Procedure

Step 1

Cut off ca 1 m of the Fireline or the nylon line, 17 mm thickness.

Step 2

Place a stop bead in the middle of the thread or use a larger bead with a knot to mark the centre of the line.

Step 3

String 24x R1 at the base of the feather and sew back to the centre using the peyote stitch – a total of +12 R1 (fig. no. 3).

3

Step 4

Add 2x R1 and 1x R2 and return from the base through the two R1 and one R2 (fig. no. 4).

4

Step 5

Remove the stop bead and start sewing the fringes in the shape of a feather on one side: string a total of 2x R1 and 1x R2. Thread the needle from the base through the two R1 and one other. It is necessary to tighten it well, so that the feather holds its shape (fig. no. 5).

5

Step 6

Sew the fringes in between the peyote ridges according to the diagram (The total number of R is given, i.e. not according to the color),
(fig. nos. 6a + 6b).

6 / a

Step 7

The thread exits from the last R in the upper section of the feather. Secure the thread by threading it through the R. Tie a knot in the thread and set it aside - do not cut it off (fig. no. 7).

7

Step 8

Start sewing the other half of the feather. String the second thread onto the needle sew it in the same way as the first half according to the diagram (fig. nos. 8a + 8b).

8 / a

Step 9

There are two possible ways of finishing. For earrings, it is advisable to sew some bigger beads to the end of the feather, onto which you can hang the hook using a ring (fig. nos. 9a + 9b).

Or you can sew an ending that can also be used to hang the feather on a wire as a necklace. There are two R next to one another at the end; the thread will extend from one of the R. String 10R and sew it back into the R, from which the thread came (fig. no. 9c).

Also sew 10R onto the second R (fig. no. 9d).

Two loops will be created next to one another (fig. no. 9e).

Return one line to the adjacent R from the loop and sew through them together using a kind of herringbone stitch. This method has been chosen, because it would be difficult to avoid the loop if you use the straight herringbone stitch.

9 / a

Step 10

Now, all that remains is for you to strengthen the feather by sewing through the quill. Sew through the middle and always add 1x R1 between the peyote base from the bottom to the top, a total of 10x R1 (fig. no. 10a + 10b).

Then string 1x R1 and return to the last of the added R1 (fig. no. 10c + 10d).

Continue adding R1 to the top of the feather. In figures 10b and 10d, the rocaille has been added in a different color for better transparency and orientation.

10 / a

Step 11

Tie a knot in both threads, sew them in, cut off the line and you're finished (fig. no. 11)!

11

Step 12

Sew the second feather is the same way and add the earring fastening (the hook) using the pliers and you're finished (fig. nos. 12a + 12b)!

12 / a

Downloads