In contrast

Difficulty: 3
TECHNIQUE: sewing

Earrings with PRECIOSA Terra Intensive Matt Seed Beads

Try out the PRECIOSA Engraved Pip Pressed Beads in combination with distinctive seed beads in the PRECIOSA Terra Intensive Matt color finish. You can choose from 11 bright colors on the seed beads. The combination of the smooth brilliance of the beads and the matt colors of the seed beads provides a highly interesting look! Make these earrings in contrasting colors according to our tutorial; they are sure to be a winner!

Ambassadors

Helena Chmelíková

She is able to switch from luxurious and extravagant fashion show pieces to the preparation of hobby projects,

Learn More

Material and Tools

Materials

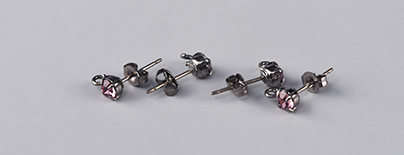
A butterfly clasp and a chaton in a cup
Tools

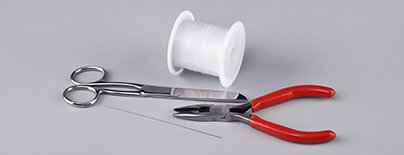
A 0.20 mm nylon line; a thin needle; scissors; flat-nosed pliers (the eye on the butterfly clip)
Procedure

Step 1

String 1x EP and 1x R8. Move them to the centre of the line. Thread one part of the line through the EP and R8 one more time. Thread the second part of the line through the R8 only and from the opposite side. Tighten.

1

Step 2

String 1x EP, 4x R8 and 1x EP onto one part of the line. Thread the same part of the line through the R8 from Step 1. Thread the line through the strung EP and 3x R8. String the second part of the line through from the opposite side of the strung EP and 3x R8. Tighten.

2 / a

Step 3

Thread one part of the line through 1x R8. Thread the same part of the line through the top R8 from Step 2 and once more through the strung R8. Thread the second part of the line through the strung R8 from the opposite side. Tighten.

3 / a

Step 4

Proceed in the same way as in Step 2. Thread the line through the R8 from Step 3. Proceed in the same way as in Step 3. Thread the line through the top R8.

4

Step 5

String 1x EP, 1x R8, 1x R10, the open eye of the butterfly clasp, 1x R10, 1x R8 and 1x EP onto one part of the line. Thread the line through the R8 from Step 5. Also thread the same part of the line through the EP, R8 and R10 one more time, as well as the eye of the butterfly clasp. Thread the second part of the line through the EP, R8 and R10 from the opposite side. Tie off both ends of the line.

5 / a

Step 6

Thread one part of the line through the eye of the butterfly clasp, the R10, R8 and EP. Thread the second part of the line through the R10, R8 and EP on the opposite side of the butterfly clasp. String 4x R10 onto both parts of the line. Thread the line through the EP again. This will create arches above the hole.

6 / a

Step 7

Thread both parts of the line through the R8 between the EP opposite one another. String 5x R10 onto one part of the line. Head across and "one level down" to the opposite EP. Thread the line through its hole. String 2x R10 onto the other part of the line. Thread the line through the central R10 of the already strung arch. String 2x R10. Thread the line through the hole of the opposite EP.

7 / a

Step 8

Create arches out of 4x R10 above the EP as in Step 7. Create a "cross" out of the amalgamated arches of 5x R10 as in Step 7.

8 / a

Step 9

Create arches from 4x EP above the EP as in Step 7. Thread one part of the line through the R8 between the EP. String 2x R10. Thread the line through the lower EP. String 2x R10. Tie off both ends of the line. Pull the ends into the surrounding material. Cut them off.

9 / a

Step 10

Create the second earring.

10

Downloads