Fringed curtain

Difficulty: 3
Technique: sewing, stringing

Seed bead earrings made from PRECIOSA Solgel

Bold, fringed earrings never go out of style. We offer a tutorial showing how to make distinctive earrings full of dynamic movement. Choose from the wide range of seed bead colors from the PRECIOSA Solgel collection and combine the colors according to your mood.

Ambassadors

Helena Chmelíková

She is able to switch from luxurious and extravagant fashion show pieces to the preparation of hobby projects,

Learn More

Material and Tools

Materials

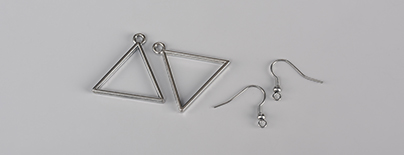
Metal parts in the shape of a "frame" (a triangle, circle), preferably with an eye for hanging; earring hooks
Tools

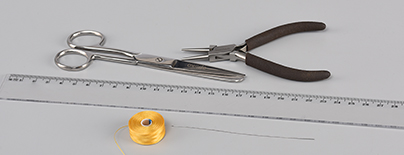
A thin needle (11/0 – with a small eye); scissors; a ruler; a nylon thread; round-nosed pliers
Procedure

Step 1

If you use a different metal part than the one in the example, first ascertain how many R you can place under the metal part. String the estimated number of R onto a 50 cm long piece of thread. Then, pass the thread through each R again using the ladder stitch. Place it against the metal part and ascertain the number. An odd number is best.

1 / a

Step 2

Cut off about 2.50 m of thread. Sew 1x R3, R3, R2, R2, R1, R1, R1, R1, R1, R2, R2, R3 and R3 to the metal part according to the pattern for arranging the colors. Move the first R3 to approximately the middle of the thread. Place the R3 from the outside against the metal part. Twist the thread around the frame of the triangle. Pass the thread through the R3 again. Continue in this way to the end of the row of R. You can carefully move the row to the edge of the metal part when sewing the R1.
 

2 / a

Step 3

The thread is now divided into two halves. String the individual fringes from the edge to the middle. Alternate the right and left-hand parts of the thread. The length of the fringe from the edge to the middle: R3 – 6 cm; R3 – 6.4 cm; R2 – 6.8 cm; R2 – 7.2 cm; R1 – 7.6 cm; R1 – 8 cm; R1 – 8.4 cm. String the length of the fringe. Omit the lower R3. Pass the thread back through the others to the metal part. Also pass the thread through the R3 in the row under the metal part. Thread it from the top and through the adjacent R3 under the metal part. Check the stringing of the fringe that you have just created. It should be loose. Proceed in the same way when stringing the other fringes up to the middle; simply extend the length of each stringing.

Recommendation – Create a pile of R. Insert the needle into them. The R will move onto the needle by themselves. Occasionally mix up the pile.

3 / a

Step 4

One part of the thread will probably now be longer. String the length of the central fringe onto it (8.4 cm). Omit the lower R1. Finish in the middle of the fringe when stringing back. Pass the second part of the thread through the central fringe from above. When the threads meet, tie them off in three knots. Insert the ends of the thread into the 15th to 20th R1 and cut them off.

4 / a

Step 5

Put an earring hook into the eye on the metal part. If the eye cannot be used or there is no such eye, use a ring to hang the hook.

5 / a

Downloads