Cornelian Holiday Set

Difficulty: 1
Technique: Herringbone stitch and basic wirework

Jewelry set made from PRECIOSA Cornelian

Follow this easy tutorial to learn how to make a simple tubular beaded bead using the classic PRECIOSA Cornelian. Once you have mastered the technique, make multiple tubes and thread them onto a wire necklace interspersed with the PRECIOSA Cornelian Star to create a range of everyday jewelry items perfect for your summer holiday.

Ambassadors

Kerrie Slade

Kerrie Slade have used Czech PRECIOSA Traditional Czech seed beads in her creation.

Learn More

Material and Tools

Materials and tools for the necklace

Beading thread to match your chosen beads, (K.O. turquoise/ Nymo D turquoise/ Fireline 4lb crystal);
size 10 to 12 beading needles; scissors; 1x steel crimp cable necklace wire; wire cutters; flat nose pliers
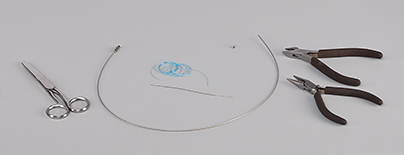
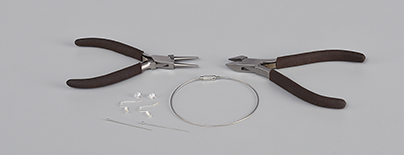
Additional materials and tools for the bracelet and earrings

Steel crimp cable necklace to cut to bracelet size; earring findings, 1 pair; ball head pins; 50 mm, 2x;
round nose pliers; flat nose pliers, 2x
Procedure

Size: Made to measure

Note: In the diagrams, beads with a black outline are the new beads being added, beads with no outline were added in previous rows.

Step 1

To make your first beaded bead:

Thread your needle with 50 cm of thread and pick up 4x K9. Leaving a 15 cm tail, pass your needle through the first 2 K9 again and position the beads so that 2 stacks of 2x K9 sit side by side. Figure 1a.

Pick up 2x K9 and pass through the first 2 K9 and the new 2 K9 again so that 3 stacks sit side by side. Figure 1b.

Pick up 2x K9 and pass through the 2 K9 added in the previous step and the new K9 so that 4 stacks sit side by side. Figure 1c.

Following Figure 1d, join the 2 end stacks together and pull your thread firmly so that the stacks form a neat cube. Figure 1e.

1 / a

Step 2

Working around the cube in a clockwise direction, pick up 2x K9 and pass your needle down the top K9 only in the next stack and up the top K9 in the next stack. Figure 2a.

Pick up 2x K9 and pass down the top K9 in the next stack, up the middle K9 of the next stack and up the first K9 added in step 2. This final move is known as ‘stepping up’. Figures 2b and 2c.

2 / a

Step 3

Working in the same direction, pick up 2x K9 and pass your needle down the top K9 only of the next stack and up the top K9 in the next stack. Figure 3a.

Pick up 2x K9 and pass down the top K9 in the next stack, up the first K9 added in the previous row and step up through the first K9 added in this step. Figures 3b and 3c.

3 / a

Step 4

Repeat step 3 so that you have 4 stacks of 5x K9. Figure 4.

4

Step 5

Close the gaps at the end of the tube by following the thread paths shown in Figures 5a – 5c without adding any new beads. Figure 5d.

5 / a

Step 6

Without adding any beads, follow the thread path shown in Figures 6a – 6b to complete the tube. Figure 6c.

Travel through the nearest adjacent stack tying 2 or 3 overhand knots between the beads. Trim the thread. Repeat with the tail thread.

6 / a

Step 7

To make the necklace:

Following steps 1 – 6, make a total of 29 beaded beads. Figure 7.

7

Step 8

Use flat nose pliers to loosen the fastening on the wire. Thread 1x KH32 onto the cut end of the cable and then pass the cable through the centre of one of the beaded beads. Figure 8a.

Repeat, adding 1x KH32 between each beaded bead and finishing with 1x KH32. Figure 8b.

8 / a

Step 9

Using your wire cutters, cut the excess cable leaving approximately 8 mm to fit inside the cable end and to create a small amount of movement in the necklace. Using the flat nose pliers, crimp the cable end into place. Figure 9.

9

Step 10

To make the bracelet:

Follow steps 1 – 6 to make approximately 11 beaded beads. Thread the KH32 and beaded beads onto another cable and cut it to size. Figure 10.

10

Step 11

To make the earrings:

Follow steps 1 – 6 to make 4 beaded beads. Thread 1x K9 onto a ball head pin, followed by 1x KH32, 1x beaded bead, 1x KH32, 1x beaded bead and 1x KH32. Using the round nose pliers, turn a loop at the top of the head pin. Using the 2 pairs of flat nose pliers, carefully open the loop on the earring finding, pass it through the loop at the top of the head pin and close the loop again. Figure 11.

11

Step 12

Repeat to make a second earring.

12

Downloads