Sauropod pendant

Difficulty: 3
Technique: brick stitch

Dinosaur pendant made from PRECIOSA PermaLux seed beads

A pendant, decoration or key ring in the shape of a dinosaur in the trending colors of the Spring/summer 2023 season for all boys and girls. Sew a pendant depicting a portrait of a herbivorous sauropod. The seed beads in the PRECIOSA PermaLux colors will also enable you to make a sauropod according to your imagination.

Ambassadors

Helena Chmelíková

She is able to switch from luxurious and extravagant fashion show pieces to the preparation of hobby projects,

Learn More

Procedure

The brick stitch

Sew a column using the brick stitch as the base (steps 1 and 2). Use the visible outer thread between the individual R for the further sewing.


A – String 1x R.
Pass the needle under the thread between the R. Pass the needle back through the R again.

B – Sewing the edges.
If the R stick out from the previous column, string 2x R. Pass the needle under the thread in the 1st gap between the R. Once again pass the needle through the 2nd R. Straighten up the strung R.

C – Sewing the edges.
he column is shorter than the previous one. String 2x R. Pass the needle through the thread in the 2nd gap between the R. Pass the needle through the 2nd R again. Return to the 1st R. Pass the needle under the thread in the 1st gap between the R. Once again pass the needle through the 1st R. Pass the needle through it again and secure the 2nd R. Proceed in a similar manner until the next column is shorter by more R.

D – If the next column is shorter, pass the needle through the outer R of the previous column one more time.

E – The projections for the feet.
String 2x R as in the protruding column. Pass the needle through them one more time from the 2nd R to the 1st R. Secure (sew under) the thread at the edge of the previous column. Pass the needle through the R again from the 1st R to the 2nd R. Sew through the edge and continue sewing the 6th column.


/ a

Step 1

Cut off about 2m of thread. Tie off the nylon thread with one or two knots next to the eye of the needle. String the central column from above according to the drawing. Start with the green R and end with the grey R. Place the strung R in the middle of the thread.

1 / a

Step 2

Pass the needle through all the strung R one at a time from the grey ones through to the top green ones using the brick stitch. Try to ensure that the R are located one above the other, as straight as possible. Tie off the thread with two knots at the last green R. Hide the knots in the holes of the top R.

2 / a

Step 3

Continue stringing the 1st column according to drawings B and A from the central column to the left and then to the right.

3 / a

Step 4

Then string the 2nd column from the centre to the right, then to the left according to drawings C and A.

4 / a

Step 5

Secure the left and right-hand parts of the head according to drawings C and A. Sew in the ends of the thread between the R.

5 / a

Step 6

Cut off about 2 m of thread. Pass the thread through the R at the place where the neck merges into the body. The left and right-hand sides of the thread should be approximately the same length.

6 / a

Step 7

Sew one side of the body. Sew in the thread.

7 / a

Step 8

Sew the second half of the body. Sew in the thread.

8 / a

Step 9

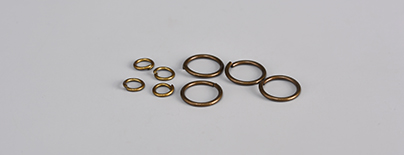
Thread the thinner rings into the holes of the top green R. Use the other rings to attach a peg or clip to them.

9 / a

Downloads