Pitahaya roja

Difficulty: 3
Technique: sewing (the right-angle weave stitch), stringing on wire, linking

Wild necklace

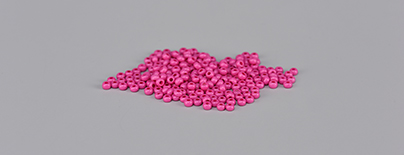
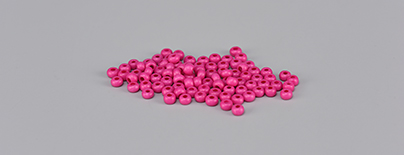
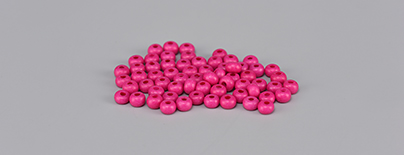
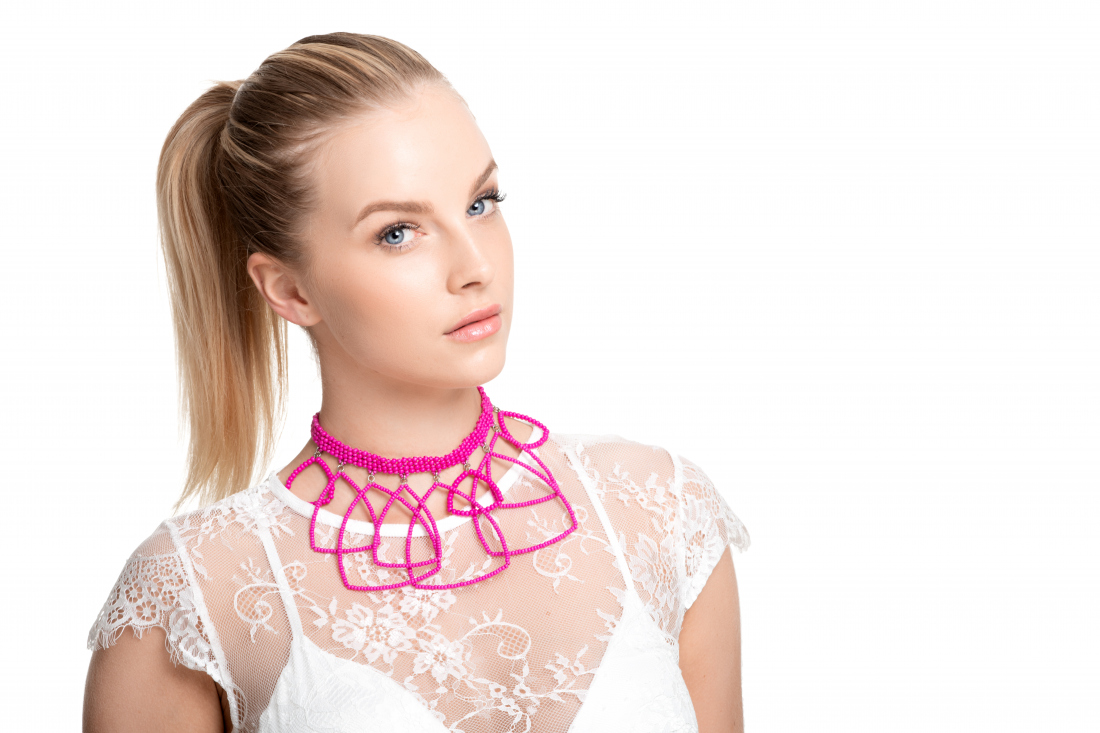
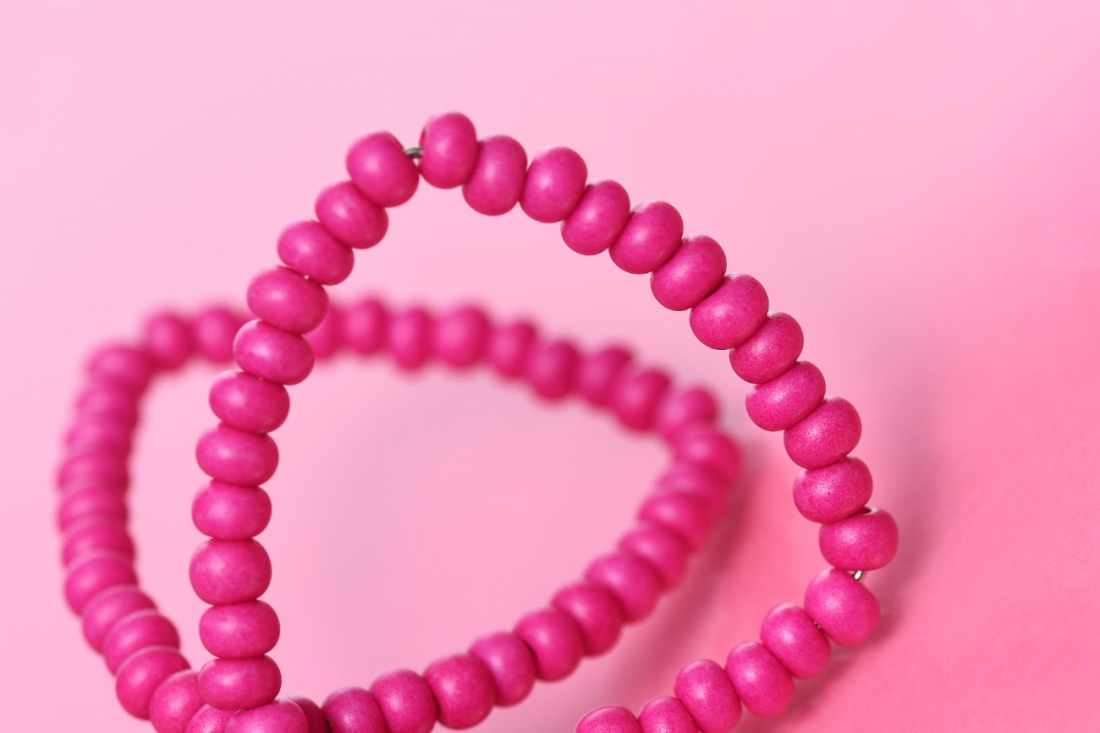
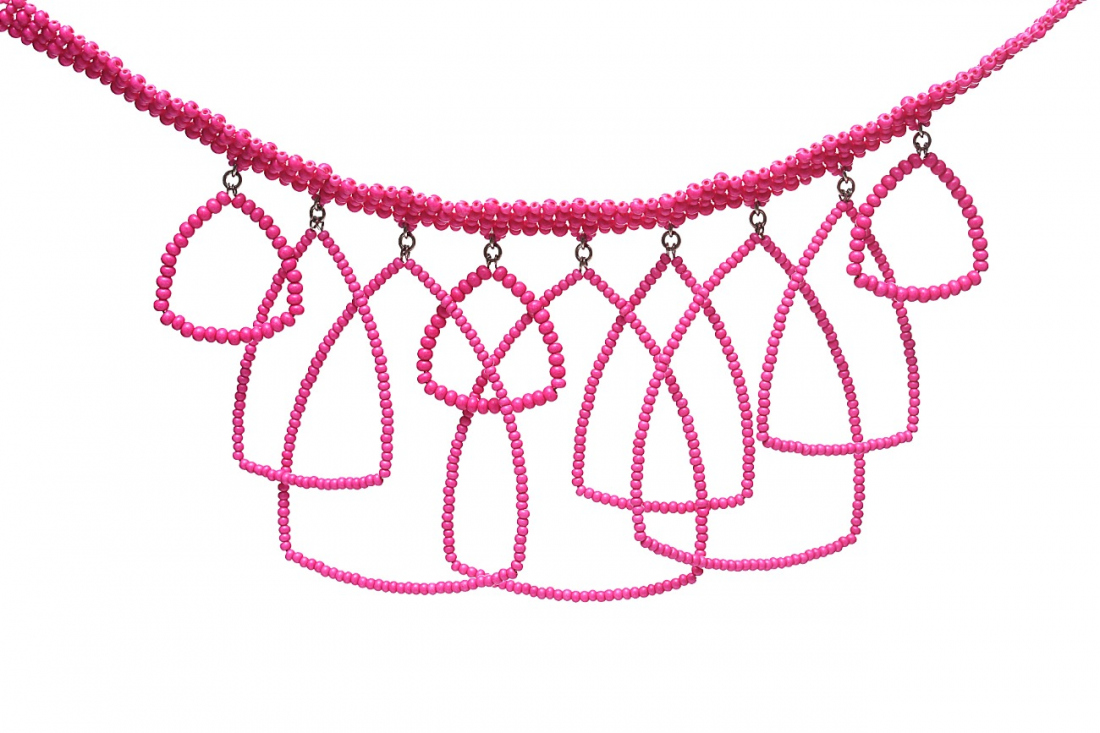
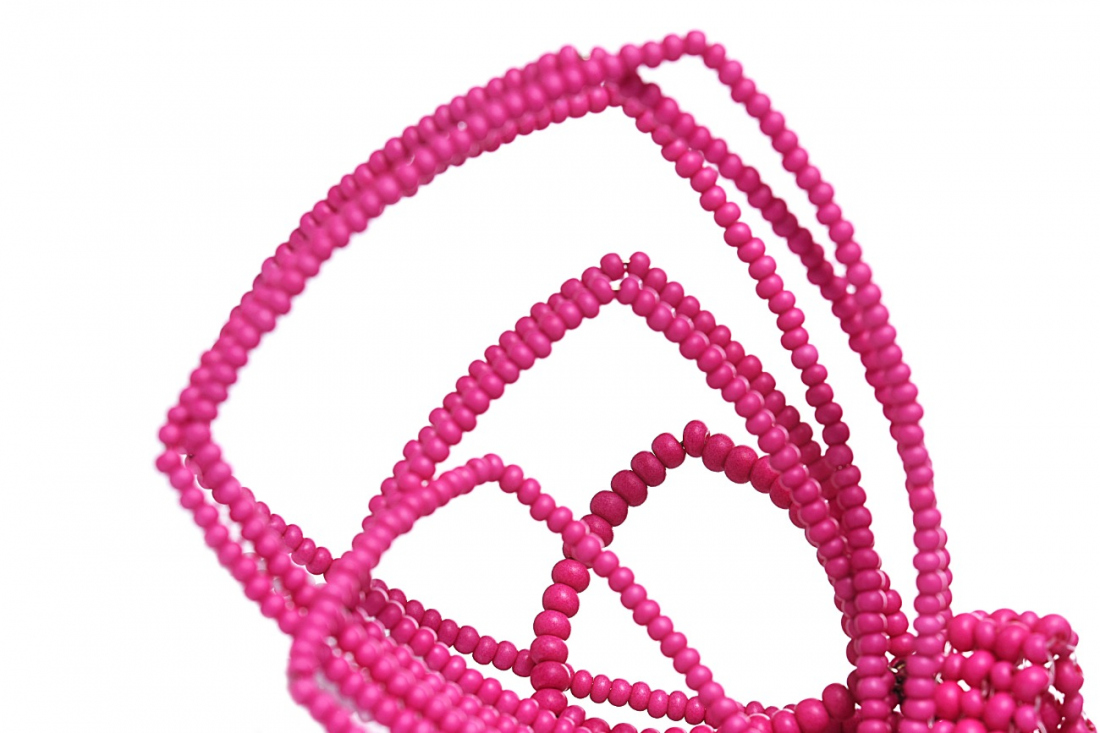
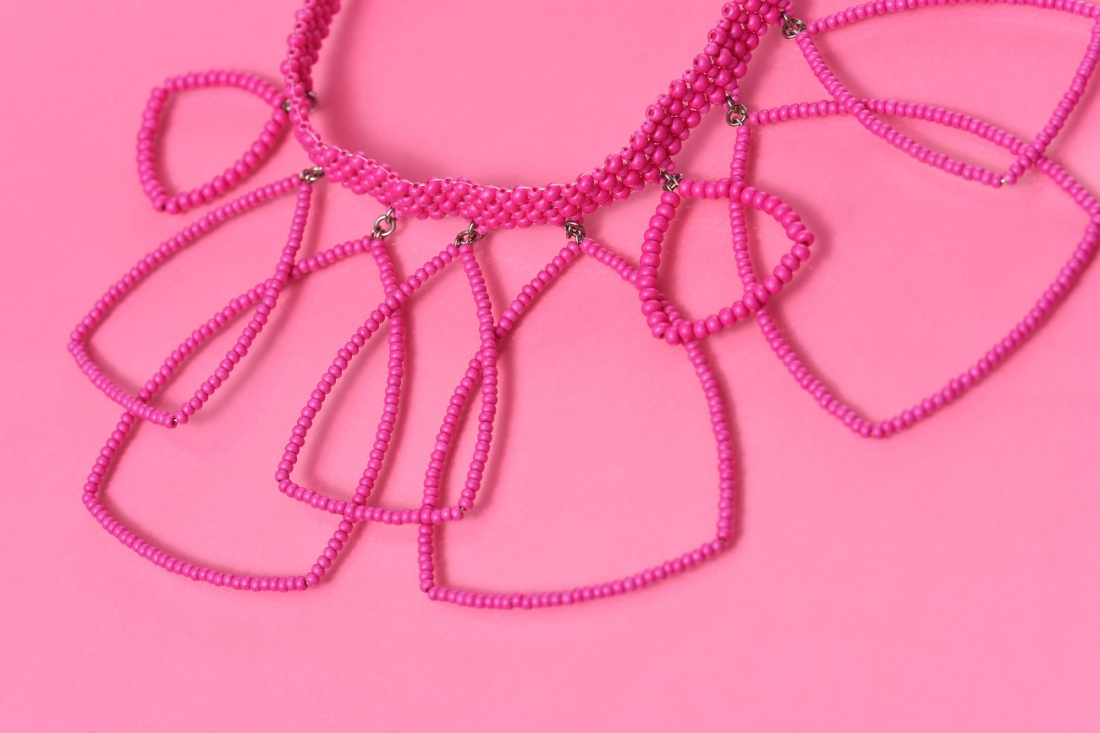
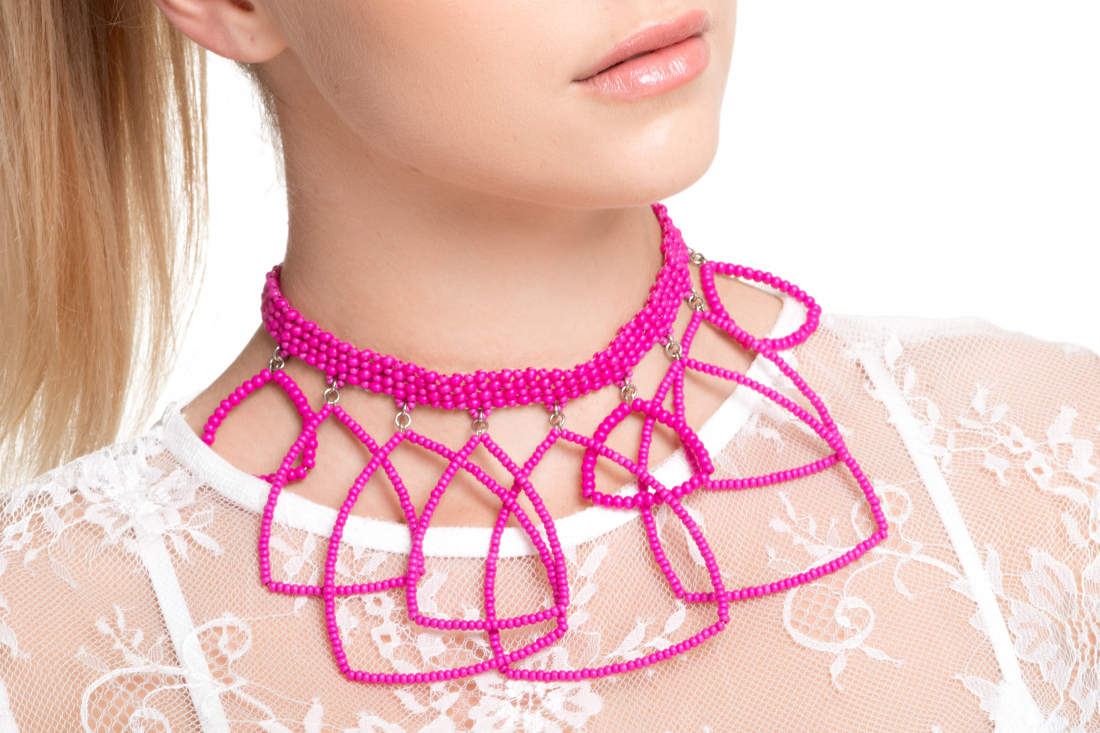
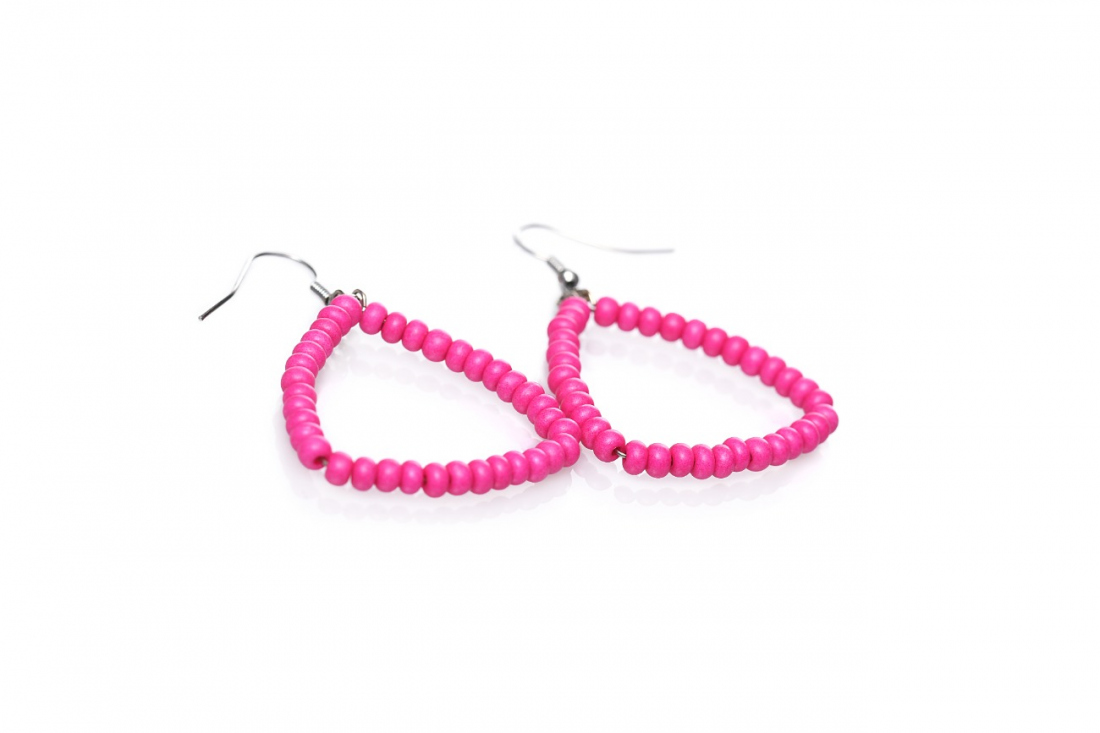
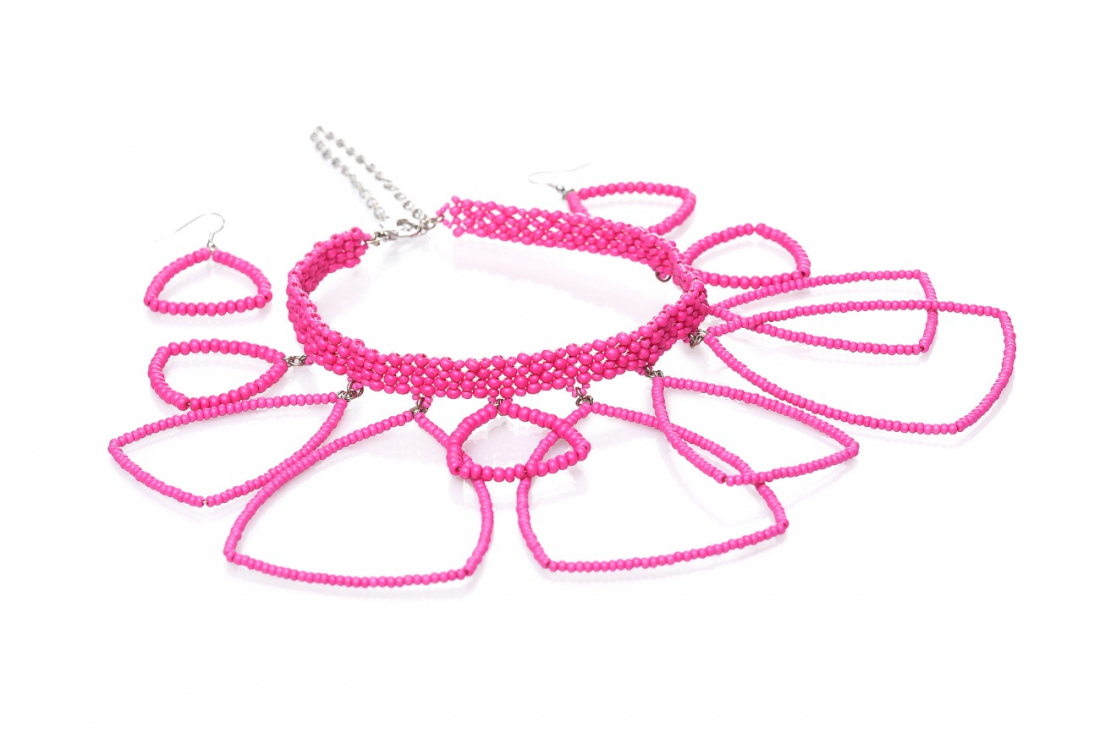
Create a necklace that is distinctive due to its color and shape and reminiscent of a dragon fruit, better known as Pitahaya roja. The opaque pink color from the PRECIOSA Terra Intensive collection in the matt version will go perfectly with your summer outfit and much more.

Ambassadors

Helena Chmelíková

She is able to switch from luxurious and extravagant fashion show pieces to the preparation of hobby projects,
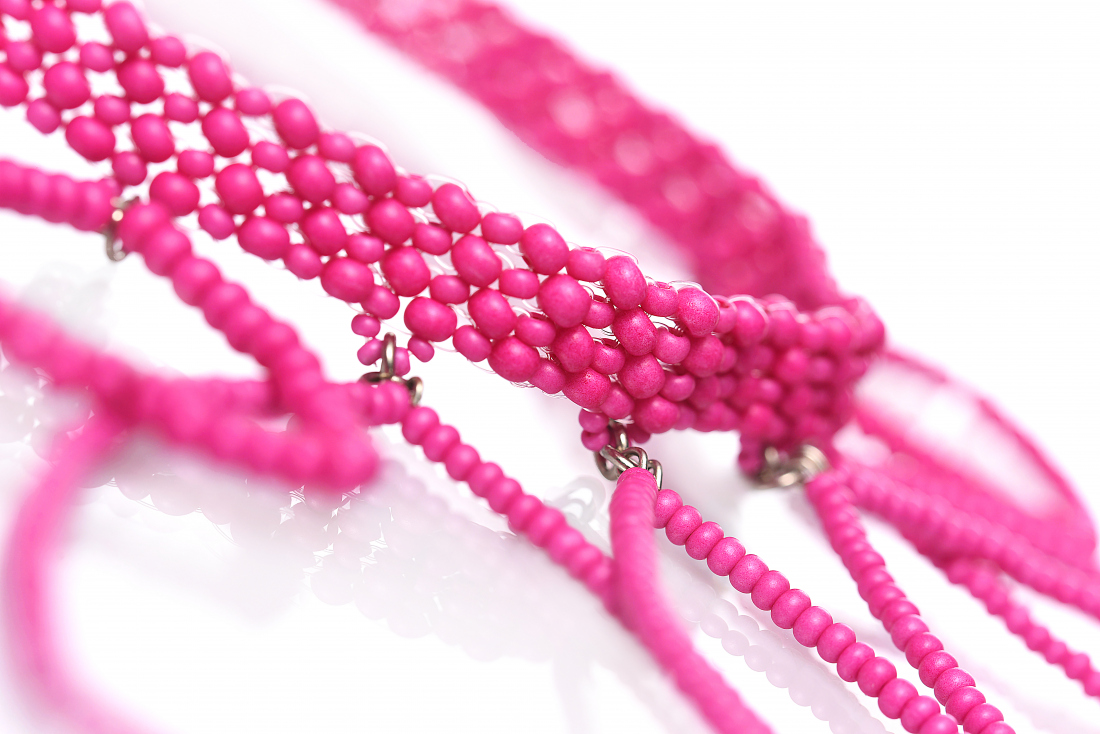
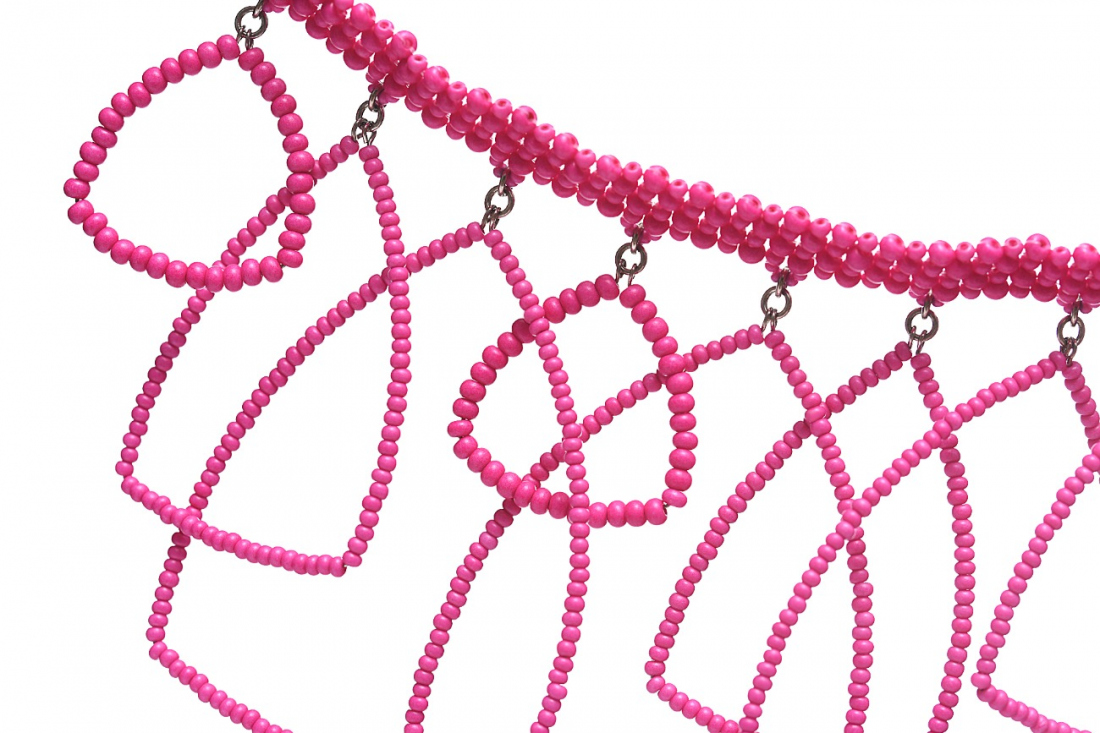
Learn More

Material and Tools

Materials

Circular memory wire; 6 cm diameter memory wire; 5 mm rings; a large carabiner; an adjusting chain with large links

Tools

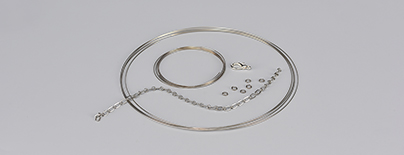
A 0.20 mm nylon line; a thin needle; scissors; a ruler; snipping pliers for the steel wire; flat-nose pliers; needle-nose pliers

Procedure

Step 1

The pendants

Create 3 small pendants out of R6. Snip off 1 twist from the 6 cm diameter memory wire. Create a loop at the start. Grasp the wire between the points of the needle-nose pliers. Carefully, but thoroughly twist the wire around the pliers. Support the wire with your left thumb and carefully twist the wire with your right hand. Do it the other way around, if you are left-handed. Twist the loop back at its neck. If you have not succeeded in closing the loop, press it shut with the flat-nose pliers. Twist the loop to a perpendicular position using the flat-nose pliers.

1 / a

Step 2

String 12x R6. Twist the wire immediately behind the R6 using the flat-nose pliers. String a further 12x R6. Twist the wire. String 12x R6 one more time.

2 / a

Step 3

Shorten the protruding wire to about 1 cm. Twist a loop. Twist the loop into the perpendicular position. Straighten the shape, adjust the angle of twist. Both loops should be close to one another.

3 / a

Step 4

Create 3 medium sized pendants from the R8. You will need about a half-twist of memory wire. Proceed in the same way as for the small pendants. This wire is stronger, so it is harder to make the loops. String 30x R8 on the sides and 20x R8 on the bottom.

4 / a

Step 5

Create the 3 largest pendants. You will need about ¾ of a twist of the circular memory wire. String 40x R8 on the sides and 30x R8 on the bottom.

5 / a

Step 6

The sewn collar

Leave about 30 cm of line free at the beginning. Use the right-angle weave stitch to sew a band. String 1x R8, 1x R6, 1x R8 and 1x R6. Thread the line through the first 2x R one more time. String a further 1x R8, 1x R6, 1x R8 and 1x R6. Thread the line through the first 2x R one more time. You will have thus created two rows.

6 / a

Step 7

Thread the line through the outer R8. String 1x R6. Thread the line through the R8 one more time. Continue threading the line through the central R6 and R8 from the 2nd row. String 1x R6 and 1x R8. Thread the line through the R6 and R8 from the 2nd row one more time. Thread the line through the last R6 from the 2nd row. String the R8 and thread the line through the R6 one more time. You will have now created the 3rd row.

7 / a

Step 8

Alternate the procedures from Steps 6 and 7. Sew a band that is 30 – 31 cm long. The total number of rows must be even.

8 / a

Step 9

Adjusting the line. Sew half a row with the reducing length of the using the procedure in Step 6. Sew the second half with a new line. Secure the next row with the new line. Only now, tie off the ends of the lines using two or three knots. Pull the ends into the surrounding R and cut off.

9

Step 10

The final eye. Use the initial 30 cm of the line and the sufficiently long line on the other end of the collar. The rows at both ends of the band should have been sewn using the procedure according to Step 6. Finish threading the line through the row in the middle R6 and R8. Do not thread the line through the outer R. String 6x R10. Thread the line through the central R6 and R8 one more time and also through all the R10. Thread the line through the central R6 and R8 one more time. Sew the line in between the R6 and R8. Cut it off.

10 / a

Step 11

Create eyes on the lower edge of the collar. Find the central 2 rows. Leave out four rows on each side of them. Place an eye in the following two rows. You will need 4 eyes on each side. A total of 9 eyes. First, thread the line through the lower part of the row. String 4x R10. Thread the line through the lower part of the adjacent row. Thread the line through everything once again. Tie off both ends. Pull them into the surrounding R and cut them off.

11 / a

Step 12

Assembly

Attach the pendants to the rocaille eyes using a ring hanging from another ring.

12 / a

Step 13

Cut off about 16 cm of adjusting chain. Attach both end links to the outer eye on the collar using two rings. Attach a carabiner to the second end of the collar using two rings.

13 / a

Downloads