Cherry brandy

Difficulty: 2
Technique: sewing onto a screen

Clip-on earrings made from a mix of PRECIOSA beads

The succulence of the ruby tones of cherry juice, the sweetness of velvety late plums and the deliciousness and flavour of the rum tones of holiday beverages evoke a pleasant mood and a feeling of ease. These earrings in the trending colors of autumn 2021 and winter 2022 will always remind you of these excellent memories.

Ambassadors

Helena Chmelíková

She is able to switch from luxurious and extravagant fashion show pieces to the preparation of hobby projects,

Learn More

Procedure

Step 1

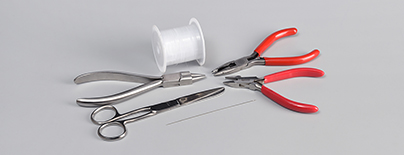
Tie about 50 cm of the line to the screen. Thread about 10 cm through a hole from the rear. Return to the back from the front through another hole. Tie off both ends of the line with two knots.

1 / a

Step 2

Thread the line through the central hole from the rear. String an IP and 1x R. Thread the line back through the IP and a hole in the screen. Hold the R in place with one hand. Tighten the threaded line with the other.

2 / a

Step 3

Sew 1x 6MM, 1x 8MM and 1x P to the outer holes on the screen according to the illustration. Don't forget the R. Tie off both ends of the line from the rear using two knots.

3 / a

Step 4

Sew 2x PB1 and 1x PB3 to each of the holes near the centre according to the illustration. Tie off the line.

4 / a

Step 5

Sew RO onto the two outer holes. Thread the line through a hole in the screen and 1x RO from the rear. Thread the line through the second hole from the front. Repeat the threading one more time. Tie off the line.

5 / a

Step 6

Sew an R on to the outer holes on the screen next to the PB1. Thread the line through the hole by the RO from the rear. String 4x R. Thread the line through the adjacent hole between the PB1 from the face. Thread the line through the hole next to the 6MM from the rear. String 4x R. Thread the line through the hole between the PB1. Tie off the line. Shorten the ends so that they do not exceed the edge of the screen.

6 / a

Step 7

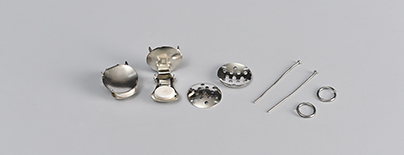
Attach the earring clip to the screen. Glue it on or crimp the projections, for example using the points of the scissors (align the shank of the clip with the R).

7 / a

Step 8

Create the second earring as a mirror image.

8

Step 9

Put a PB2 onto an eye pin. Shorten the protruding wire to about 1 cm. Grasp the wire between the points of the needle-nosed pliers and twist it around them. Open a ring. Place it on the shank of the clip. Attach the eye of the eye pin and close the ring.

9 / a

Downloads