Rudbeckia

Difficulty: 3
technique: Right Angle Weave, Basic Beadweaving, sewing onto the perforated base plate

Lapel spin

Today, we will show you how to combine PRECIOSA pressed beads with a popular shape which is reminiscent of a flower's petal and the elongated, slender PRECIOSA Thorn™ bead. The rudbeckia flower sewn onto a metal base plate can be attached to a pin, a round broach base, a hair clip or the flat surface of a ring.

Ambassadors

Helena Chmelíková

She is able to switch from luxurious and extravagant fashion show pieces to the preparation of hobby projects,

Learn More

Materials & Tools

Other materials & Tools

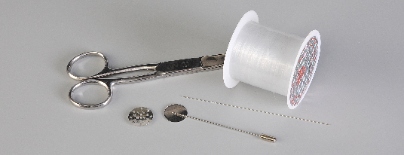
16 mm perforated metal base plate, eight holes around the circumference; a pin with a flat base, a 0.20 mm nylon line; a thin needle; scissors; glue for non-absorbent material
Procedure

Step 1

The circle of petals

Tie a rocaille at the start of the line as a stop bead (fig. no. 1a). String 2x PB and 1x R (fig. no. 1b), a total of 7x. Only string 2x PB at the end (fig. no. 1c). String all the PB so that they are facing the same way (fig. no. 1d).

1 / a

Step 2

Use the "right angle weave stitch". Thread the line through the penultimate PB. The PB will turn with their dimples towards one another. String 1x R. Thread the line through the 3rd PB from the end. The PB will turn with their ridges towards one another (fig. nos. 2a, 2b and 2c).

2 / a

Step 3

Repeat Step 2 a total of 8x.

Step 4

String 1x R. Thread the line through the last PB. String 1x R. Thread the line through the first PB. Tie off the line. Pull it into the surrounding beads. Cut it off (fig. no. 4).

4

Step 5

The centre

Alternatively string 1x TH and 1x R a total of 5x (fig. no. 5a). Thread the line through the stringing one more time (fig. no. 5b). Tie off the line. Pull the line in and cut it off (fig. no. 5c).

5 / a

Step 6

Sewing the flower onto the perforated base plate

There are 8x R around the internal circumference and the base plate has 8 holes around its external circumference (fig. no. 6a). Tie the line onto the middle of the base plate with the knot on the bottom (fig. no. 6b). Thread the needle out of one of the holes on the circumference of the base. Thread the line through an R. Return to the same hole in the base plate. Proceed through the next 7 holes in the same way. Tie off the line (the end from the attachment to the base plate and the working line) (fig. no. 6c and 6d).

6 / a

Step 7

Press the central TH together. Place them in the opening in the circle. Sew them to the 4 central holes in the base plate. Unfortunately, the number no longer corresponds to the number of rocailles, so you will have to use the holes which are visible under the TH (fig. no. 7).

7

Step 8

Place 1x TH in the centre. Sew it to the central hole on the base plate. Tie off the line. Cut it off about 3 mm from the knot (fig. no. 8).

8

Step 9

Glue the Rudbeckia to the flat plate on the pin according to the instructions on the glue (fig. no. 9a, 9b and 9c).

9 / a

Downloads