Golden Colors of Fall

Difficulty: 1
Techniques: Beadweaving

Sewn earrings

We have prepared a tutorial for you for a pair of earrings in the colors of fall with the PRECIOSA Candy Rose and PRECIOSA Candy™ Pressed Beads supplemented with PRECIOSA Rocaille Seed Beads. We wish you many pleasant hours of beadworking


Ambassadors

Alexandra Lysenko - Snow Mirna

Her name has resounded throughout the world of bead and seed bead costume jewellery for a number of years.

Learn More

Procedure

Step 1

Thread a C, R10, CR and R10 onto the thread and tie a knot (fig. no. 1a), thread the line upward through the right-hand hole of the CR (fig. no. 1b), string an R10, C and R10 and then pass the thread upwards through the same hole (fig. no. 1c) and then work your way to the outer right-hand hole in the C through the neighboring holes and head upwards (fig. no. 1d).

1 / a

Step 2

In the second row, string an R10 and CR, then pass the thread downwards through the neighboring hole, the R10 and then through the lower C (fig. no. 2a). Pass the thread through the R10 and upward through the first hole of the CR, string an R10 and C, then pass the line downward through the neighboring hole and the R10 and then through the lower CR (fig. no. 2b). Add the last CR in the same way (fig. no. 2c). Pass the thread through the right-hand hole in the lower C, then the R10 and the upper CR (fig. no. 2d).

2 / a

Step 3

String an R10 and sew it between the CR and C from above (fig. no. 3a), string another R10 and sew it between the CR and C from below, head upwards (fig. no. 3b). Work through the beads so that you emerge upwards to the C (fig. no. 3c). String an R10 and sew through it between the C and the CR from above (fig. no. 3d), string another R10 and sew it between the C and the CR from below, head upwards (fig. no. 3e). Work through the beads so that you emerge upwards in the outer CR (fig. no. 3f).

3 / a

Step 4

Proceed identically in the last row as in Step 2. String an R10 and C, then pass the thread downwards through the neighboring hole, the R10 and the lower CR (fig. no. 4a). Pass the thread through the R10 and upward through the lower hole of the neighboring C, string an R10 and CR and then pass the line downwards through the neighboring hole, the R10 and the lower C (fig. no. 4b). Add the last C in the same way (fig. no. 4c). Pass the thread through the right-hand hole of the lower CR, the R10 and the upper C (fig. no. 4d).

4 / a

Step 5

Add an R10 between the C in the same way as in Step 3. String an R10 and sew it upwards between the C and the CR (fig. no. 5a), string another R10 and sew it downwards between the C and the CR and emerge upwards (fig. no. 5b). Pass the line through the beads so that you emerge upwards in the CR (fig. no. 5c). String an R10 and sew it between the CR and the C from above (fig. no. 5d), string another R10 and sew it between the CR and the C from below, head upwards (fig. no. 5e).

5 / a

Step 6

Pass the thread upwards through the first hole of the C (fig. no. 6a) and then do the same in the R10 (fig. no. 6b). String 10x R10 and pass the thread through the second hole of the C (fig. no. 6c). Passs the thread through the beads one more time and sew an R8 between the R10 (fig. no. 6d). Sew the thread in and hide the end (fig. no. 6e - 6f).

6 / a

Step 7

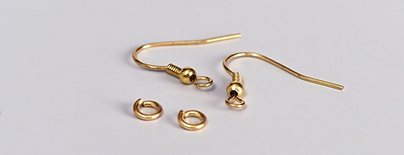
Use a connecting ring to attach a hook (fig. no. 7a). Repeat the procedure one more time to create the second earring (fig. no. 7b).
You can also use this method to sew a bracelet or necklace.

7 / a

Downloads