Easter Bunny

Difficulty: 4
Technique: Right Angle Weave

Decoration Made from PRECIOSA Fire Polished Beads

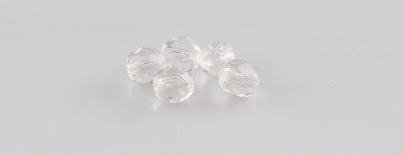
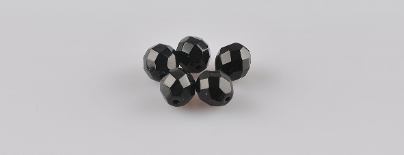
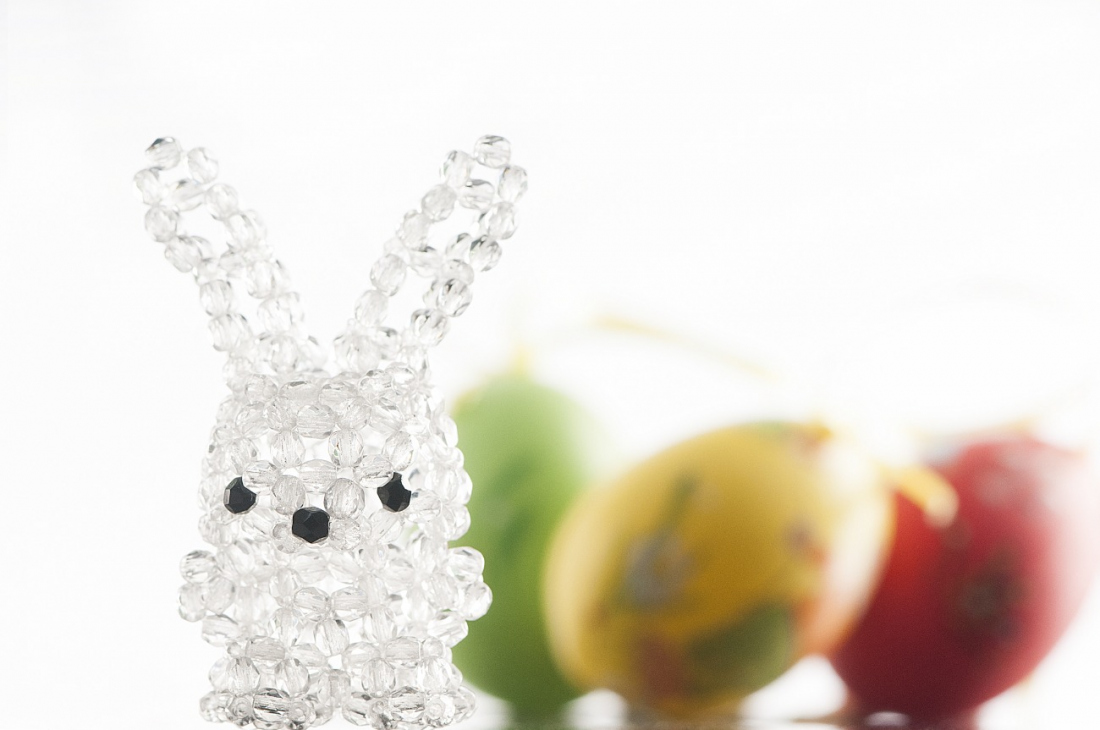
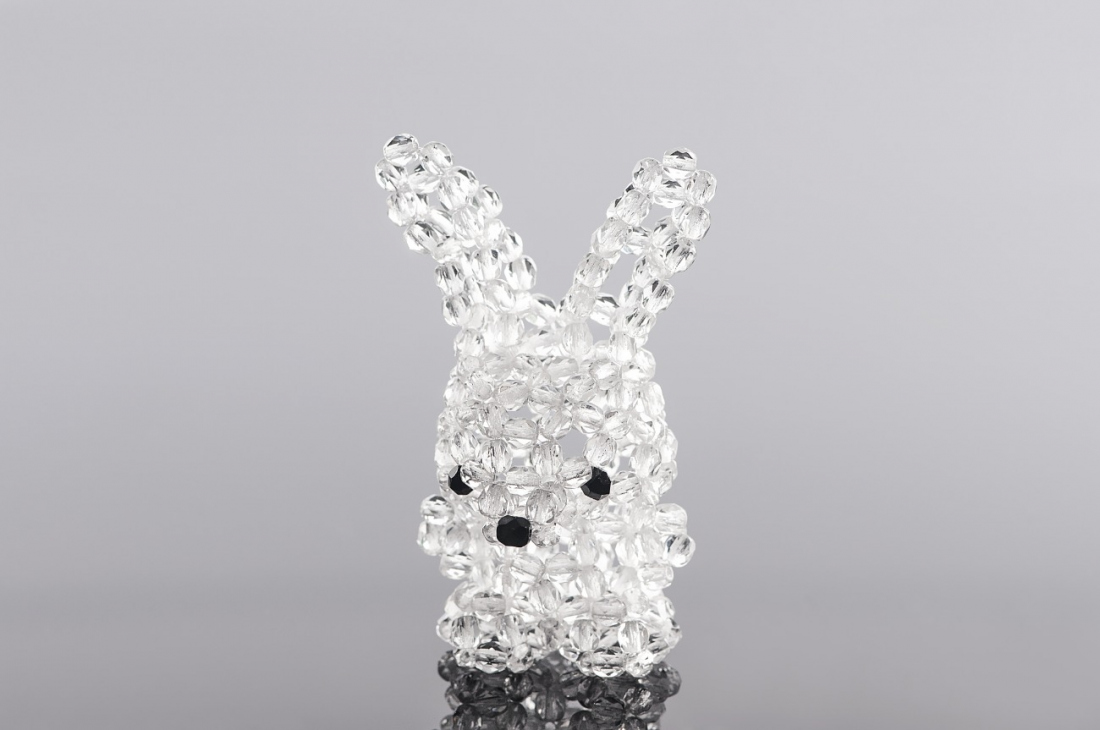
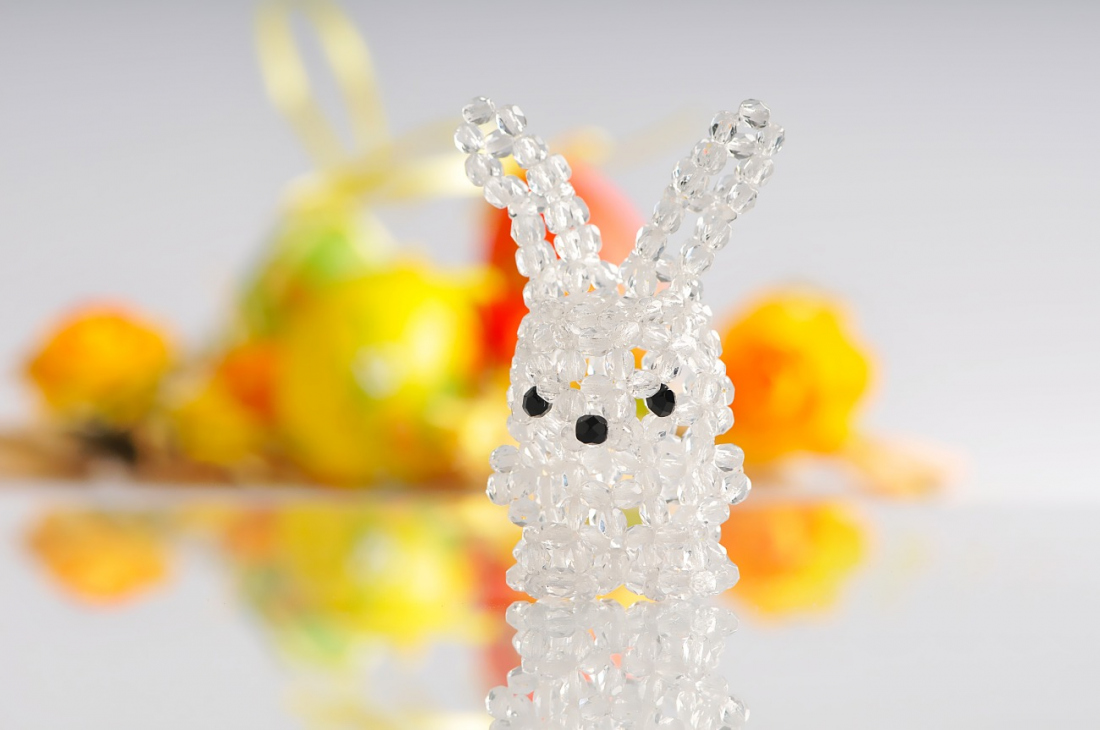
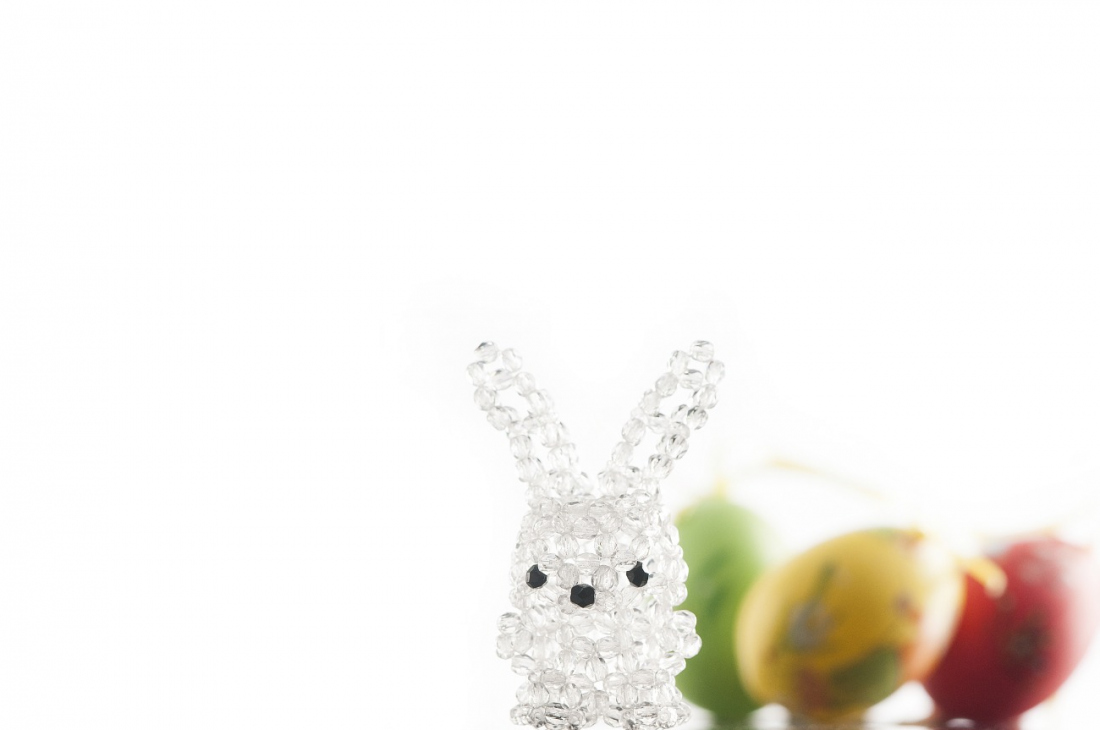
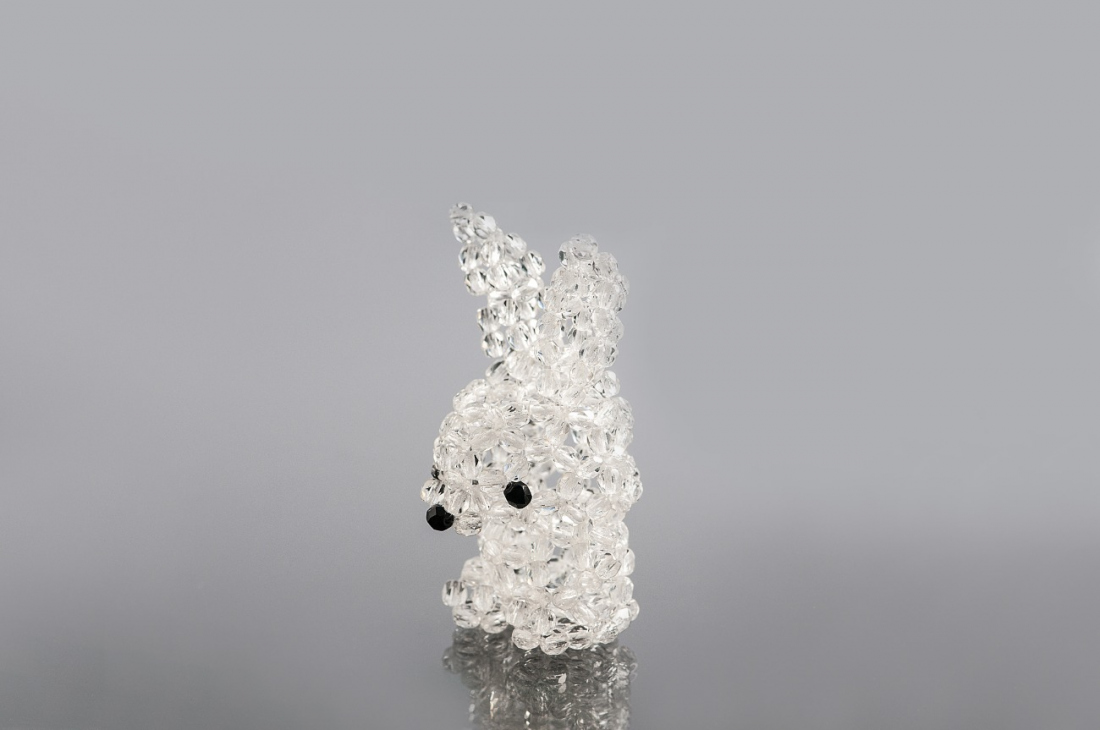
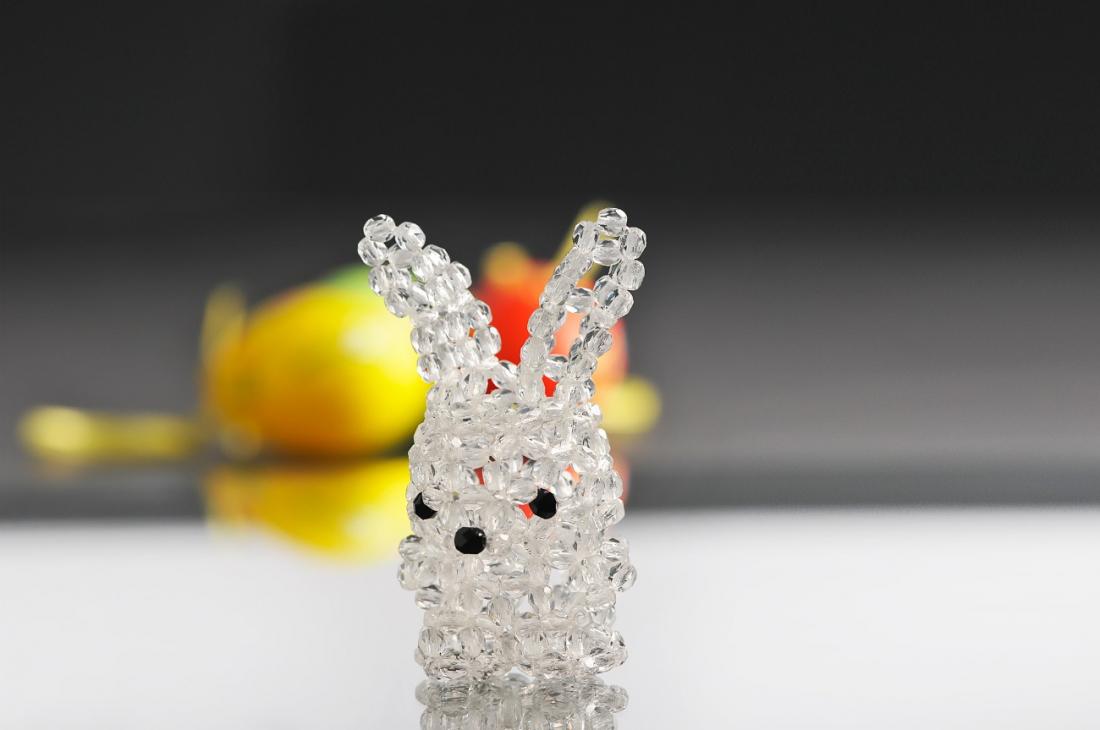
The Easter holidays are a great opportunity to make spring decorations. Let yourself be inspired and create a small glass bunny made with fire polished beads from our PRECIOSA Traditional Czech Beads™ collection.

Ambassadors

YANI - Drahomira Krupkova

Drahomíra Krupková’s company has been involved in the design and manual production of glass costume jewellery for almost 30 years.
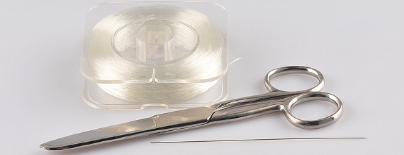
Learn More

Procedure

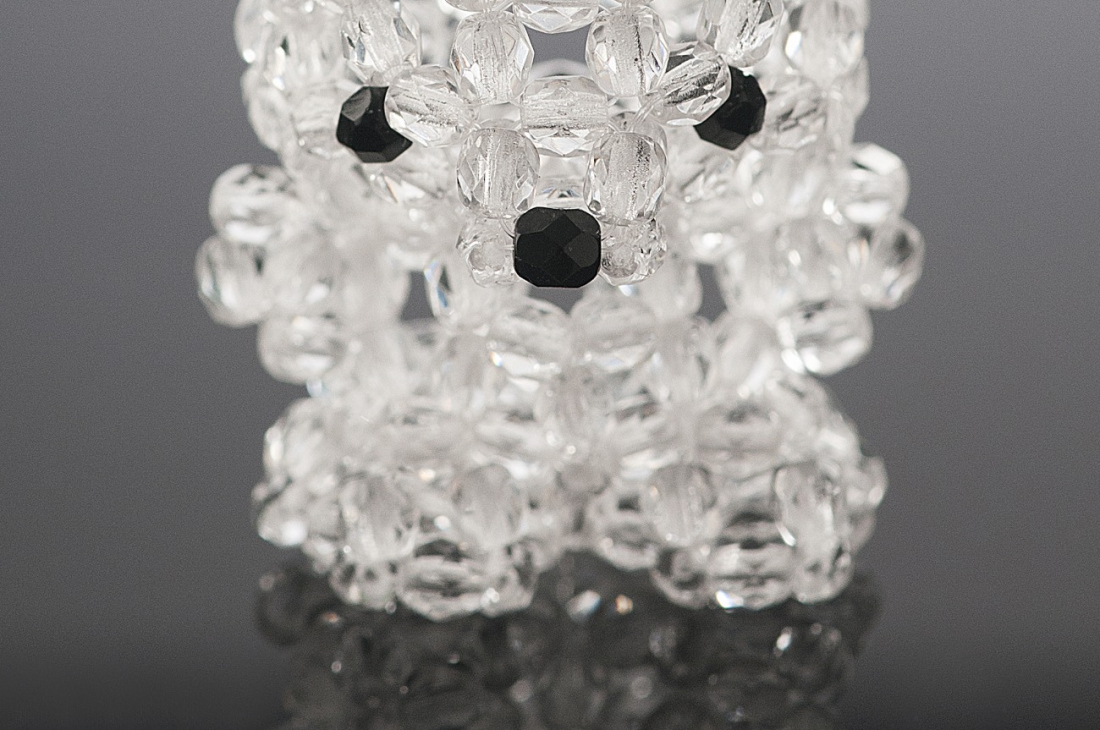
To make this lovely bunny you will use one sewing stitch, namely the Right Angle Weave stitch. This project consists of a series of bead circles, each made of 4-6 pieces of FPB. Sew one circle at a time.
To start, thread your needle, pick up 4 FPB and tie a knot. Add 1 FPB. Pick up the remaining FPB to create the second circle. Connect them. Pass your needle through some of the FPB a second time.
Pick up the appropriate number of FPB. Connect them. Attach this circle to the previous one by passing your needle through several FPB. Continue in a similar way (see Figure 1a). Follow the numbered circles, from the smallest to largest number.

Step 1

Head
Cut a 3 m piece of nylon thread. You can also make the bunny’s head using 1.5 meters and then add another 1.5 meters for the body. First sew the top of the head (forehead, crown, nape) (Figure 1b). 

1 / a

Step 2

Next attach the face to the FPB on the outside edge (as marked by small letters on the diagram). Do not forget the eyes (black FPB) (Figure 2a). Lastly, above Circle No. 34 sew on the nose (Figure 2c).

2 / a

Step 3

Body
Continue with the same thread (if using 3m) or add on the next 1.5 m of thread. Attach the body to the head along the outside FPB edges of both parts (marked by red crosses and dots in the diagram). Attach the front of the body to the front of the head, the back to the back. Continue sewing in ascending circle numbers (Figure 3a).

3 / a

Step 4

Hind Legs
For the bunny to stand properly, it needs a pair of flat paws and legs to stand on. Start sewing on the front side of the belly. Sew a thin length of FPB, attach it to the body at several points, and widen it at the back. Find a connecting FPB on the body (marked with capital letters in the diagram). The FPB grouping of the left foot is a mirror image of the right (Figures 4a, 4b).

4 / a

Step 5

Front Paws
Attach the front paws onto the FPB marked by capital A – closest to the tummy at the circle on the upper side of the body (Circle No.3 and No.7). Sew on 3 FPB and then 2 FPB. Continue in a circle on the head (Circle No.31 and No.37), (Figure 5a).

5 / a

Step 6

Ears
Cut and thread a new 1.5 m piece of nylon beading thread. Attach it to the head. To add the ears, use Circles No.5, 6 and 7 (the appropriate FPB are marked with capital letters). Sew from the head to the tip of the ears (Figures 6a, 6b, 6c)


6 / a

Downloads