Branch

Difficulty: 3
TECHNIQUE: wiring

Decoration made using PRECIOSA Chilli™

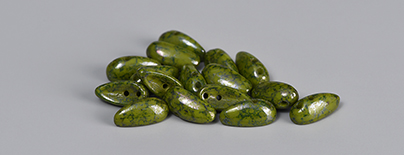
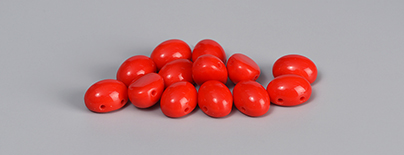
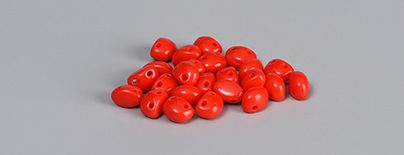
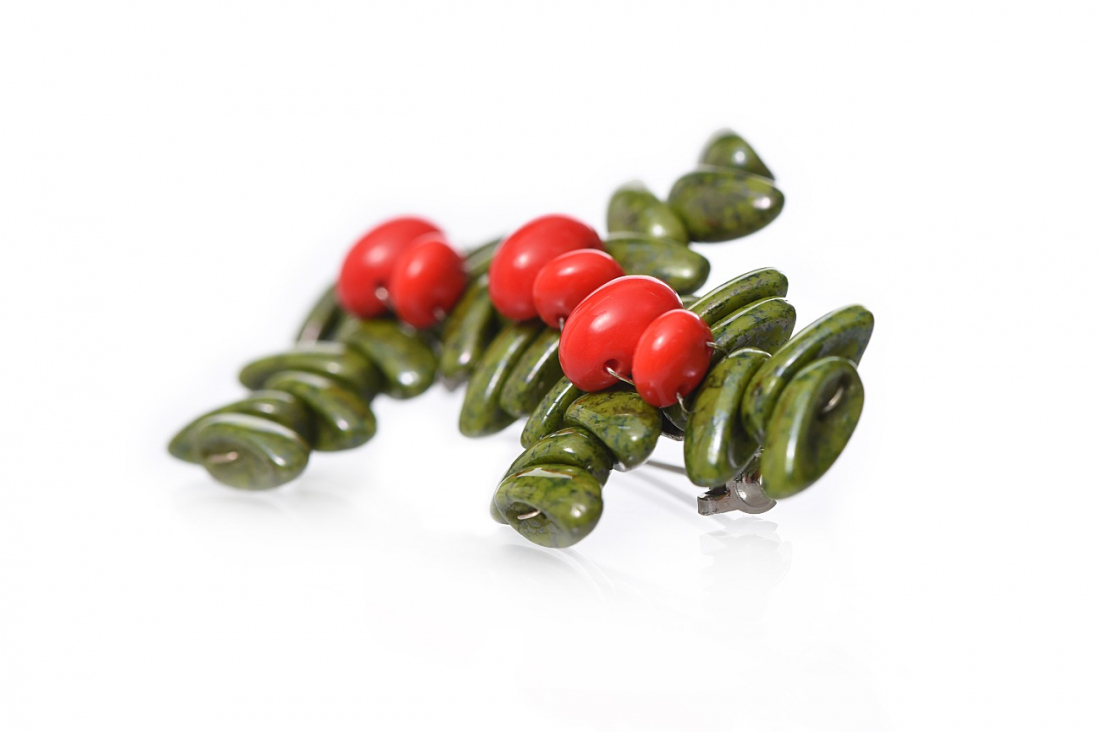
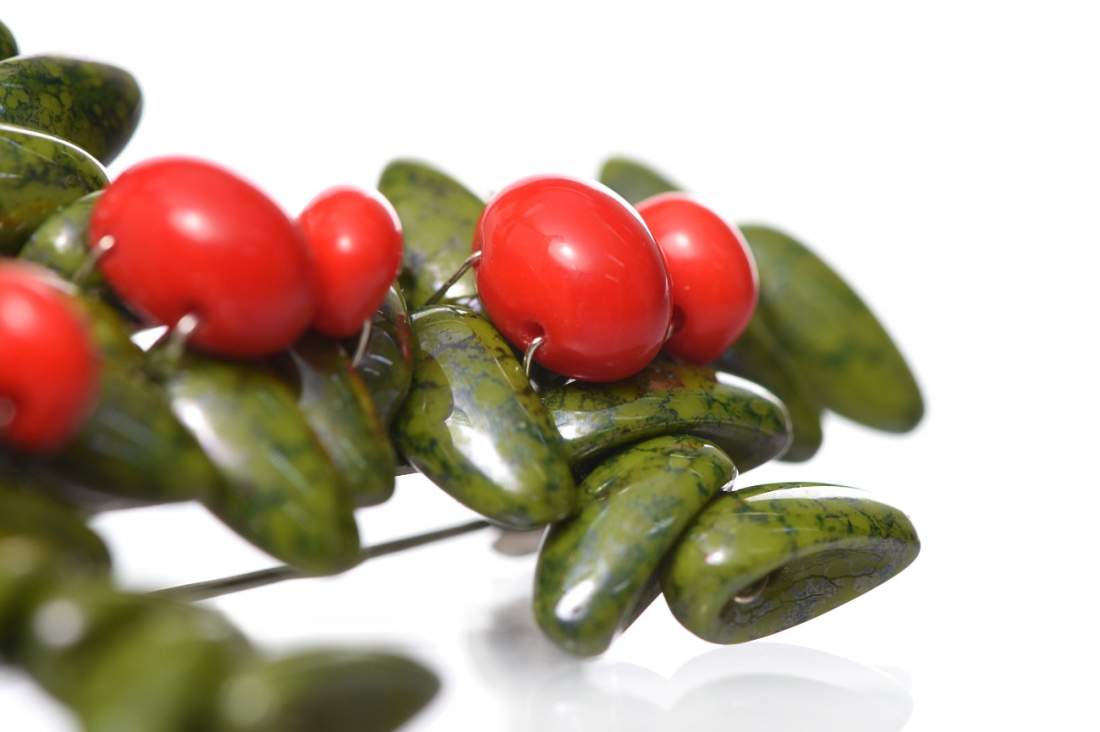
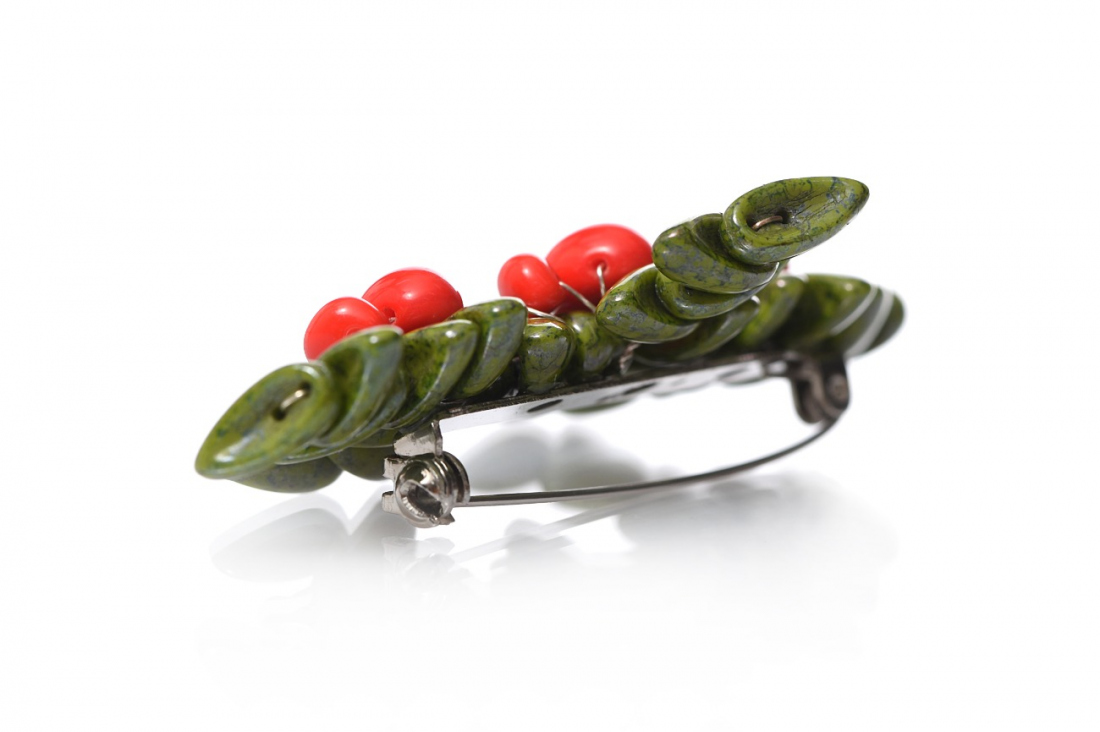
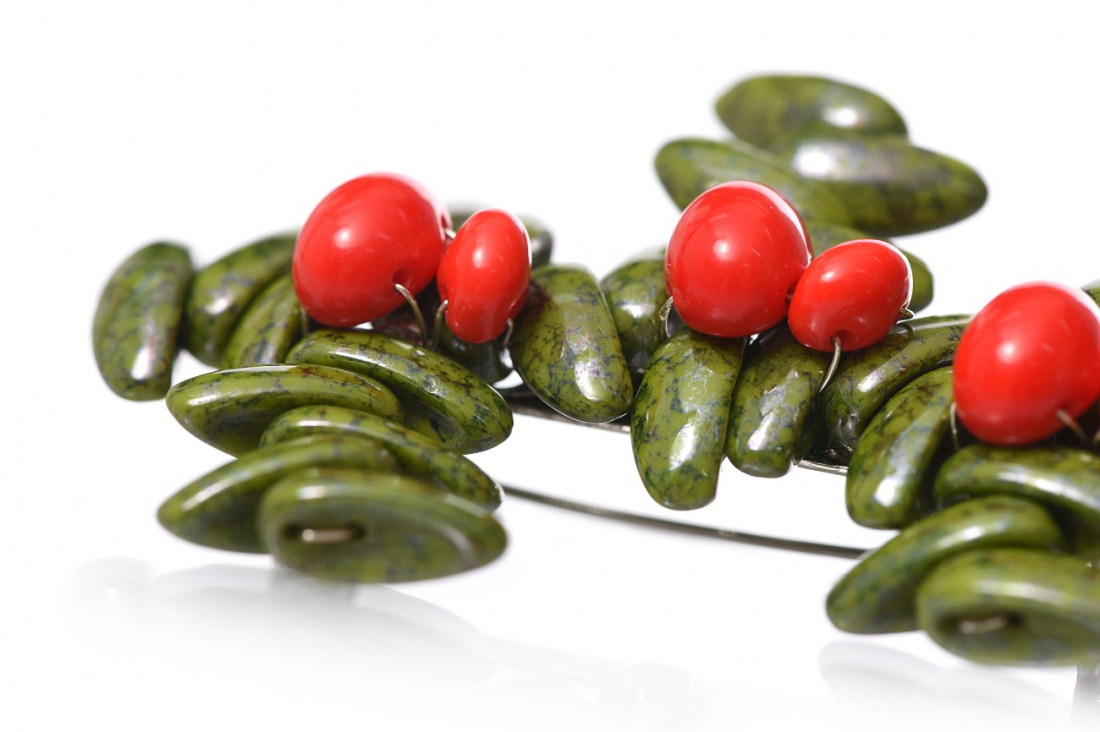
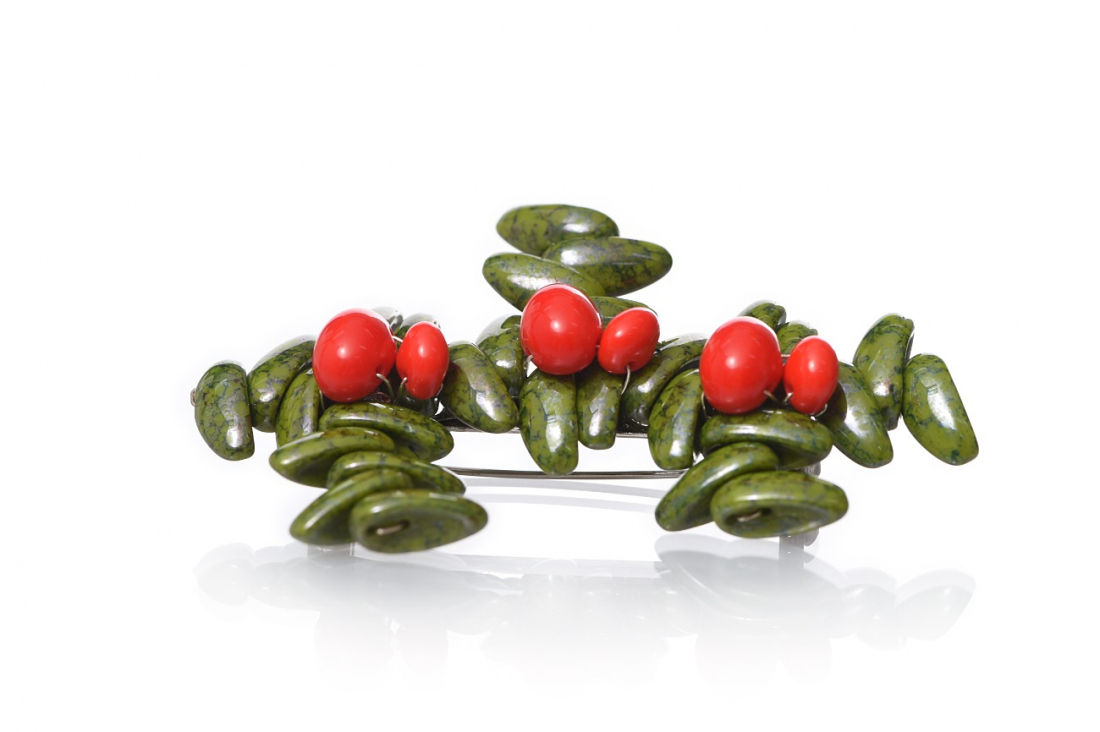
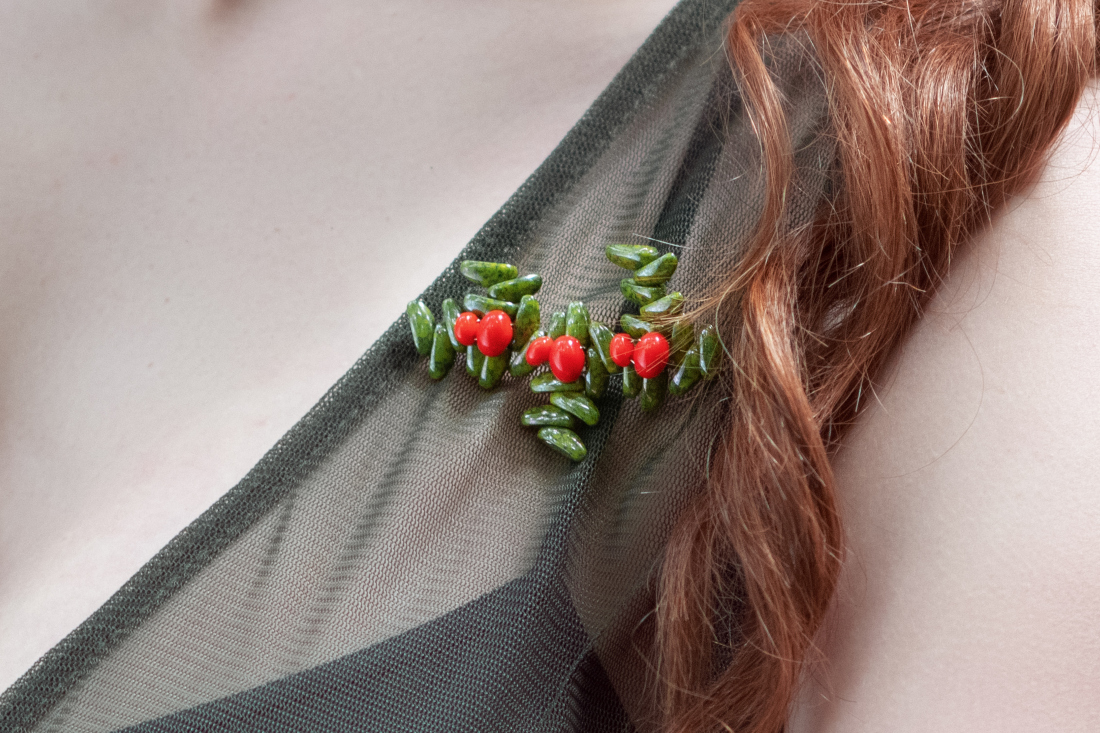
Are you missing the pleasant natural smell of pine needles? This tutorial using wiring and the two-hole PRECIOSA ChilliTM Pressed Bead will help you evoke it. The "zigzag" effect enables the imitation of a fir or pine branch. You can make a broach or create a decoration for a present.

Learn More
Ambassadors

Helena Chmelíková

She is able to switch from luxurious and extravagant fashion show pieces to the preparation of hobby projects,

Learn More

Material and Tools

Tools

A gluing surface (the base on a broach pin, a card, a decoration for a present); a wire with a diameter of 0.30 – 0.35 mm; snipping pliers; flat-nose pliers (to grasp the wire); a ruler; glue depending on the used material

Procedure

Step 1

Snip off about 50 cm of wire (fig. no. 1a). String 4x Ch from their dimples (fig. no. 1b); the first through the outer hole (fig. no. 1c), the second through the central hole (fig. no. 1d), the third through the outer hole (fig. no. 1e) and the fourth through the central hole (fig. no. 1f). Twist the Ch in a zigzag (fig. no. 1g) and thread the wire through the free holes (fig. no. 1h). Place the beginning of the hole approximately in the middle of the wire.

1 / a

Step 2

Twist the point of the first Ch to the right. Use the right-hand part of the wire (fig. no. 2a). String 3x Ch through the hole from the ridge; use the central hole in the first Ch, the outer hole in the second and the central hole in the third. Arrange the Ch in a zigzag. Thread the wire through the empty holes (fig. no. 2b). Tighten carefully.

2 / a

Step 3

String the wire through the outer hole from the ridge of 1x Ch (fig. no. 3a + 3b).

3 / a

Step 4

String 3x Ch from the dimple onto the part of the wire with the sprig. Tread the wire through the central hole in the first Ch, the outer hole in the second and the central hole in the third. Arrange the Ch in a zigzag. Thread the second part of the wire through the empty holes (fig. no. 4a + 4b).

4 / a

Step 5

Use the left-hand part of the wire (fig. no. 5a). String 4x Ch through the hole from the ridge. Thread it through the central hole of the first Ch, the outer hole of the second, the central hole of the third and the outer hole of the fourth. Arrange the Ch in a zigzag. Thread the wire through the empty holes (fig. no. 5b). Tighten carefully.

5 / a

Step 6

String 1x Ch onto the second part of the wire through the outer hole from the ridge (fig. no. 6a + 6b).

6 / a

Step 7

The same as Step 4.

7

Step 8

Use the right-hand part of the wire (fig. no. 8a). String 5x Ch through the hole from the ridge. Use the central hole on the first Ch, the outer hole on the second, the central hole on the third, the outer hole on the fourth and the central hole on the fifth. Arrange the Ch into a zigzag. Thread the wire through the empty holes. Tighten carefully (fig. no. 8b).

8 / a

Step 9

String 1x Ch through the outer hole from the dimple onto the second part of the wire (fig. no. 9a + 9b).

9 / a

Step 10

String 3x Ch from the dimple onto the part of the wire with the sprig. Thread the wire through the central hole on the first Ch, the outer hole on the second and the central hole on the third. Arrange the Ch in a zigzag. Thread the same part of the wire through the empty holes. Twist both ends of the wire together. Snip it off. Press the wire in amongst the Ch (fig. no. 10a + 10b).

10 / a

Step 11

Snip off about 25 cm of wire (fig. no. 11a). Thread it through the hole of a C1. Move it to the centre (fig. no. 11b). Place it at the base of the branch decoration. Arrange the C1 in the direction of the stem (fig. no. 11c + 11d). Twist the ends of the wire at the back (fig. no. 11e).

11 / a

Step 12

Thread one end of the wire through the second hole of the C1 (fig. no. 12a). Add 1x C2. Head to the back once again (fig. no. 12b).

12 / a

Step 13

Thread the wire through the second hole of the C2 (fig. no. 13a). Head to the back once again. Twist both ends of the wire together. Snip them off. Press them in amongst the Ch (fig. no. 13b).

13 / a

Step 14

Add two more C1 and C2 (fig. no. 14a + 14b).

14 / a

Step 15

Glue the decoration to a base (fig. no. 15a + 15b).

15 / a

Downloads