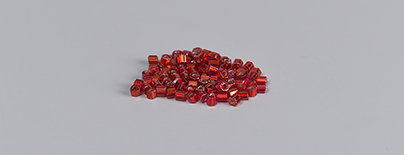
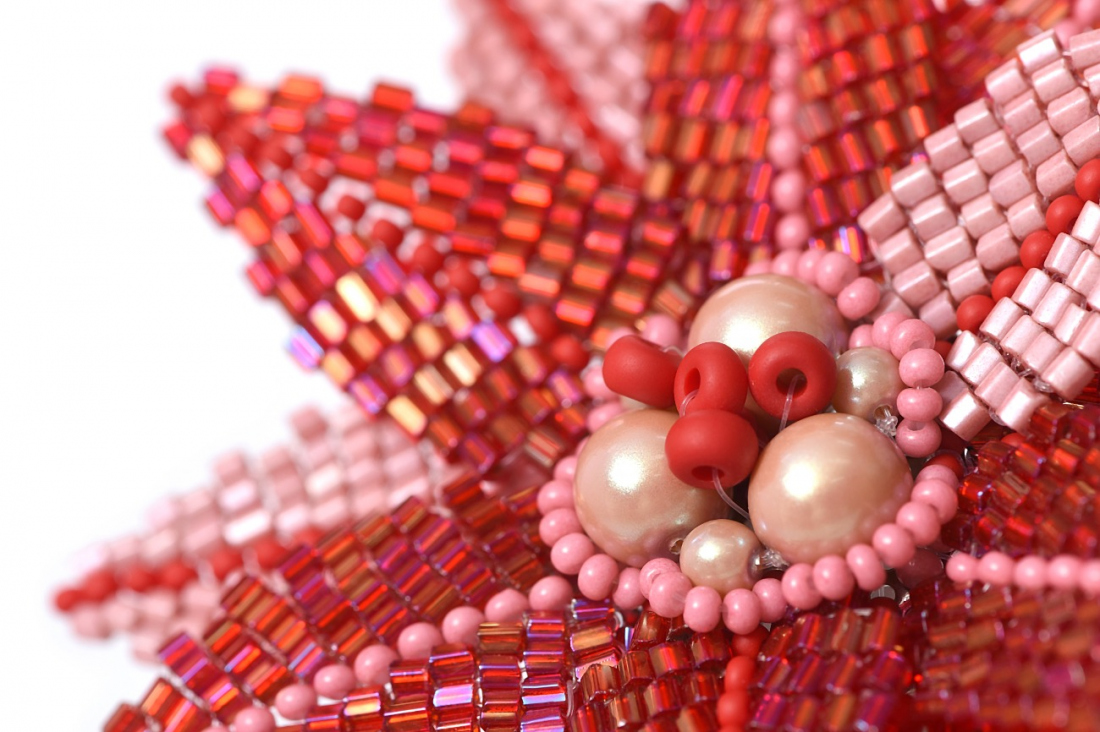
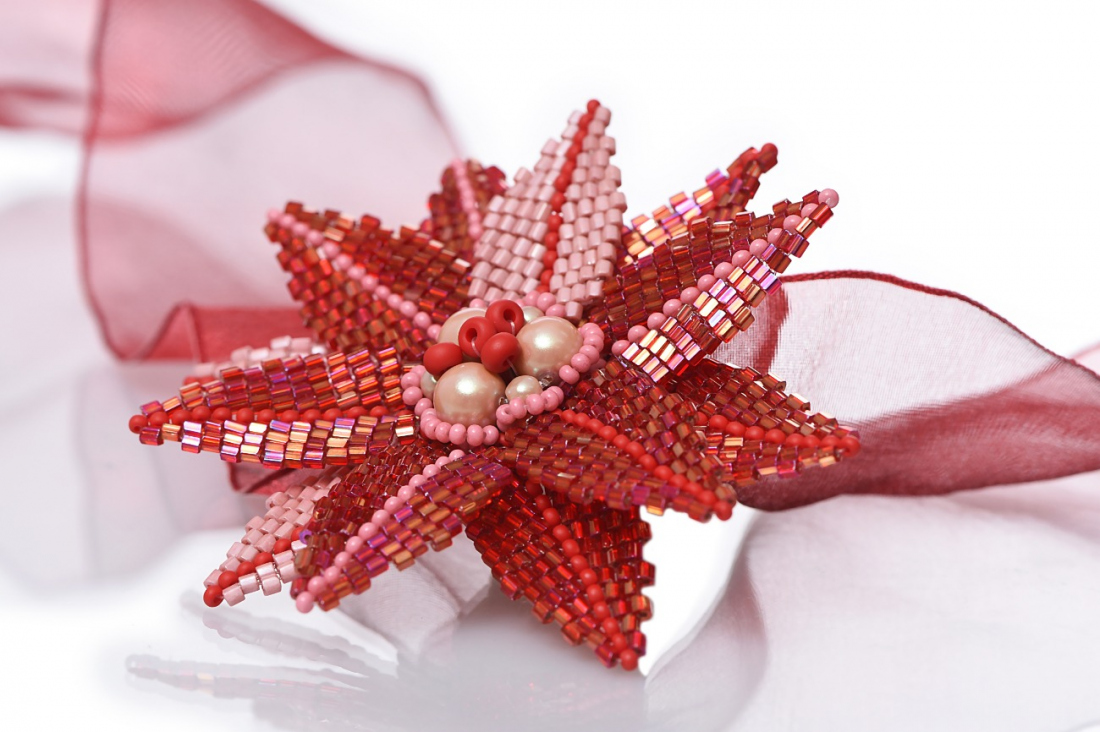
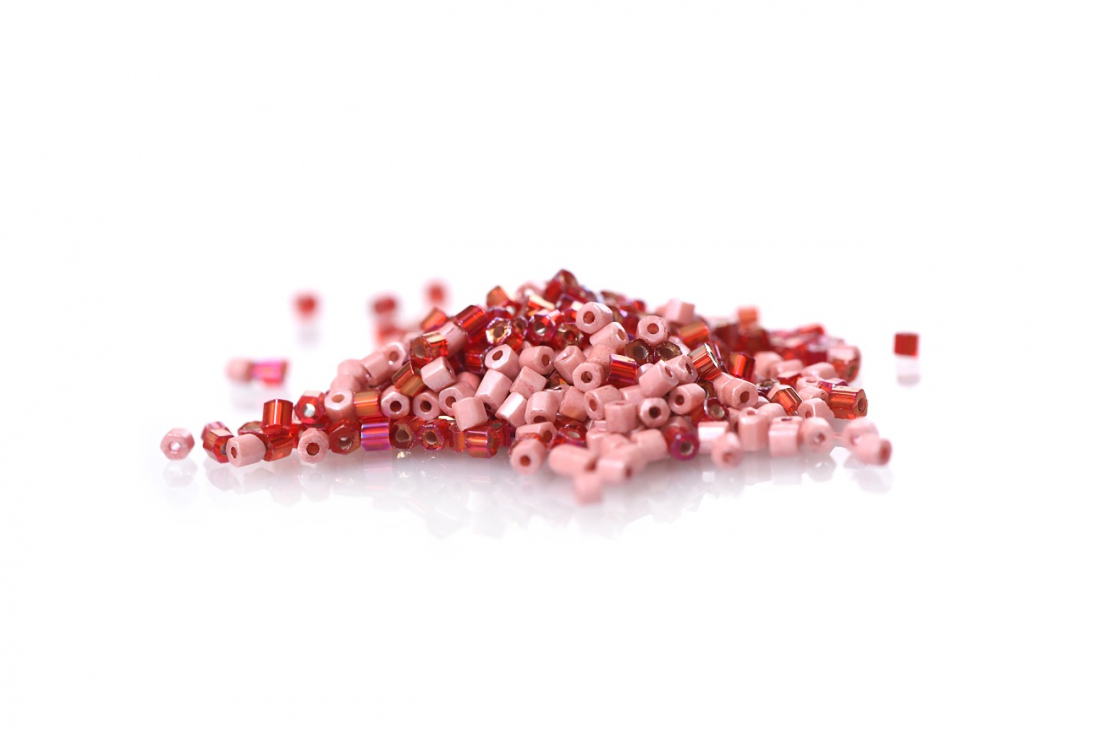
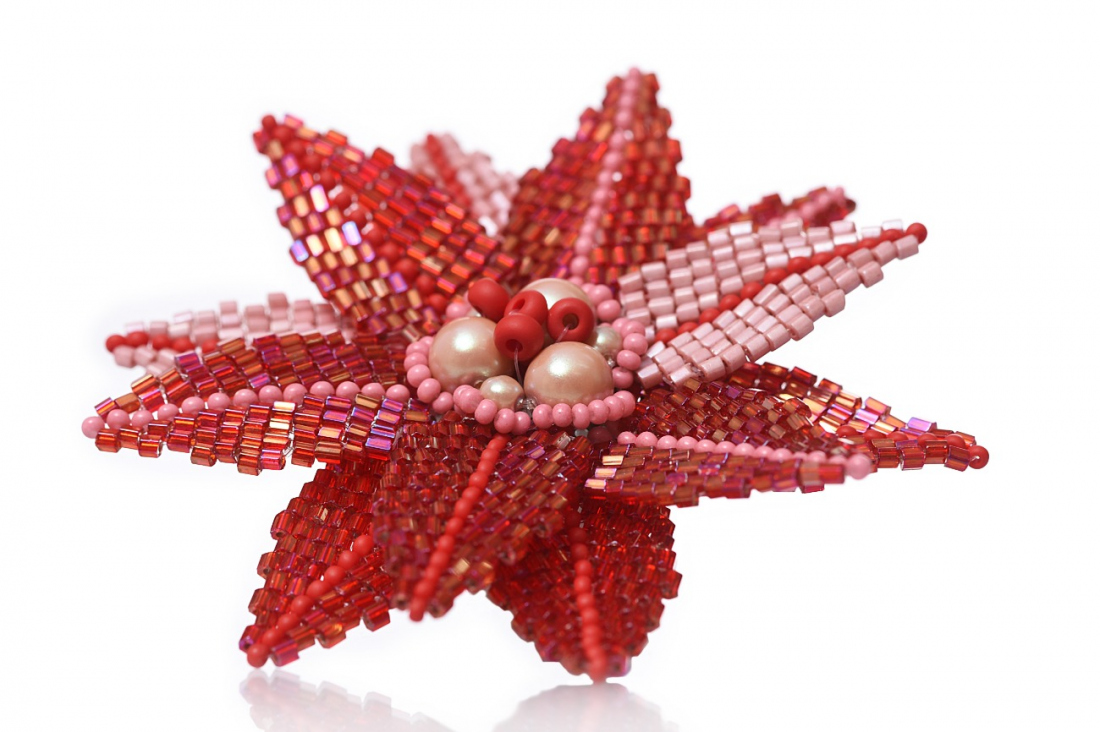
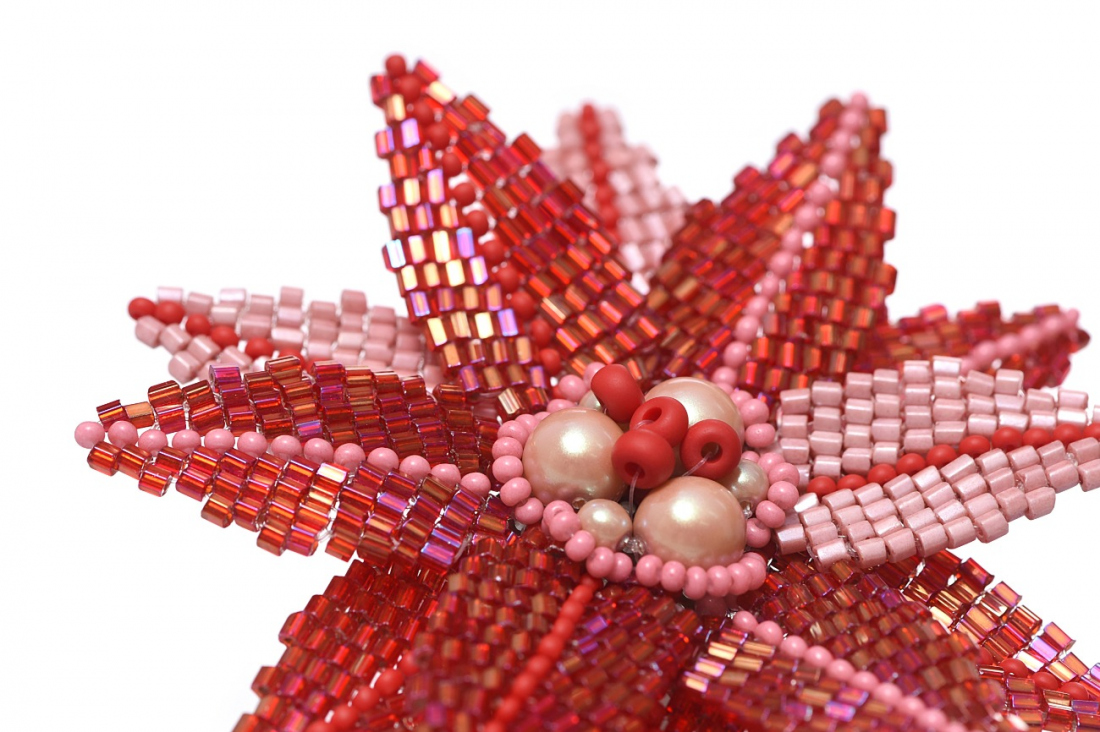
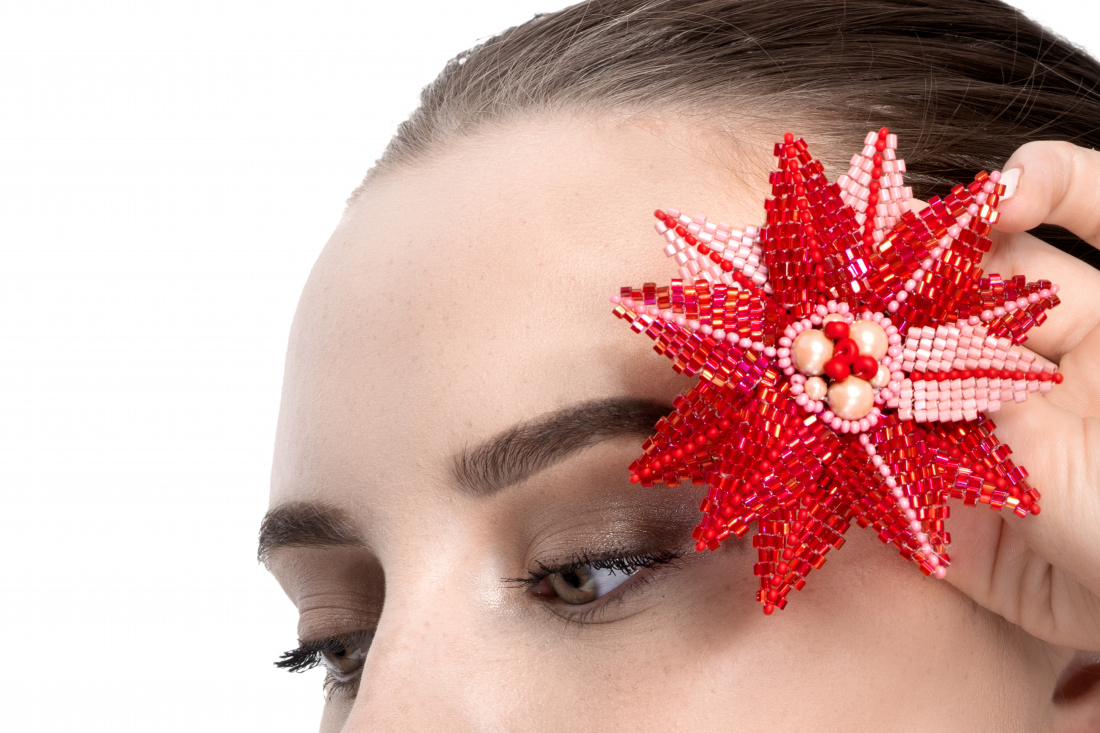
Is patience one of your strengths? Try sewing a red poinsettia using PRECIOSA Two-Cuts. It will last a long time and won't require any special care or shade, but it will have no problem with a draught. Delight yourself and your loved ones. Incorporate the poinsettia into your own design or use it as a decoration. You will be pleasantly surprised by the result.

She is able to switch from luxurious and extravagant fashion show pieces to the preparation of hobby projects,
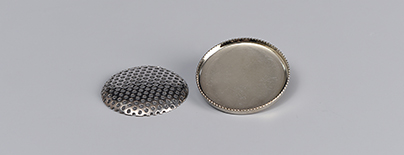
Learn MoreA sieve 27 mm in diameter; a round broach base 28 mm in diameter
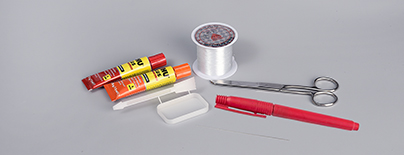
A 0.20 mm nylon line; a thin needle; scissors; glue for non-absorbent materials; a permanent black marker
Share this project with your friends
This website uses cookies
PRECIOSA ORNELA, a.s. hereby informs you that its website uses cookies You can find more information about our cookies and how your data is processed in the privacy statement. We request your consent to use cookies specified below.