Double-sided terrycloth

Difficulty: 3
Technique: Loom weaving

Woven bracelets made from PRECIOSA Tee™ beads

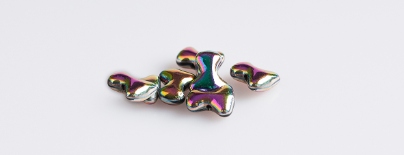
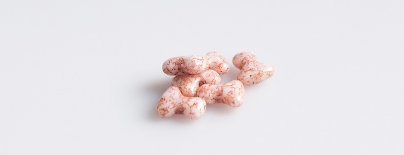
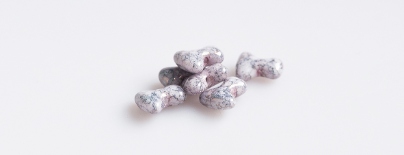
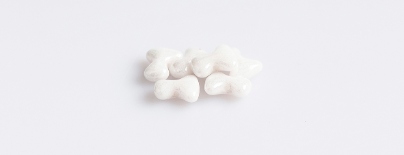
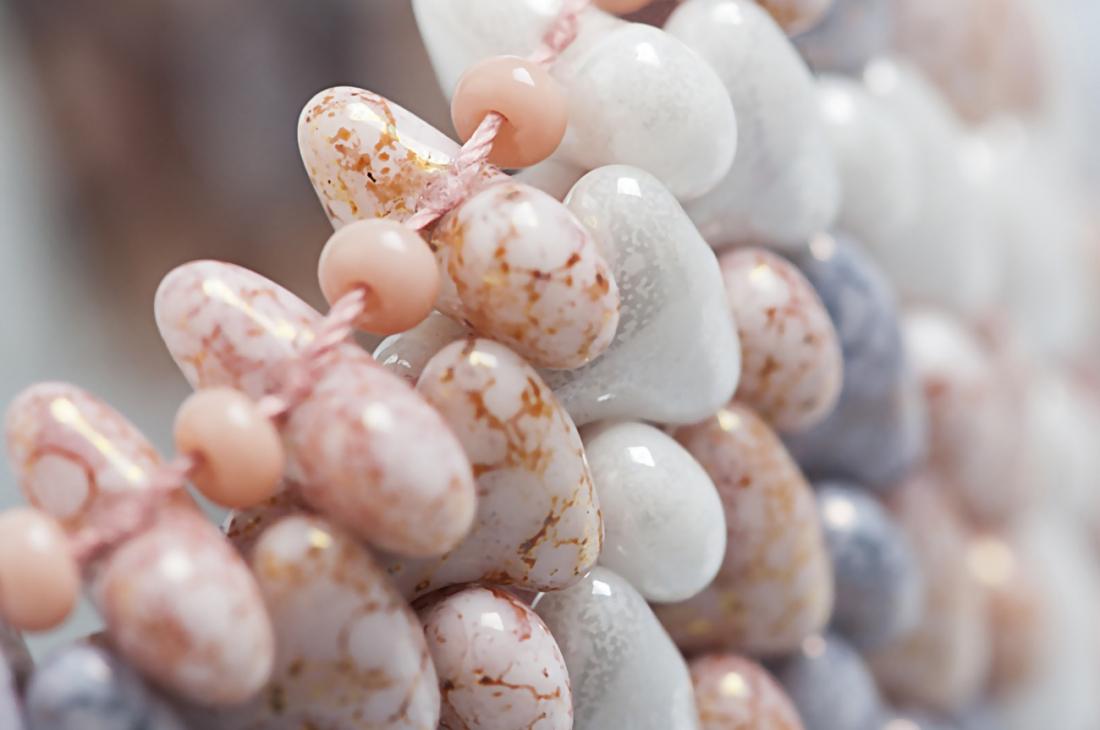
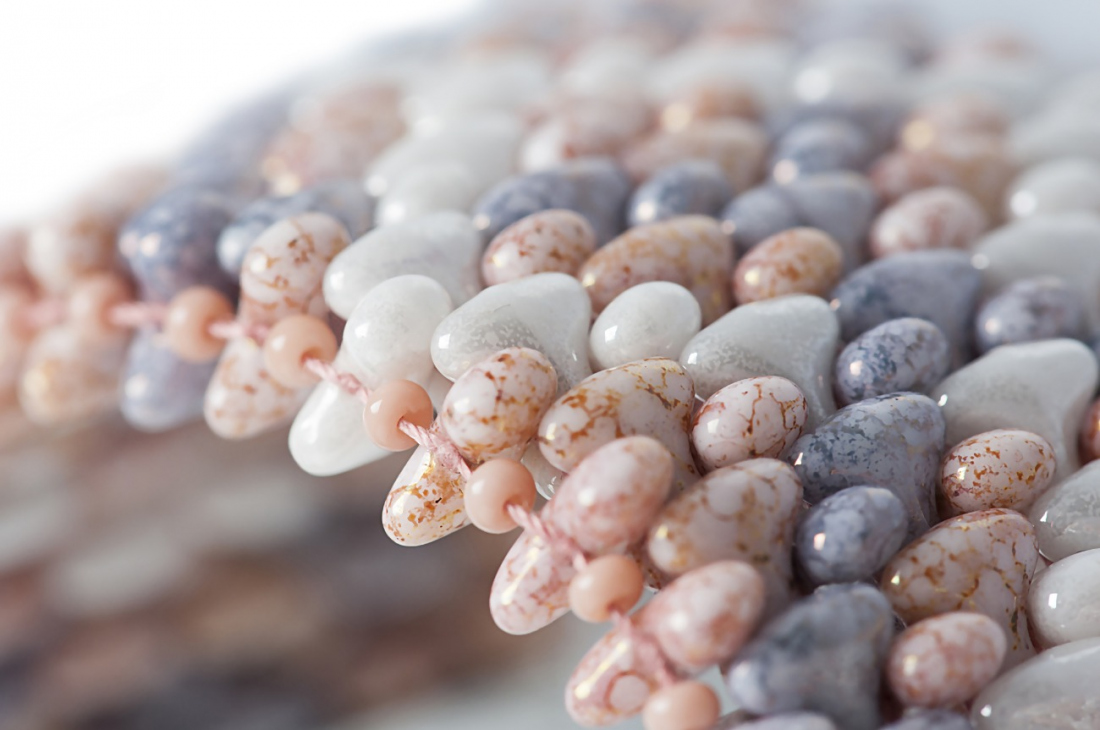
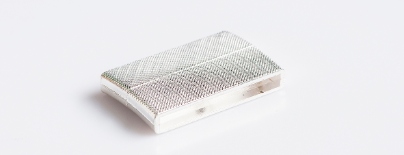
PRECIOSA Tee™ pressed bead's dimensions of 2 x 8 mm mean that this product complies with the current trends for mini beads. The axially symmetrical flat "T" shape enables the use of vacuum half-coatings with the resulting effect of a full-coating decoration and other popular surface finishes. The strung beads closely interlock and as such simplify the creation of varied three-dimensional structures and interesting planar structures.

Ambassadors

Helena Chmelíková

She is able to switch from luxurious and extravagant fashion show pieces to the preparation of hobby projects,
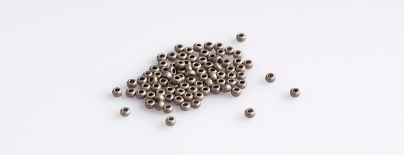
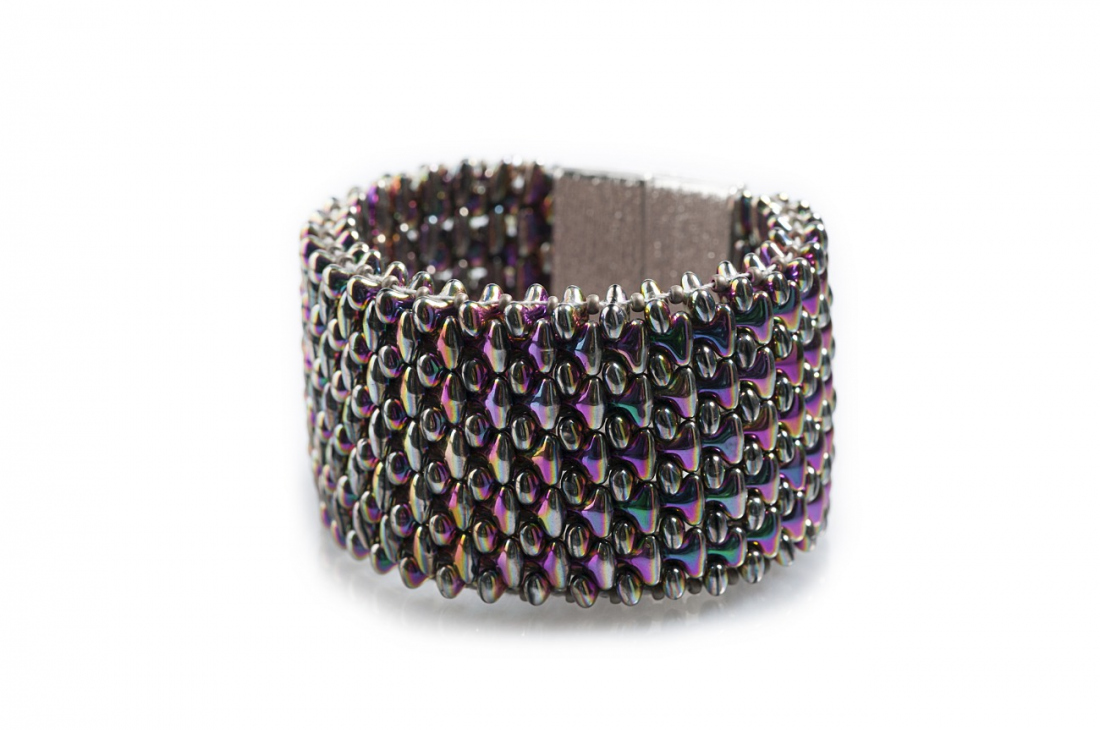
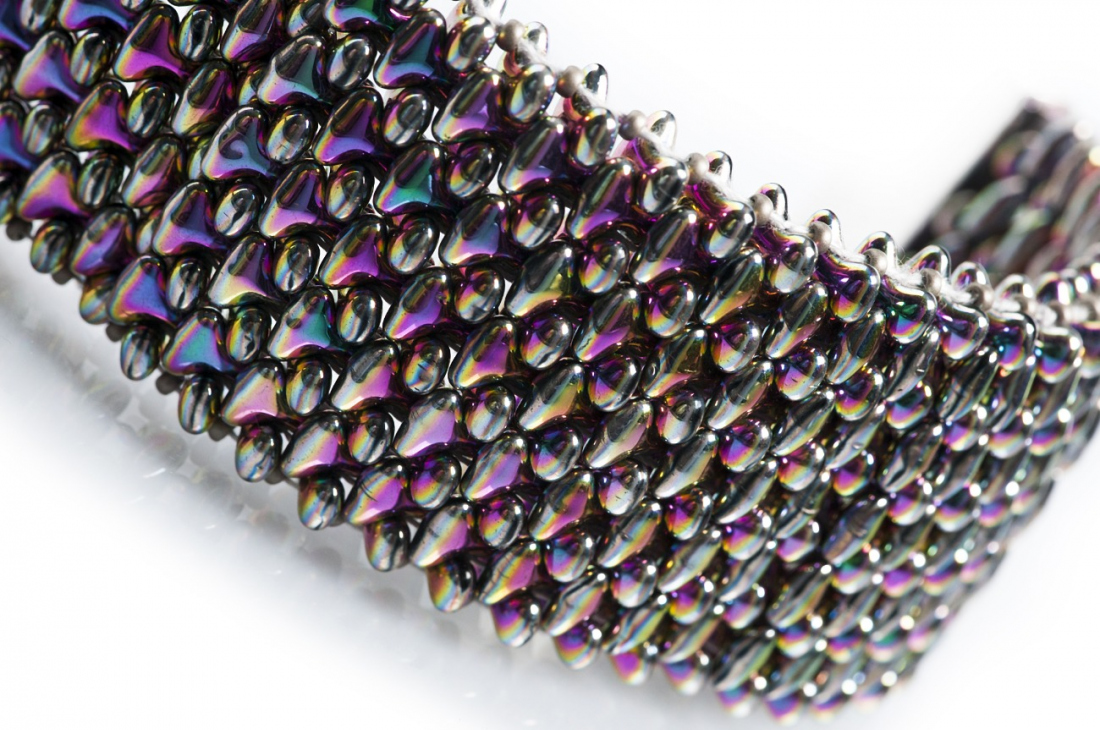
Learn More

Materials & Tools

Multicolored bracelet

Materials

Metal parts – any surface finish: magnetic endings on a 4 cm ribbon; they can be replaced with crimp ends, rings or an American fastening (a T-bar)

Tools

A medium thread (Belfil-S 30 polyester thread – the warp, the weft, the ending); a long thin needle; scissors; a small loom; a thicker tailor's needle; super glue; flat nose pliers (closing the rings); glue for absorbent - non-absorbent materials (sticking on the ends); a rubber mallet (closing the crimp ends)

Procedure

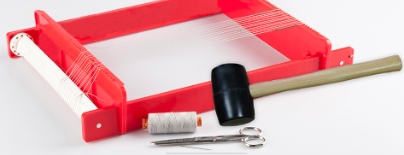
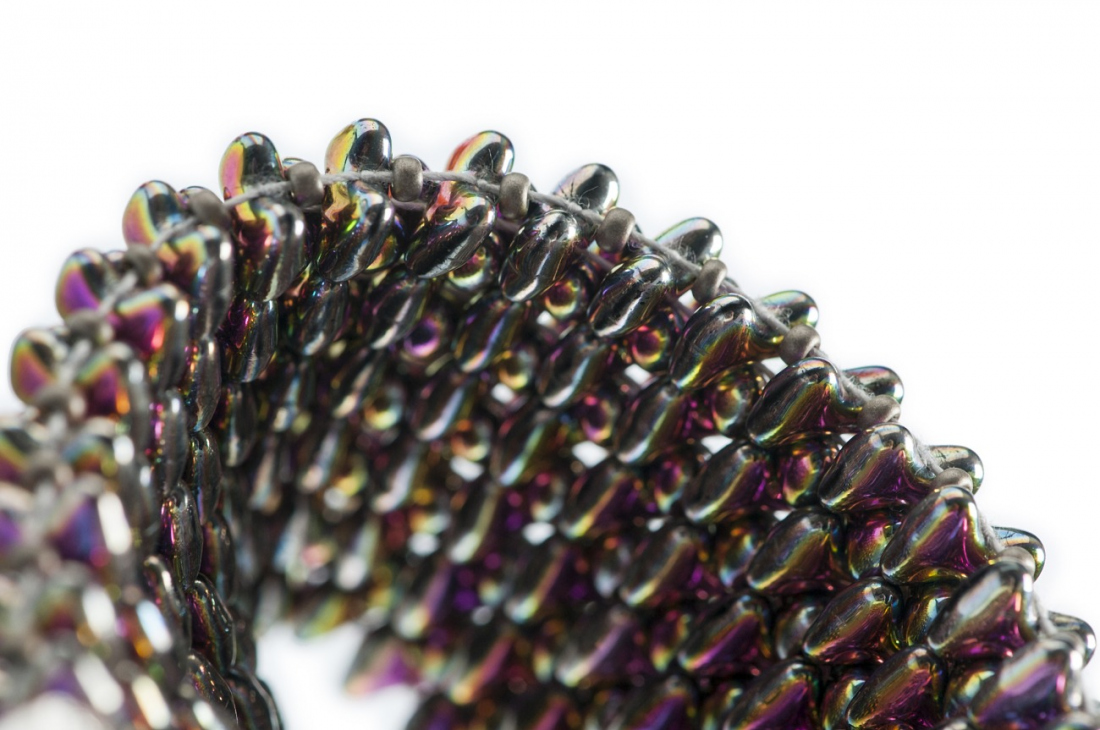
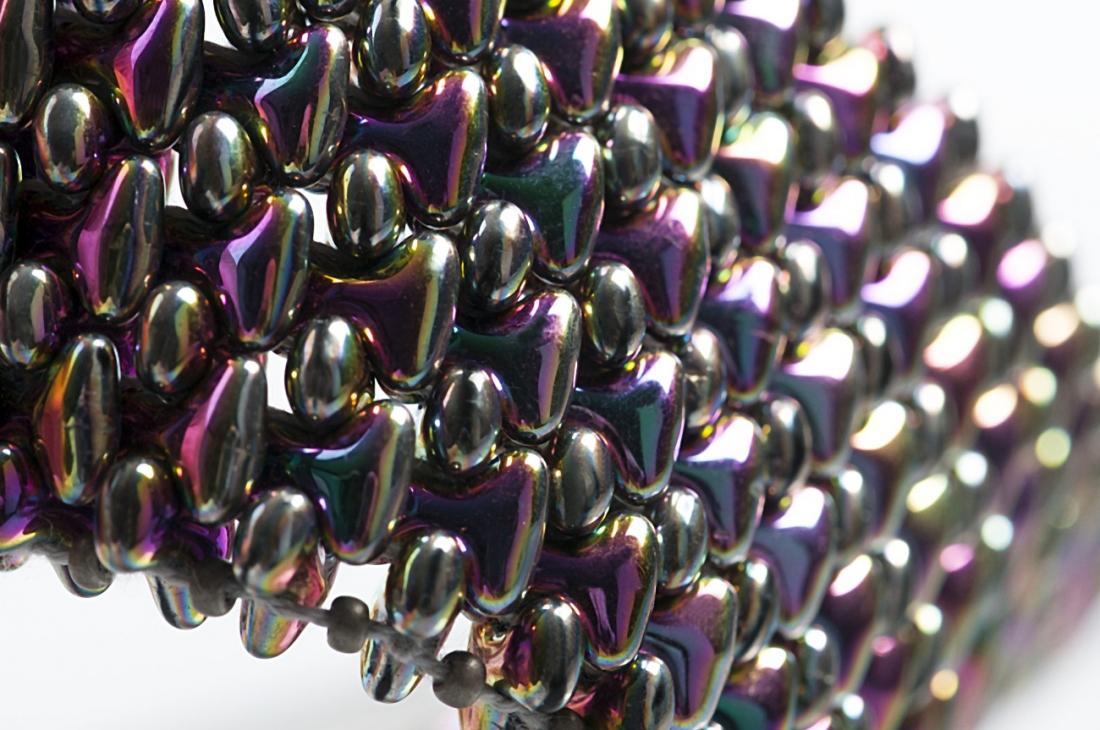
The bracelet is 4 cm (11 rows) wide. The woven section consists of 29 columns. The bracelet is 18.5 cm long.

Step 1

The warp consists of 12 threads.Use a shade which is suitable for the Tee. Tie the end of the thread to the edge of the loom. Stretch the 2nd to 11th threads from one side to the other. Tie the end again at the edge. Stretch the 1st and 12th threads separately. String 28x R on them.

1 / a

Step 2

Cut off a long piece of thread (about an arm's length). Use two such long pieces of thread for the entire bracelet. Cut the end of the thread into a point and wet it. String it directly into the eye of the needle. String 11x Tee and move them to the end of the thread. Alternately turn the Tee crosswise in relation to one another. Orient the wider section (the arms) forward (in the direction towards one another). Orient the narrow section towards the back. The 1st, 3rd, 5th, 7th, 9th and 11th Tee face with their arms downward. The 2nd, 4th, 6th, 8th and 10th Tee face upwards.

Leave about 20 cm of the end of the thread free. Press the Tee to the warp from below and thread the line through them from the top, preferably one after the other. This will create the weft. Tie the weft thread at the first column. Twist the 1st weft thread twice. Thread the line through 1x R to the 1st warp thread. Shift 1x R on the 12th thread of the warp. String another column.

2 / a

Step 3

Tying the thread – Create a complete column on the remaining thread. Leave about 20 cm of the end of the used thread free. String a new thread. Leave about 20 cm of the end of the thread free. Continue weaving the column. Tie off the ends of the thread using two knots. Pull them into the Tee and cut them off. After creating the woven section, sew in the remaining ends of the thread between the Tee in the outer columns.

3

Step 4

Weave the end bands which you should then attach or glue to the endings. Pass the thread into the larger tailor's needle. Start threading the needle through the weft behind the woven section, approximately from the middle to the edge. Then thread the line through the entire warp. In doing so, you will create a textile weft of about 0.5 to 1 cm. Once again finish in the middle. Reinforce the bands with superglue. Once it has set, cut the warp from the band.

4

Step 5

Assembly. Glue the bands to the endings. If you have crimp endings (with the teeth at the edge), slightly close the endings, insert the band. Carefully close it, for example with a tap from the rubber of mallet. Attach the American fastening to the loops of the crimp endings using rings. Attach several rings to the "T".

5 / a

Colourful bracelet

The woven section consists of 30 columns. the length of the bracelet is 19 cm. String 29x to the outer thread of the weft. Otherwise, the procedure is the same.

/ a

Downloads