Bat

Difficulty: 3
Techniques: Stringing

Halloween made from PRECIOSA Chilli™ and PRECIOSA Thorn™ beads

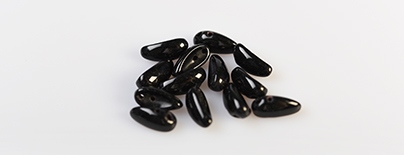
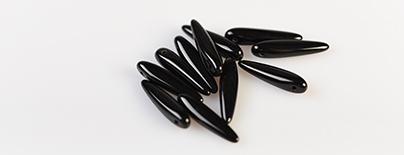
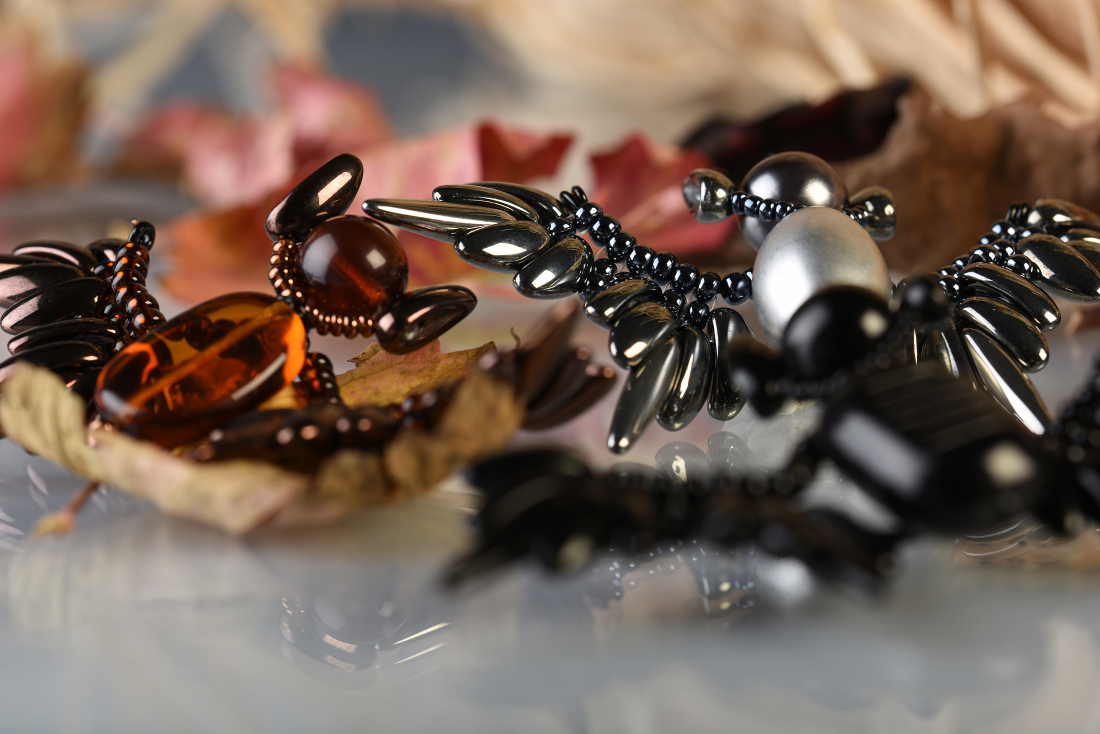
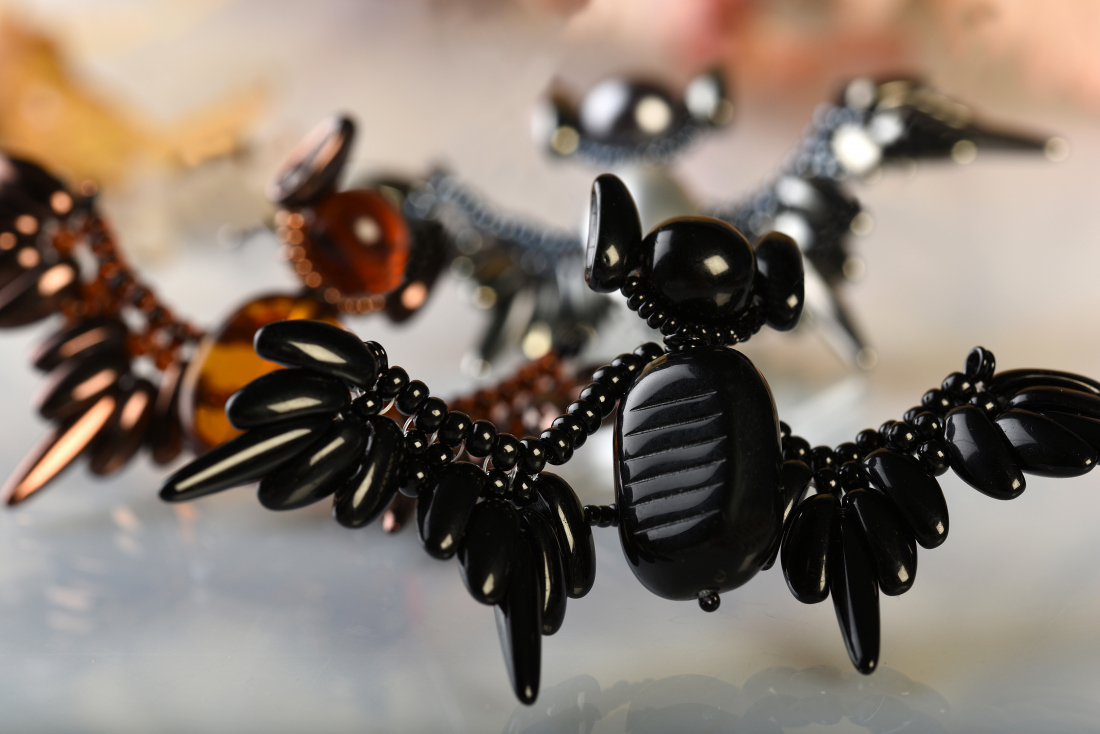
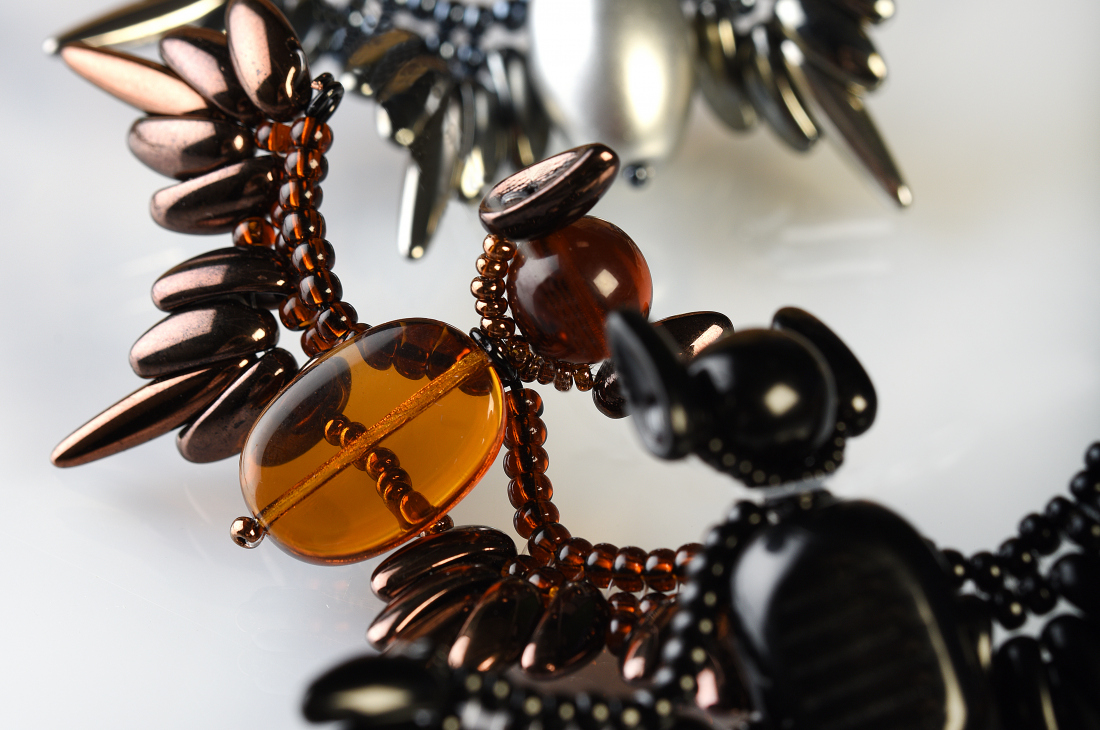
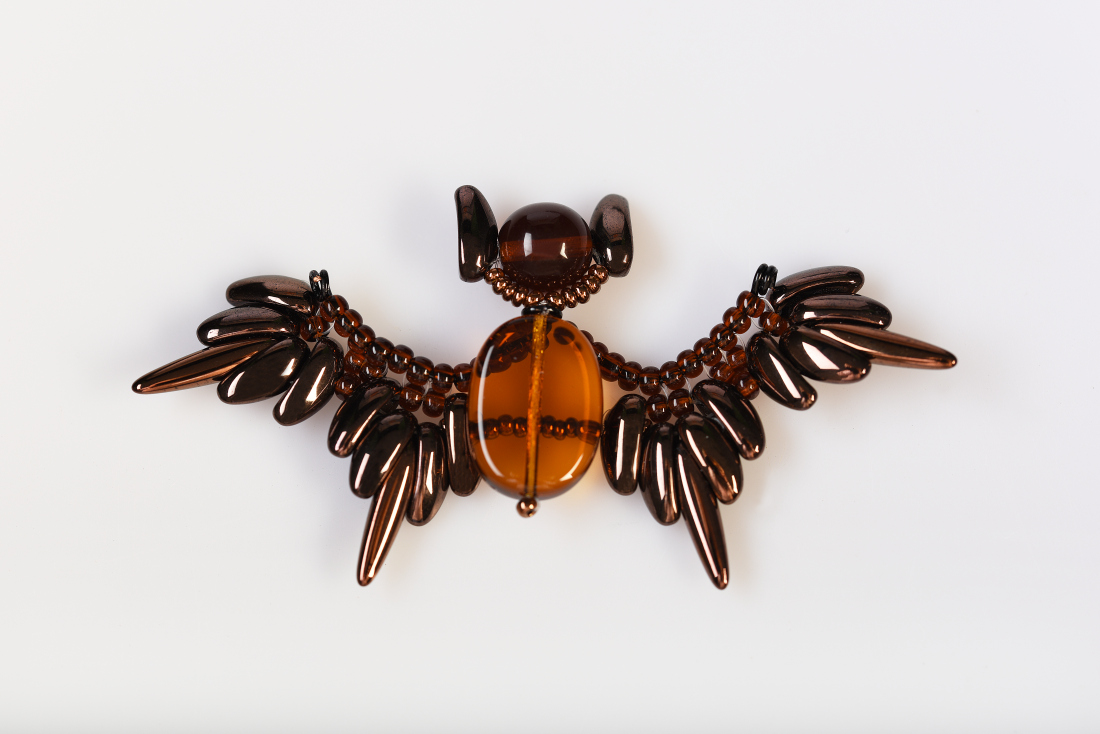
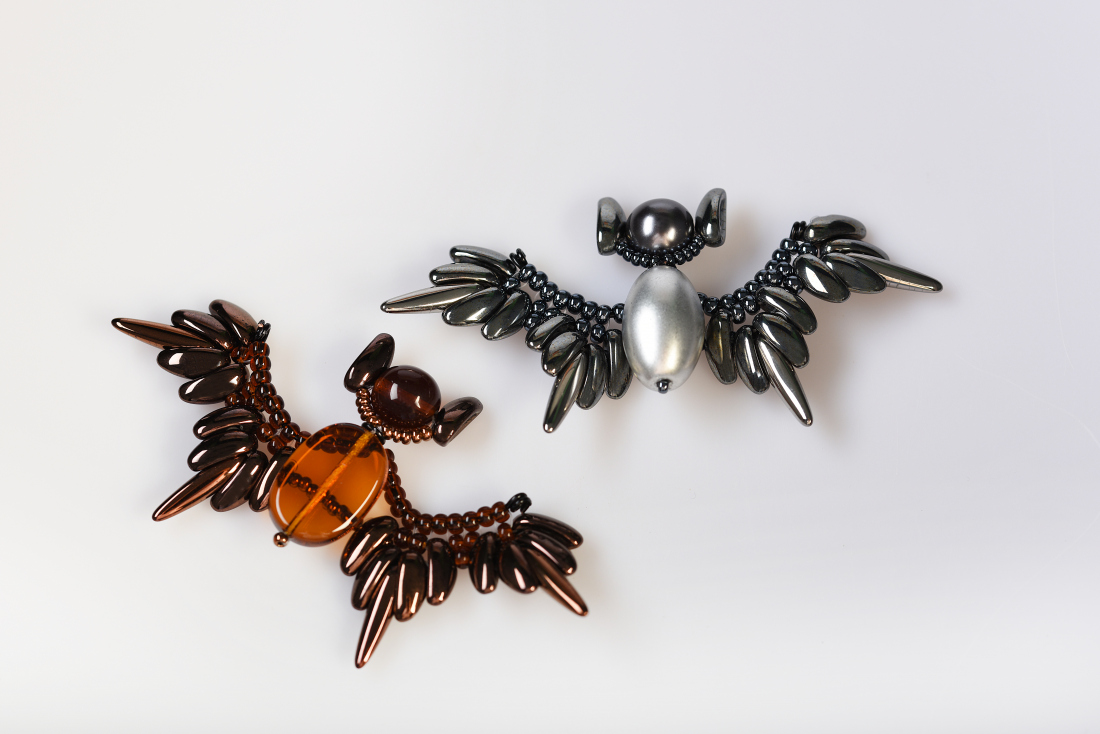
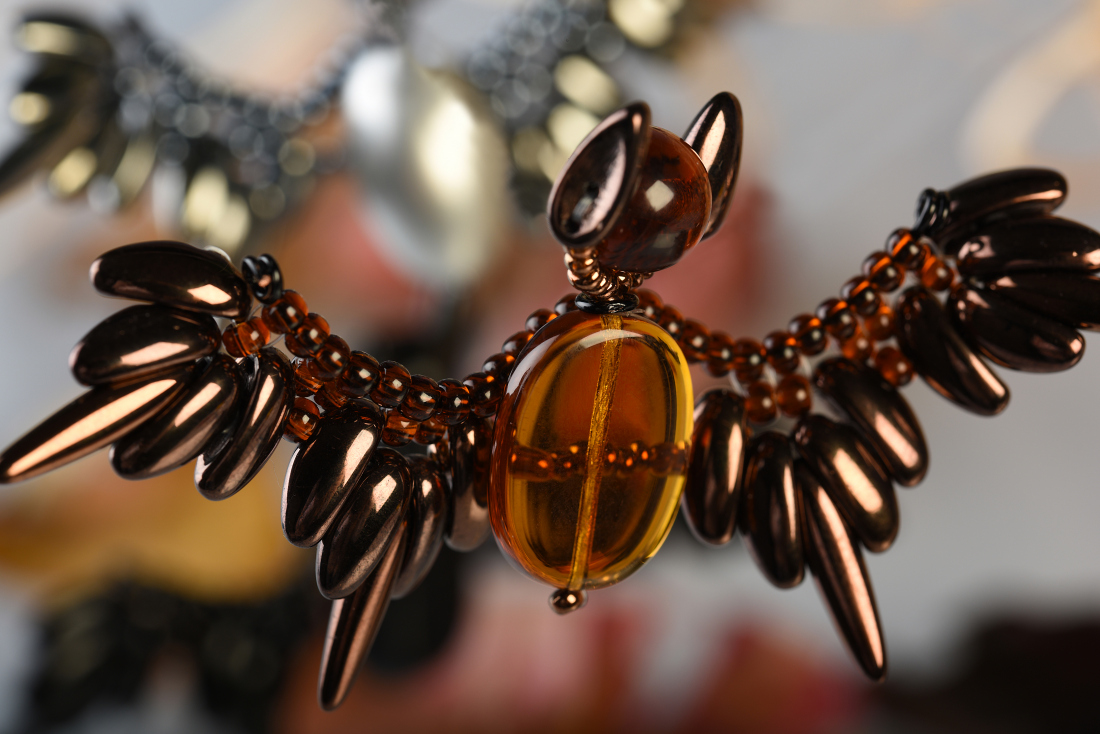
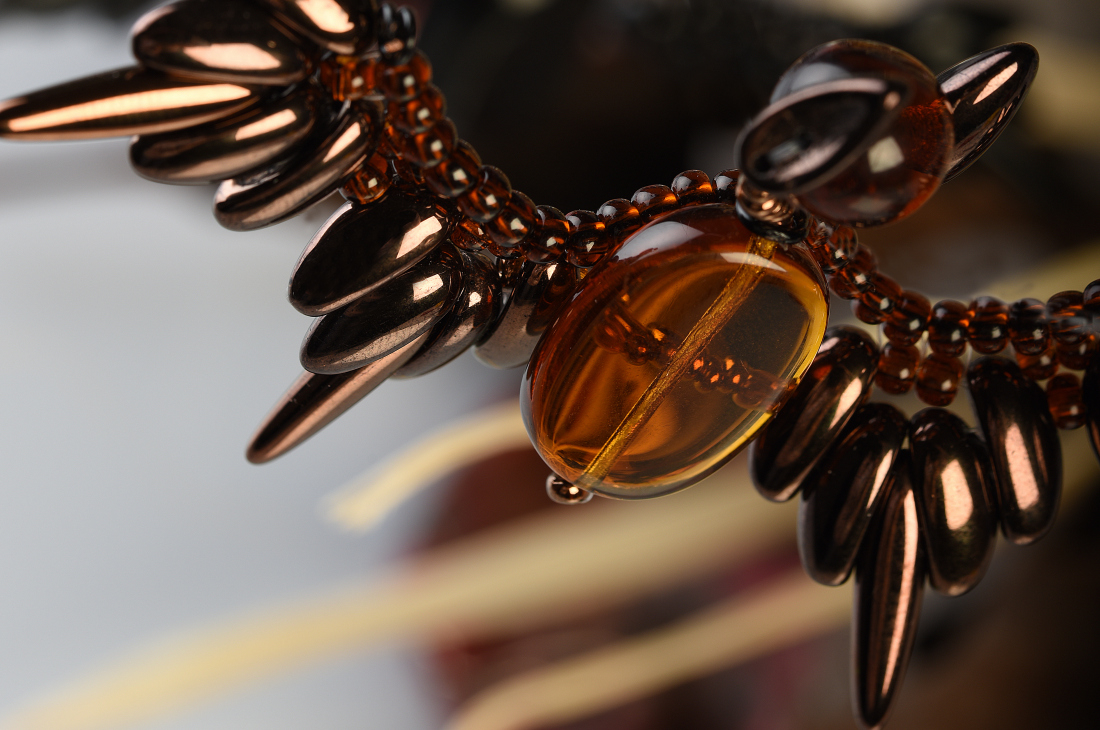
Witches gather on the eve of the Anglo-Saxon feast of Halloween. Various ghosts and mysterious creatures of the night celebrate with them and bats fly out of the dark. So now is the time to make a bat by Helena Chmelíková with the new PRECIOSA Chilli™ beads. This is a two-hole bead with an extended imaginative shape. The ridge of the bead excellently fits into the dimple of the following bead. They suitably supplement other round beads and seed beads, in this case the PRECIOSA Thorn™ bead.

Ambassadors

Helena Chmelíková

She is able to switch from luxurious and extravagant fashion show pieces to the preparation of hobby projects,
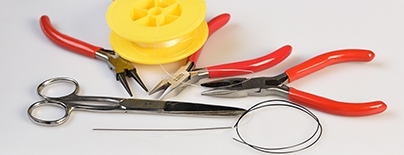
Learn More

Material and Tools

Tools

A 0.60 mm – 0.80 mm wire (depending in the size of the holes in the R8); about 20 cm; a thin needle; a 0.20 mm nylon line; scissors; snipping pliers; needle nose pliers; flat nose pliers (for flattening the beginning of the line, straightening the wire loops)

Procedure

The Chilli beads are two-holed. They have one hole at the edge of the bead, while the second hole is closer to the middle of the bead. A ridge extends on one side and they have a dimple on the opposite side.

Step 1

The wings

Leave the end of the line long. Thread the line through the outer hole of the Ch from the dimple. Also thread the line through the central hole on the ridge of this Ch. String the second Ch on the ridge through the outer hole. In the third Ch, string the outer hole in the dimple. Also string the central hole on the ridge in this Ch. String 1x Th. Thread the line through the central hole from the dimple in the second Ch. Thread the line through the outer hole again in the second and third Ch. String the fourth Ch through the central hole from the dimple.

1

Step 2

String 1x R8.

2

Step 3

Repeat Step 1 in the opposite direction. String the shape in an order which is a mirror image.

3

Step 4

After threading the line through both holes in the 8th Ch, continue by threading the line through 2x R8. Return to the first R. Thread the line through the outer hole of 5th Ch in the dimple. Thread the line through 2x R8. Return to the first one. Once again, string 2x R8. Return to the first one again. Thread the line through the outer hole on the ridge of the 4th Ch. String 2x R8. Return to the first one. String 2x R8 at the initial end of the line. Return to the first one.

4

Step 5

Tie off the end of the line. Sew it in. You have finished the first wing.

5 / a

Step 6

Repeat steps 1 to 5 to make the second wing.

Step 7

Twist about 20 cm of wire in half. Grip the centre of the wire between the points of the needle nose pliers. Create a big loop. Cross the wire over. Twist it once. Crimp the loop with the flat nose pliers.

7

Step 8

String 7x R8 on both sides (adapt the number to the used shape). Bend the wire.

8

Step 9

String 2x R8 on the wings. String 1x new R8. String another 2x R8 on the wings. String 1x new R8. String the last 1x R8 on the wing. Shape the wire. Cut off about 1.5 cm from the rocailles on the wings. Twist double loops.

9 / a

Step 10

The head and body

The head

Leave a long piece of line at the beginning. String 6 ks R11. String a 10mm ball. String the hole on the ridge of 1x Ch. Thread the line through the second hole in the dimple. Thread the line through the 10mm ball again. String the hole on the ridge of 1x new Ch. Thread the line through the second hole inh the dimple. Thread the line through the 10mm ball again. String 6x new R11.

10

Step 11

Thread the line through the first 6x R11 again. Thread the line through the outer hole on the ridge of the Ch. Thread the line through the central hole in the dimple. Thread the line through the 10 mm hole. Thread the line through the central hole on the ridge of the Ch. Thread the line through the outer hole in the dimple. Also thread the hole through the remaining 6x R11.


11 / a

Step 12

The body

String 1x R11 on the central wire loop on the wings. String the large shape as well. Also thread the beginning of the line through everything. String 1x R11. Tie off the end of the line. Sew it in.


12 / a

Step 13

Reinforcement

Connect the internal edges of Ch at the wings. Thread through the central hole on the ridge. String 1x R11. Return to the same hole in the dimple. String 12x R11 (adapt the number to the used shape). Thread through the central hole on the ridge of the opposite Ch. String 1x R11. Return to the same hole. Thread through the rocailles once again. Tie off the end of the line. Sew it in.


13 / a

Downloads