Neon circles

Difficulty: 2
Designer: Jaroslava Růžičková
Technique: basic beadweaving

Pendants made using Preciosa Twin™ and Preciosa Solo™

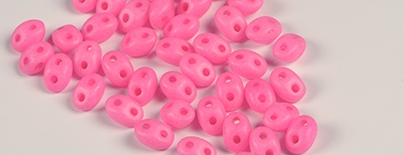
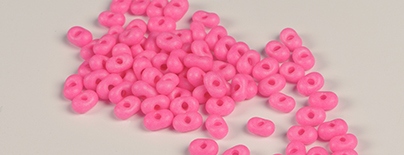
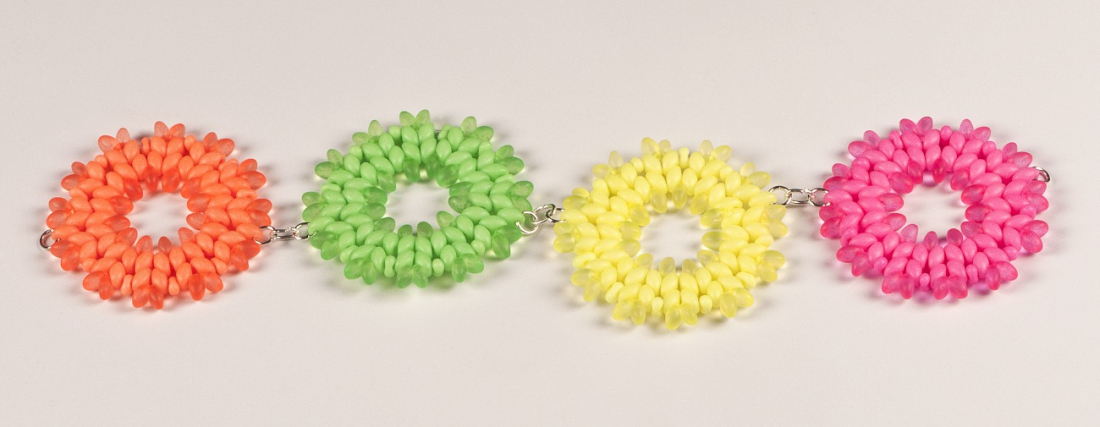
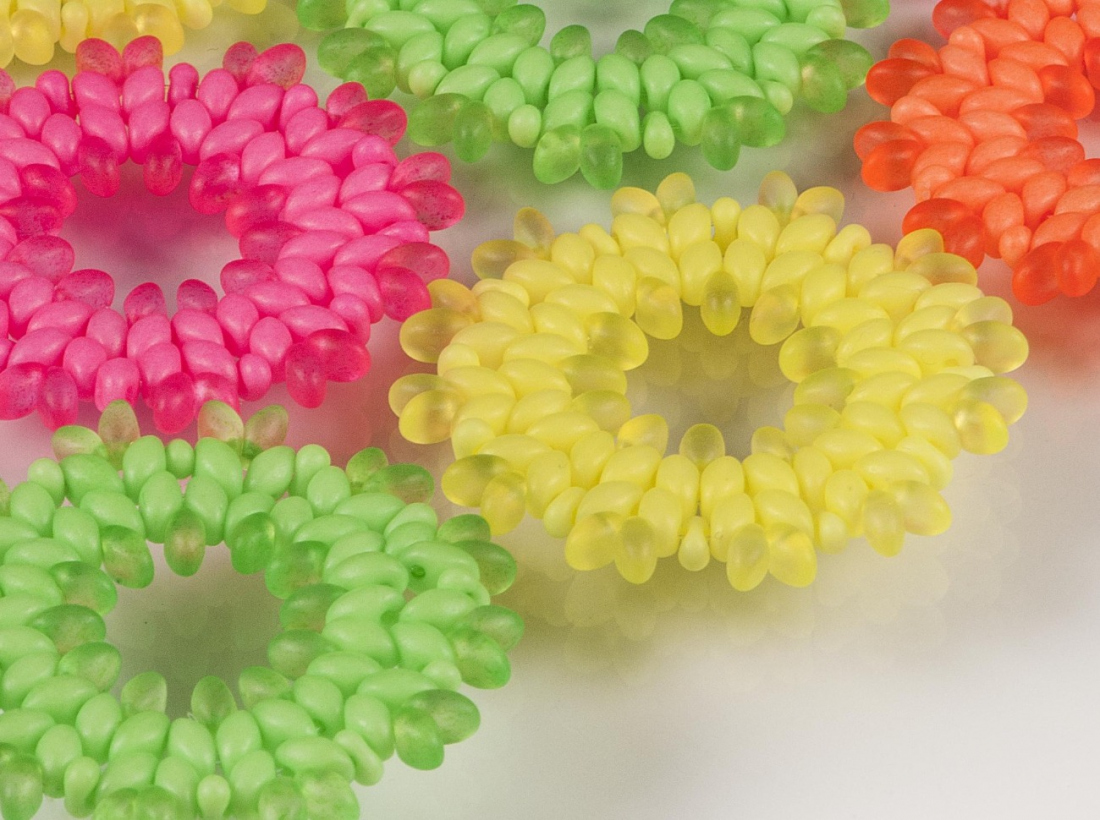
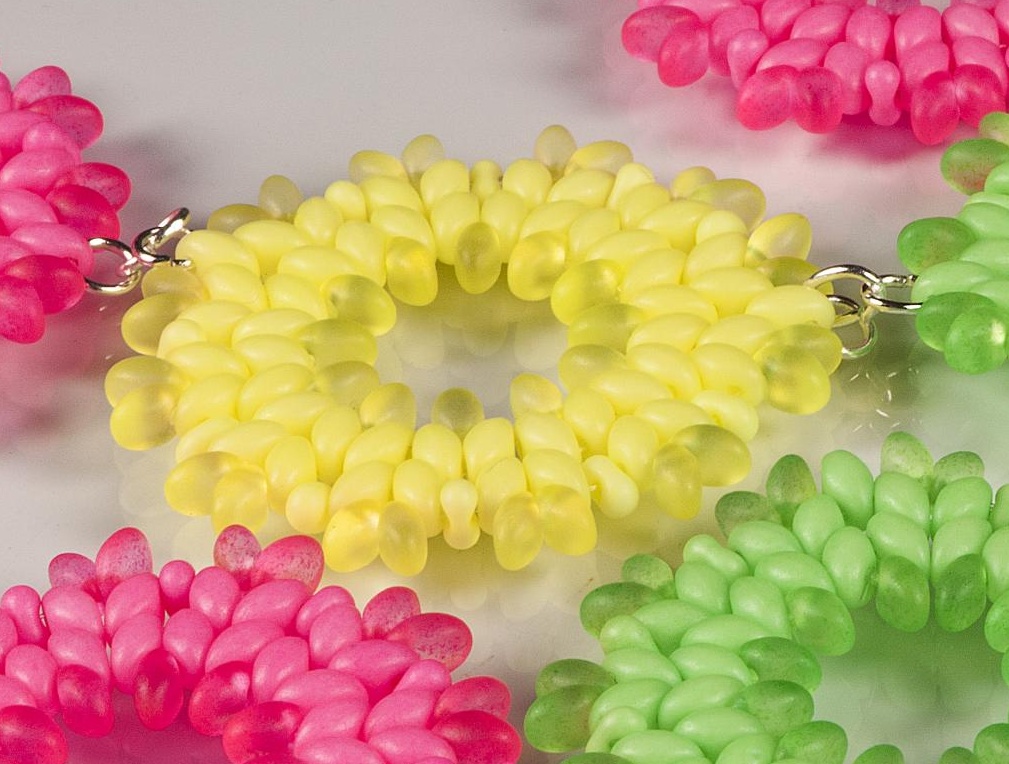
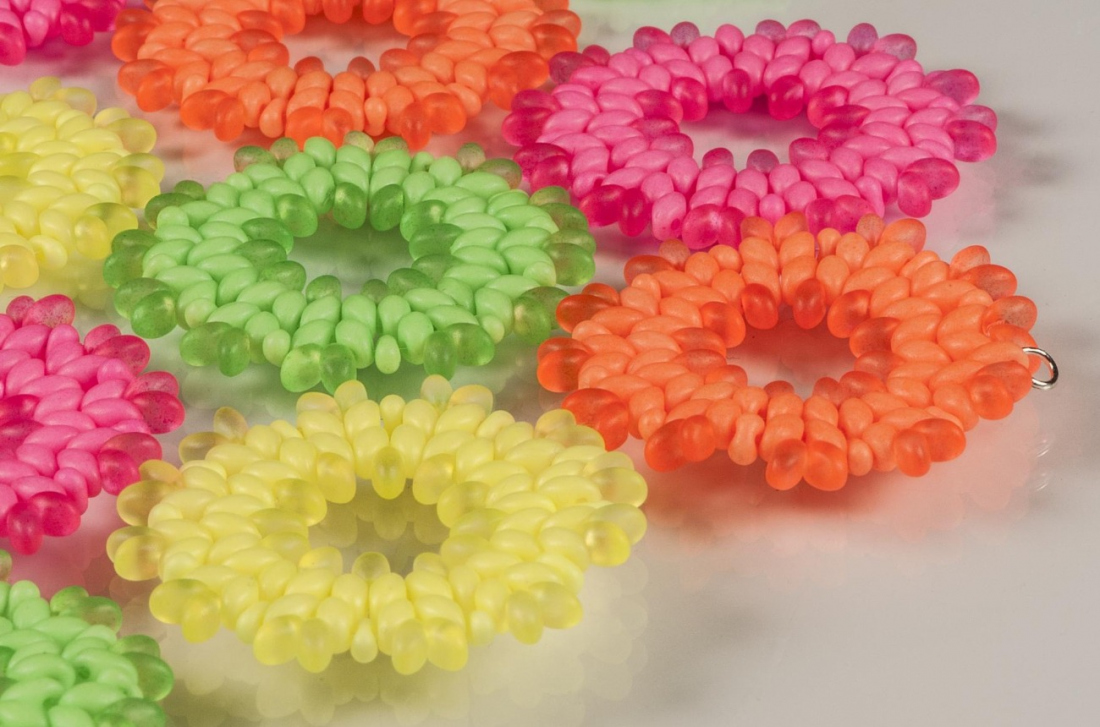
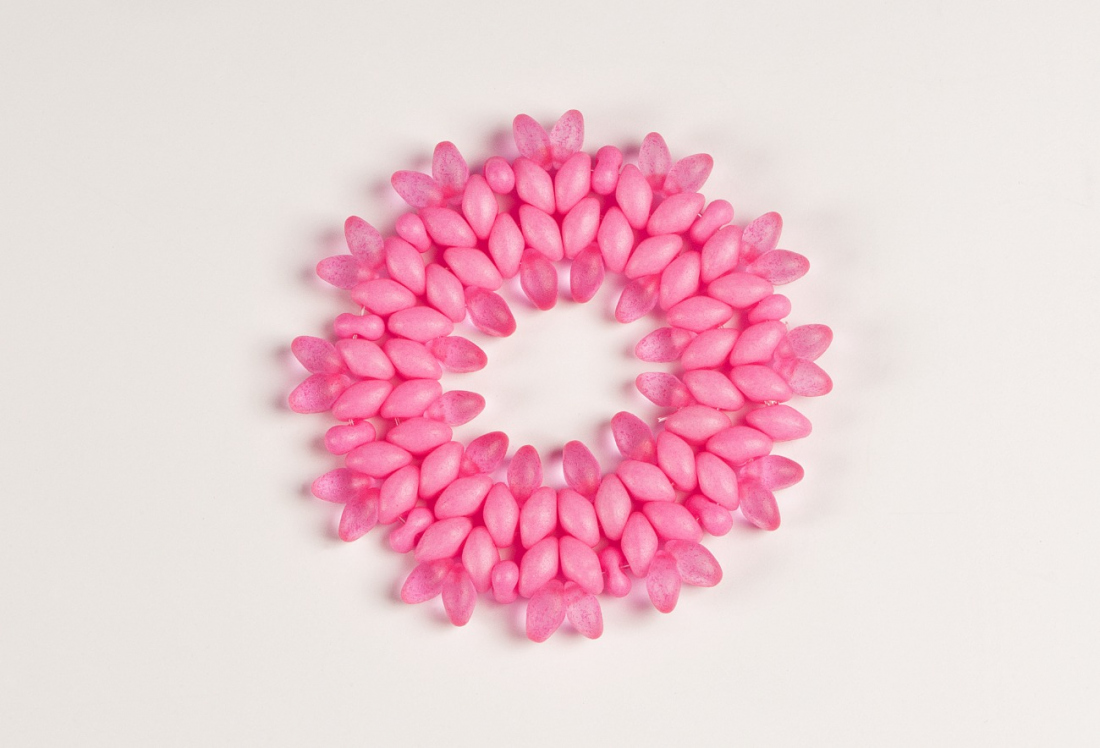
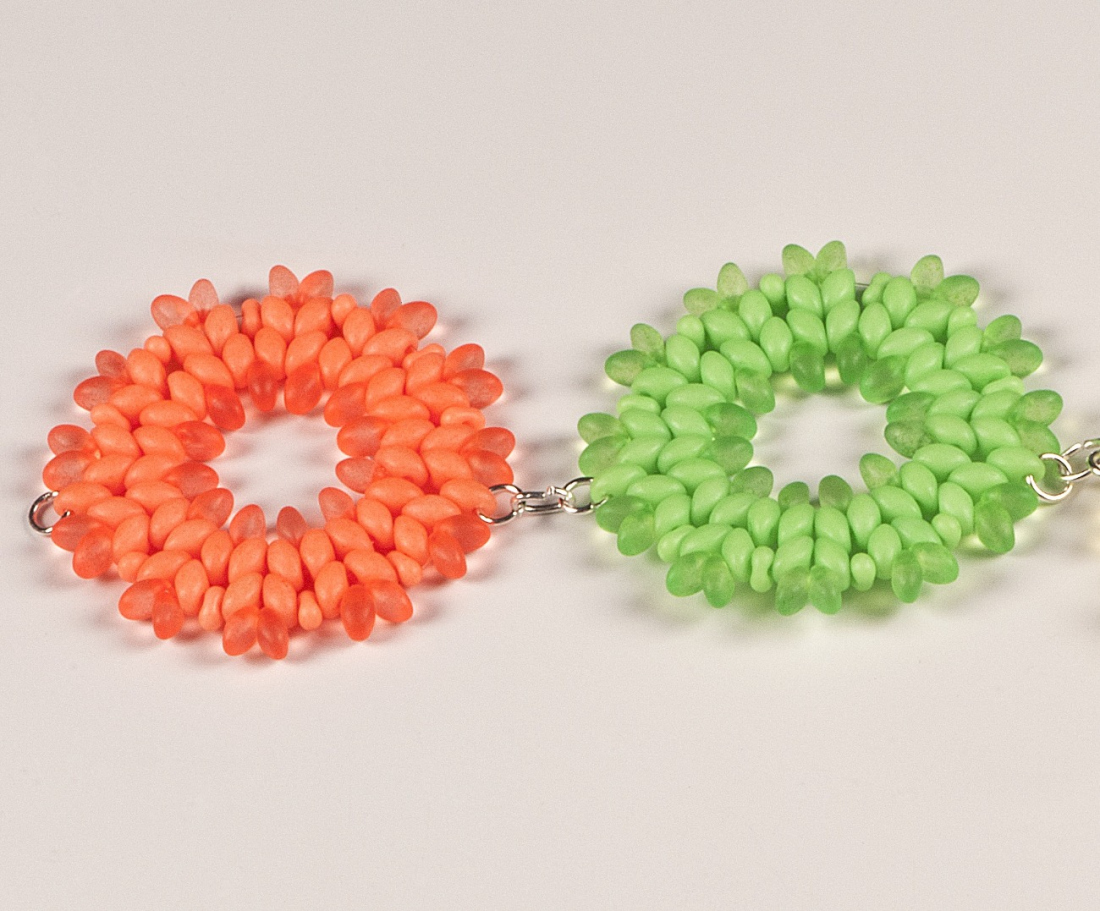
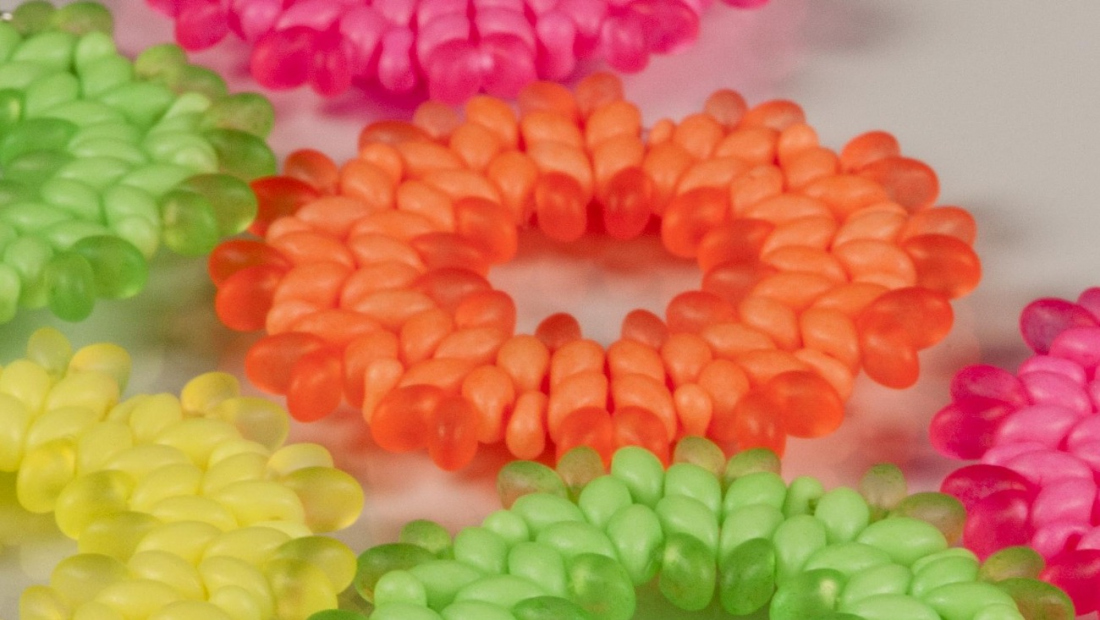
Preciosa Ornela presents the Preciosa Twin™ pressed bead and the supplementary Preciosa Solo™ pressed bead which has the same shape and 2.5/5 mm size as the Preciosa Twin™ seed bead in four shining neon colors: yellow, orange, pink and green which shine under UV light. They are available in transparent and opaque matt versions in the selected shapes created by means of the surface coloring of crystal and chalk glass. Try combining the opaque version of the neon colors with their transparent variant and create a pendant in the shape of a circle which can also be used as earrings. You can also connect them to make a necklace in sparkling colors. We wish you much sparkling inspiration with beads and seed beads with the Preciosa Traditional Czech Beads™ brand.
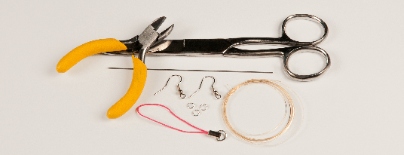
Procedure

Use the principle of the circular version of the so-called herringbone stitch.

Step 1

In the first row, alternately string 2x T and 1x S. Tie the strung beads into a circle and pass the needle and line through the second hole of the first T. String a total of 24x T and 12x S in the first row (figure no. 1).

1

Step 2

Add 2x T between each pair of T from the first row. Thread the needle and the line through the second holes of the last and first T from the first row and through the second hole of the first T from the second row. Add a total of 24x T in this row (figure no. 2).

2

Step 3

String 1x T and then alternately add 2x S and 1x F between each pair of T. Thread the line through the first T at the end of the row one more time. Straighten up the entire stringing, tighten it appropriately and finish it off with a knot between the nearest beads. Pull the line through several beads once again and cut it off. String a total of 23x S, 11x F and 1x T in this row figure no. 3).

3

Step 4

Thread the fine metal ring through the second hole of the single T in the last row and close it using the flat nose pliers. This step means that it is possible to connect the created circle with a mobile phone cord or earring hooks. If you wish to create a necklace, string 1x T on the adjacent side of the outer row as needed. Then thread the fine ring through the second hole of the given T and use it to connect the individual circles (figure no. 4).

4 / a

Downloads

This website is using cookies

To improve our services and provide information that suits your interest, we use the advanced website traffic analytics tools. However, we need your consent. More information about how we process and protect your data can be found in the privacy statement. We ask you for approval of the terms.

Functional cookies These cookies are necessary for the proper functioning of the website and therefore cannot be turned off.
Analytics cookies Analytical cookies help us track and analyze the way visitors interact with our site in Google Analytics 4. This information allows us to improve content and provide a better user experience.
Marketing cookies Reading and writing cookies for marketing purposes for advertising systems such as Google Ads or Sklik. These cookies allow us to track user behavior and measure website performance and the effectiveness of our advertising campaigns.
Personalized advertising Remarketing cookies allow us to present you with personalized advertising based on your previous interactions with our site in systems such as Google Ads, Sklik.
Use of personal data With this option, you consent to the sending and processing of your personal data to Google for the purposes of targeting and evaluating online advertising and targeted marketing.