Kumihimo and PRECIOSA Pip™

Difficulty: 2
Techniques: Kumihimo

Braided bracelet

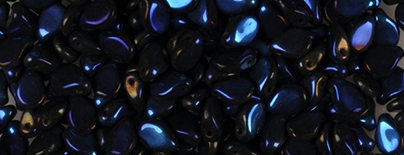
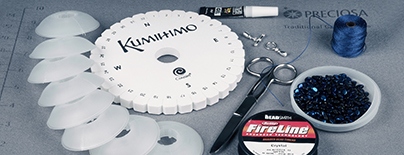
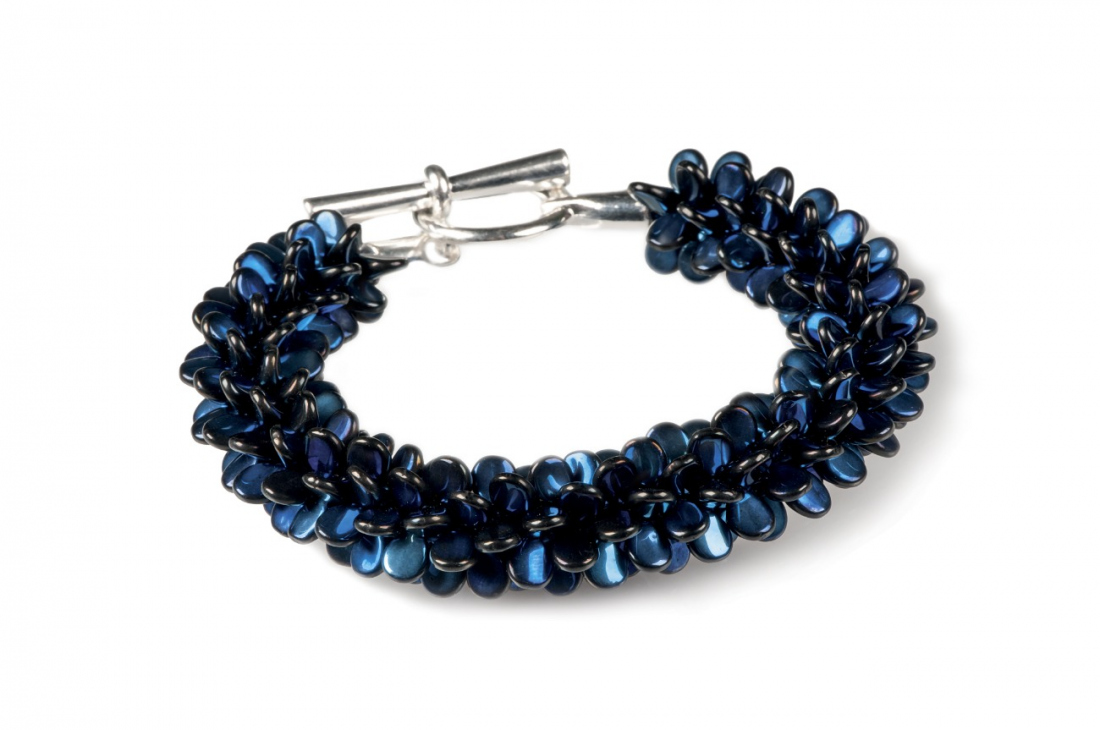
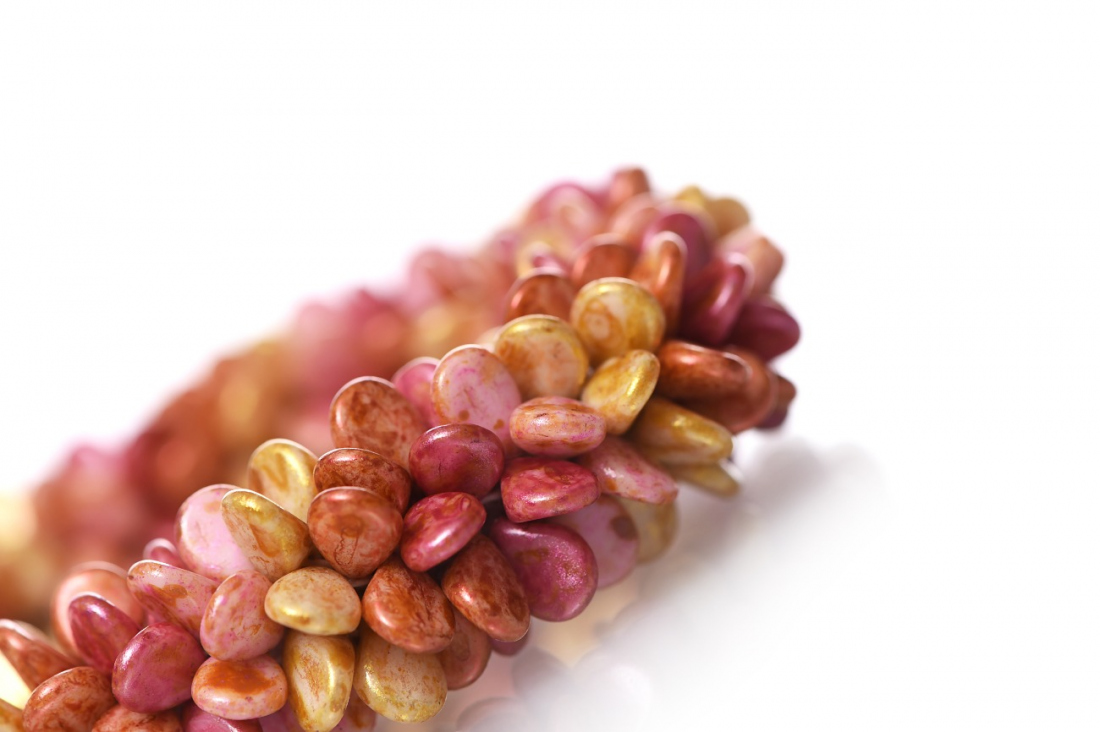
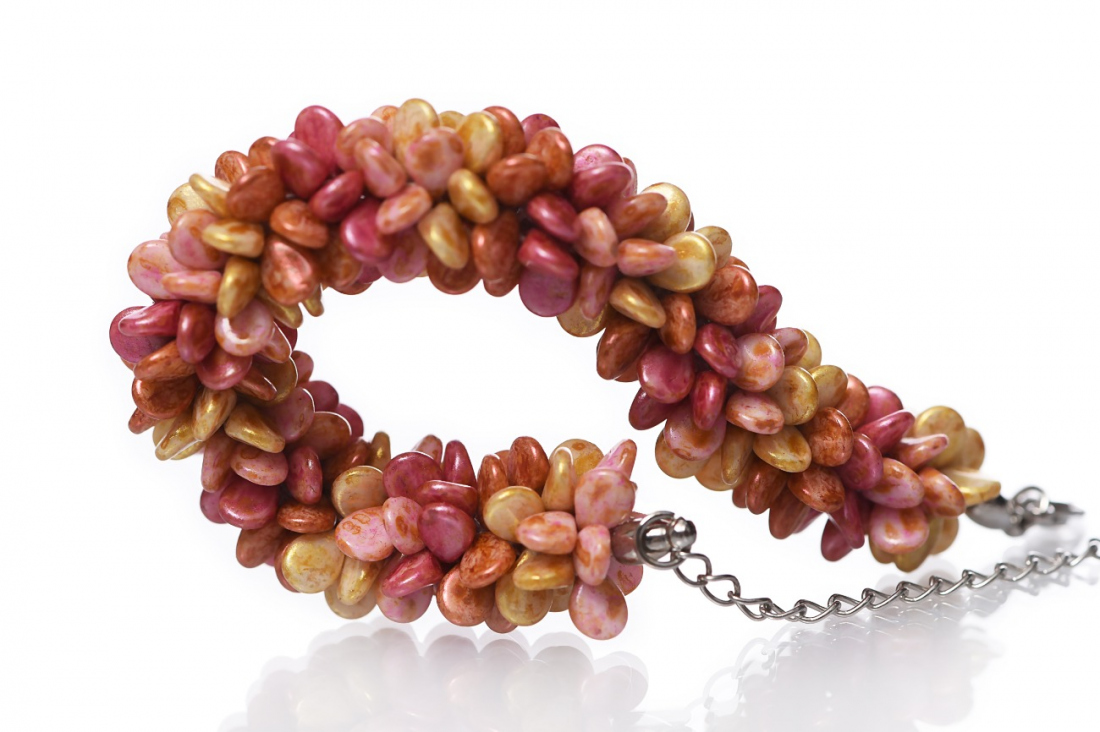
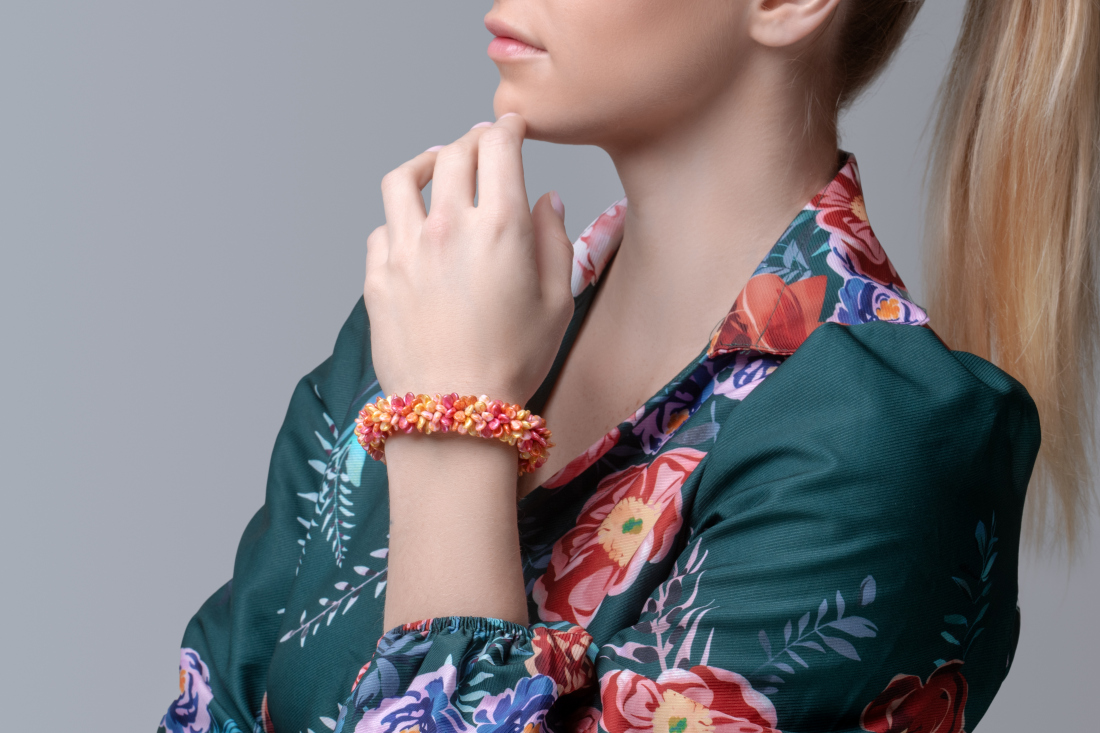
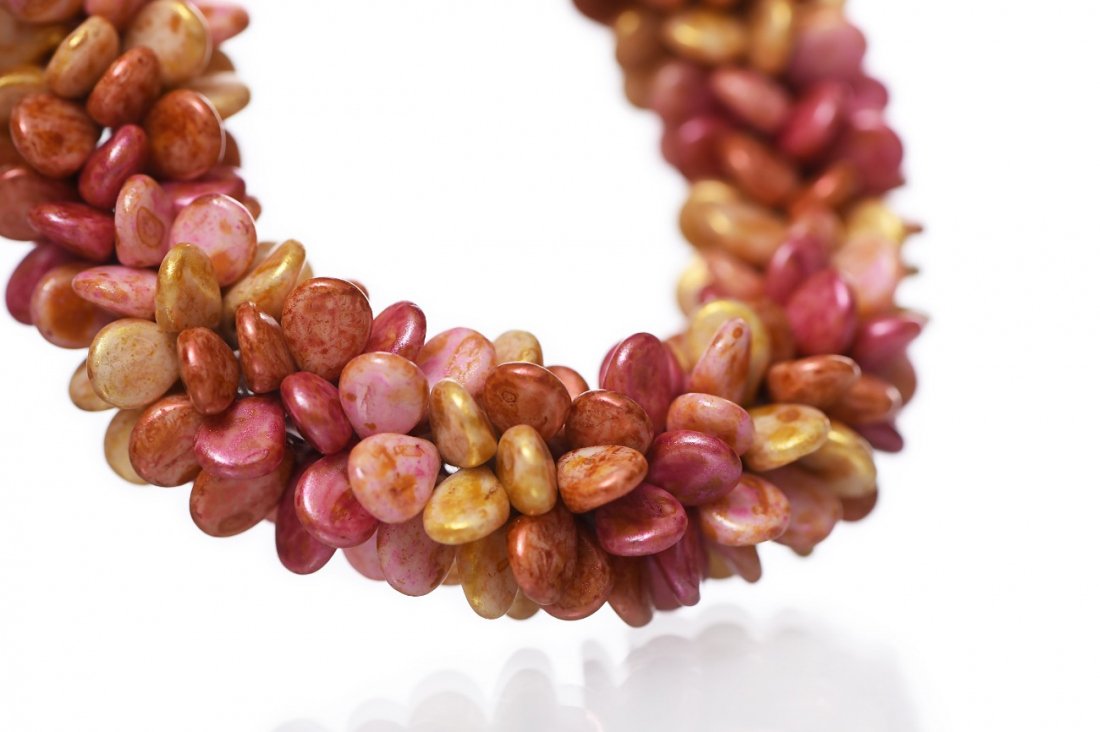
Preciosa Ornela presents bead in the shape of a small pip from the PRECIOSA Traditional Czech Bead brand. The author of the tutorial, the English designer Kerrie Slade, has made use of this popular technique of braiding lines and cords to create an original and impressive presentation of the new PRECIOSA Pip™ Pressed Bead. The combination of the new Preciosa Ornela bead in the shape of a small pip with the braiding technique known as Kumihimo will enable you to create an enticing bracelet. This tutorial is for a bracelet at a length of 21 cm including the clasp; however, you can adjust the stringing size to what you need.

Ambassadors

Kerrie Slade

Kerrie Slade have used Czech PRECIOSA Traditional Czech seed beads in her creation.

Learn More

Procedure

Step 1

Cut 8 x 65 cm (26 inches) lengths of S-Lon cord and tie an overhand knot at one end of each cord.

Step 2

Thread each cord with 30 Pip beads.

2

Step 3

Gather the 8 cords together and tie them with an overhand knot leaving 5 cm of cord above the knot. Tie the other end of each cord to the centre of a bobbin and wrap the spare thread around the bobbin, leaving approximately 30 cm (12 inches) of cord to work with between the bobbin and the top knot. Leave all of the beads outside of the bobbin suspended on the working section of the thread. See Figure 3.
 

3

Step 4

Feed the top knot through the central hole of the Kumihimo disk from front to back and tie a weight to it.

Step 5

Position the cords in the notches around the disk as shown in Figure 5.

5

Step 6

Without adding any beads, pick up the top right-hand cord and bring it down to the free notch directly to the right of the two cords at the bottom. See Figure 6a.

Pick up the bottom left-hand cord and take it up to the free notch to the left of the single cord at the top of the disk. See Figure 6b. Turn the disk a quarter of a turn to the right.

6 / a

Step 7

Create a small section of non-beaded braid by repeating step 6 a further 19 times (making a total of 40 moves worked in steps 6 and 7) remembering the sequence of top right to bottom right, bottom left to top left and a quarter turn. Figure 7 shows the underside of the work at the end of step 7.

7

Step 8

Repeat step 6 but slide a Pip bead down each cord as you work and tuck it under the horizontal cord that crosses it (make sure that the bead stays in place and does not jump out from under the thread). See Figures 8a and 8b which show adding the first 2 Pip beads.

8 / a

Step 9

Repeat step 6 until all the Pip beads have been used sliding 1 Pip bead down each cord and tucking it under the horizontal thread that crosses it and remembering to turn the disk a quarter of a turn after every 2 moves. Unwind thread from the bobbin as needed. Figure 9 shows how your work should look from the top of the disk as you complete each 2 move sequence.

9

Step 10

When all the Pip beads have been used, repeat step 6 a further 20 times (a total of 40 moves) without adding any beads to give you a small section of non-beaded braid at the end of your bracelet.

Step 11

Remove the weight and the bobbins and pinching the newly braided section worked in step 10, carefully remove the braid from the disk and tie an overhand knot next to the braided section to prevent it from unravelling. Gently pull both ends of the braid away from each other to stretch out any tension. See Figure 11.

11

Step 12

Using approximately 40 cm (16 inches) of beading thread (Fireline) bind one end of the braid by wrapping the thread tightly around the non-beaded section of the braid several times (approximately ½ cm away from the beaded section of the braid) tying several knots as you work. Trim the thread and cut off the knot at the end of the braid close to the binding and seal the end with a small amount of glue. See Figure 12.

12

Step 13

Repeat step 12 at the other end of your braid.

Step 14

Following the instructions on the glue carefully, apply a small amount of glue to one end of your braid and insert it into one half of the clasp. Wipe away any excess glue and leave it to set. Glue the other half of the clasp to the other end of your bracelet. See Figure 14a and Figure 14b.

Tips:

•To make it easier to thread the beads onto the cord, cut the cord at an angle and add a small amount of clear nail varnish or glue to the tip of the cord to stiffen it.

•Adjust the length of your bracelet by adding more beads to your cords in step 2.
 

14 / a

Downloads