Apple orchard

Difficulty: 3
Technique: embroidery (a rocaille knot, a tacking stitch)

An embroidered pendant

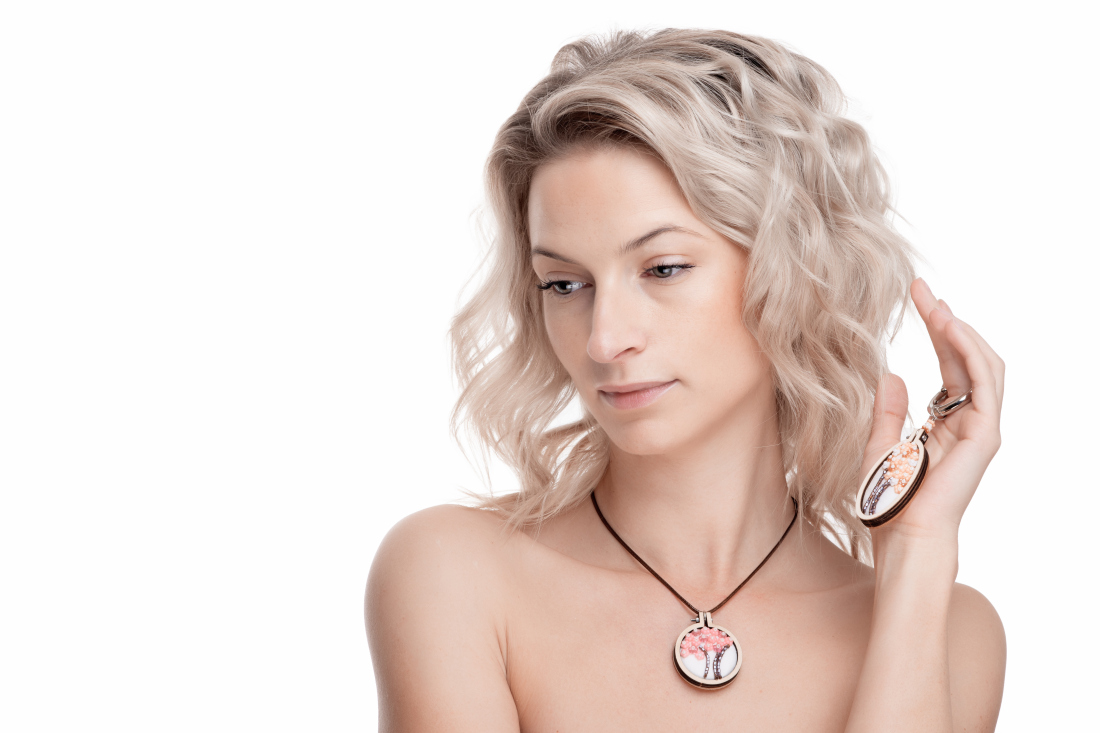
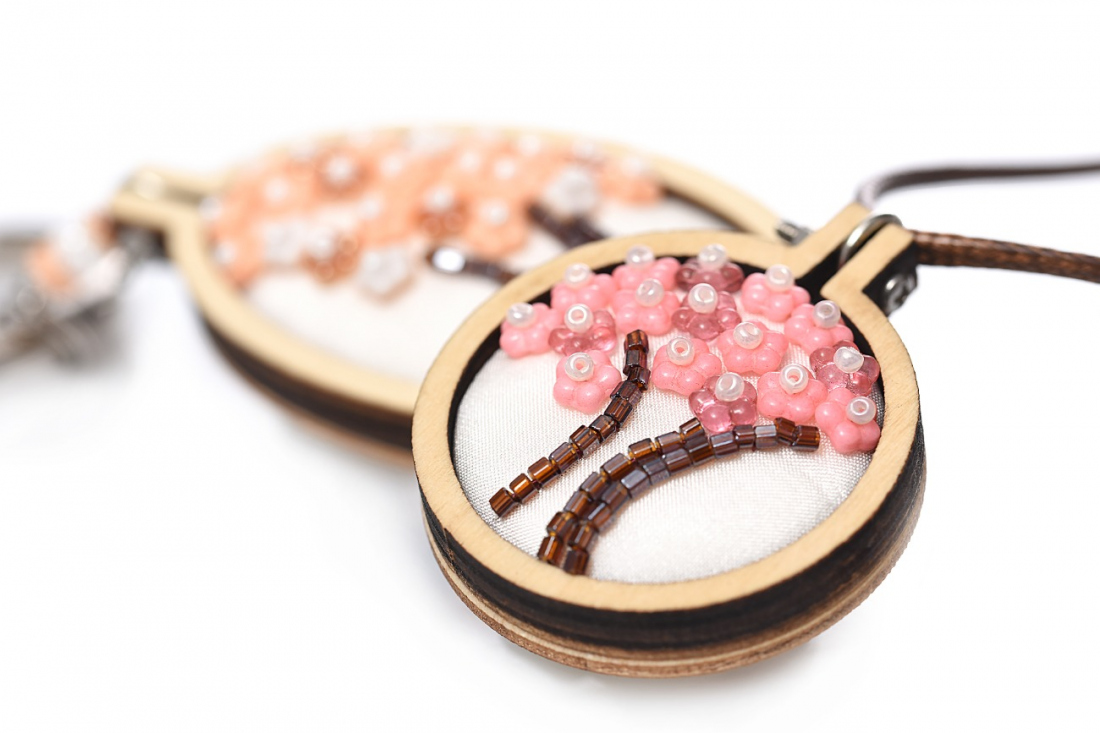
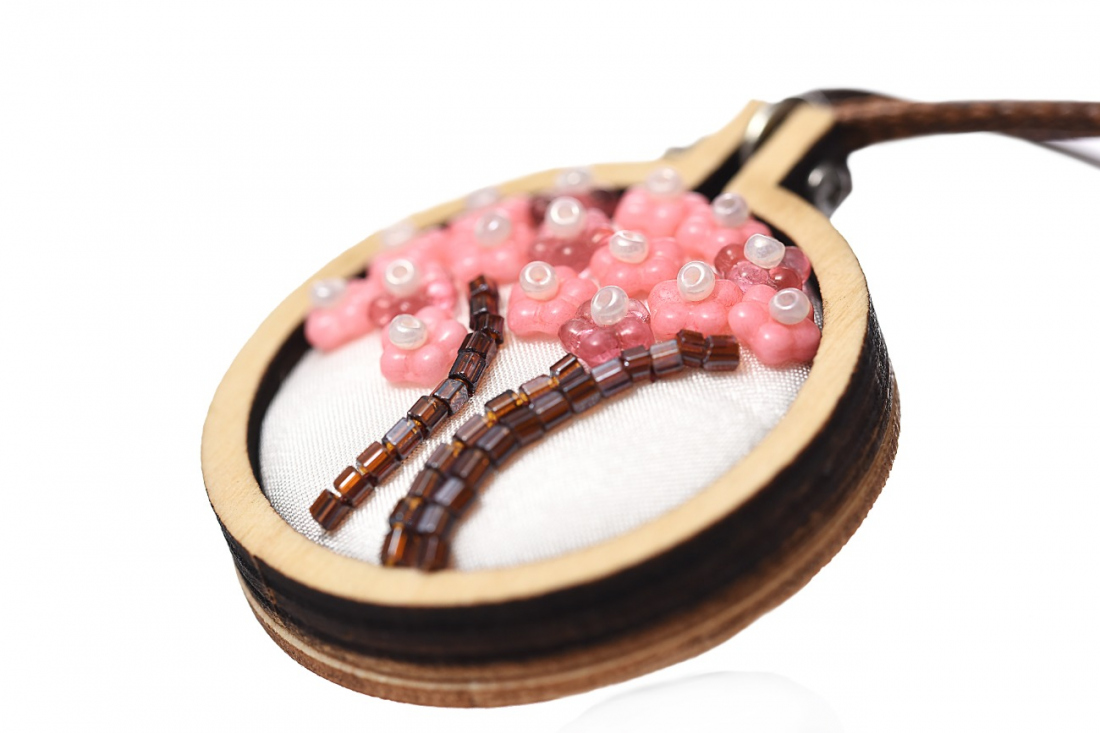
Have you ever tried to embroider using PRECIOSA beads and seed beads? Now you can. We have prepared a beginners tutorial for you with the spring mood of a blossoming orchard. Create a simple, appealing accessory out of PRECIOSA Two-Cut and pressed beads in the shape of delicate little flowers.

Ambassadors

Helena Chmelíková

She is able to switch from luxurious and extravagant fashion show pieces to the preparation of hobby projects,
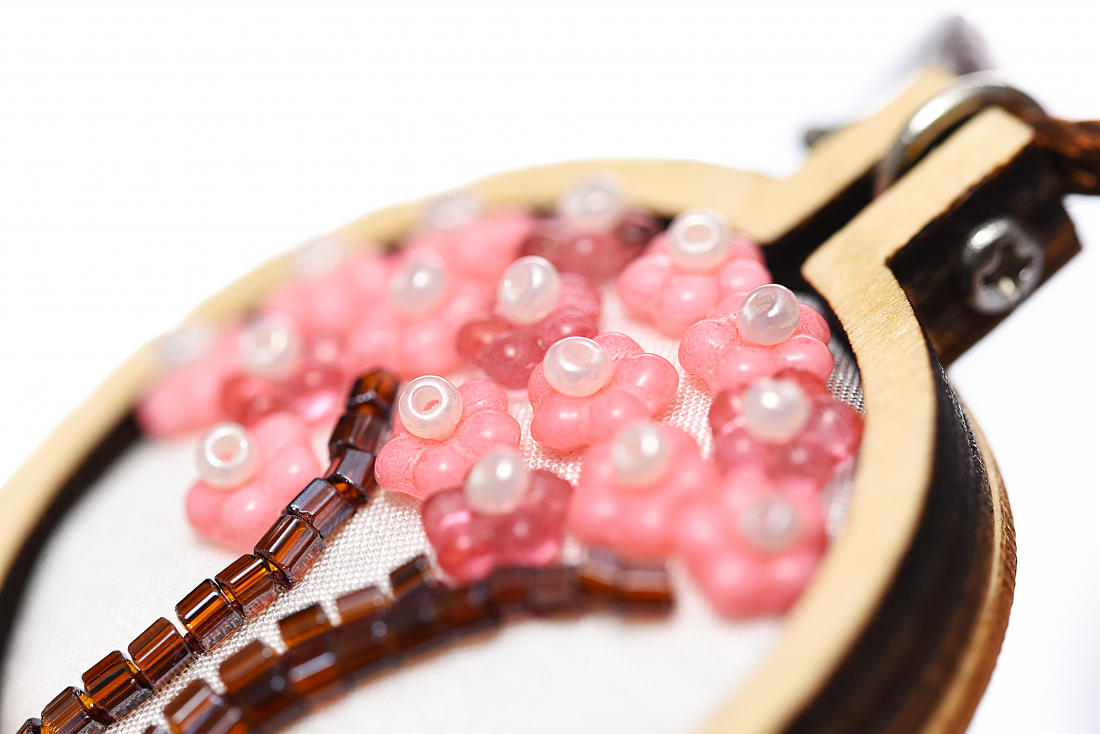
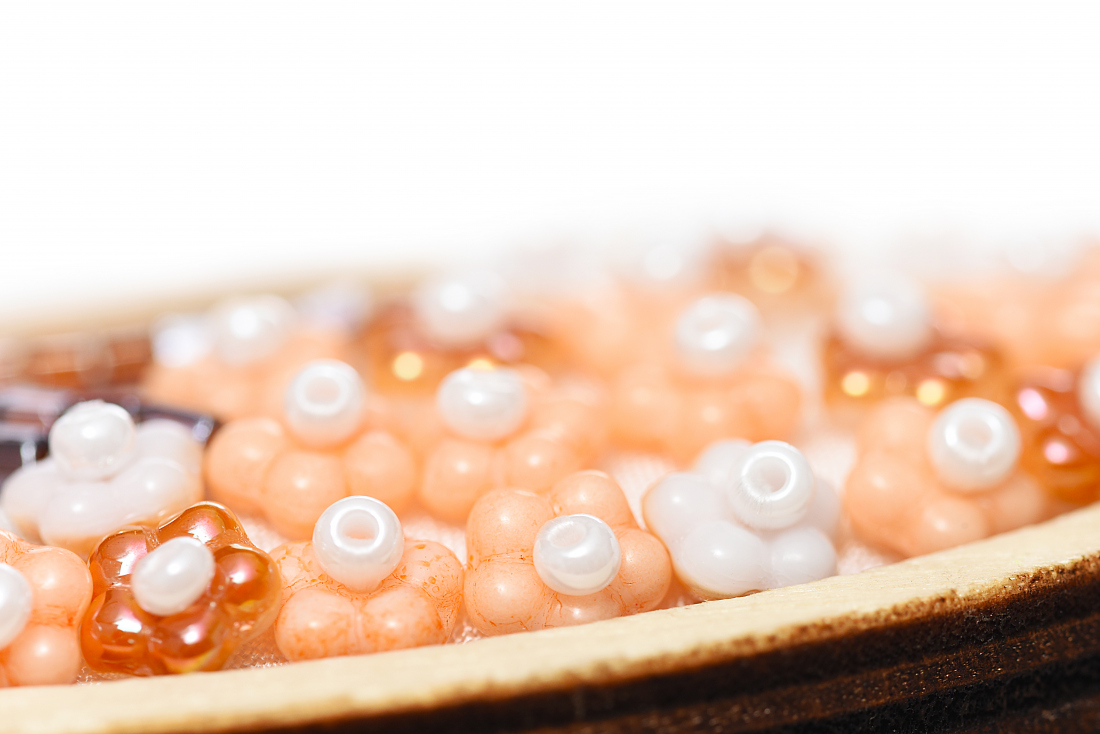
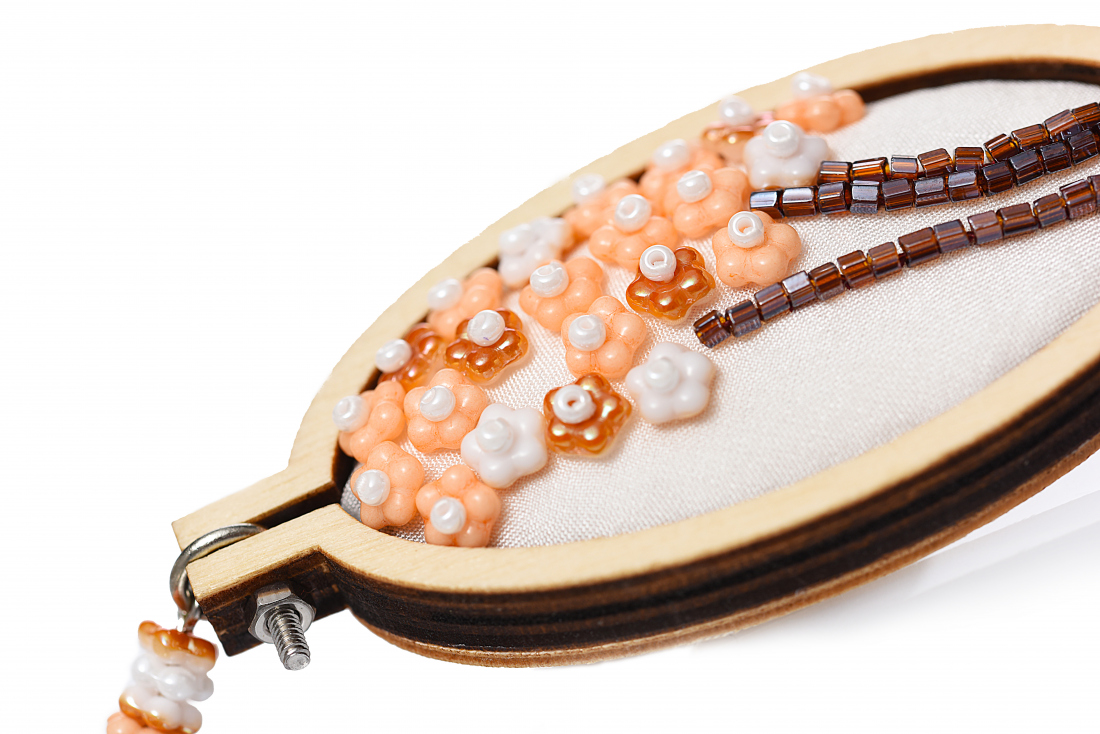
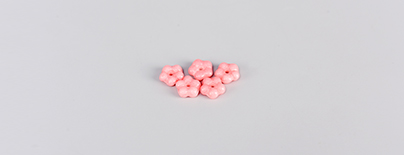
Learn More

Material and Tools

PRECIOSA Forget-me-nots

111 01 362; 5 mm; 03191 pink; 11x
(PB)

PRECIOSA Forget-me-nots

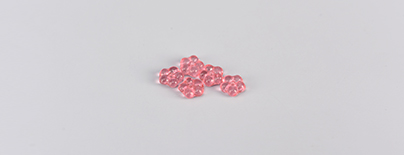
111 01 362; 5 mm; 00030/01193 transparent pink; 4x
(PB)

PRECIOSA Two-Cut

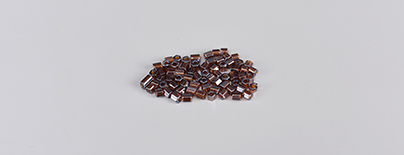
351 31 001; 10/0; 17110 dark brown; 30 – 35x
(TC)

PRECIOSA Rocailles

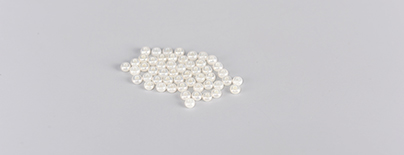
331 19 001; 10/0; 57206 ivory; 15x
(R)

Materials

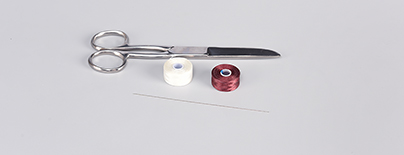
A thin LI04-0002-01 (white – PB) and LI04-0002-08 (Bordeaux – TC) nylon thread; a thin needle; scissors

Tools

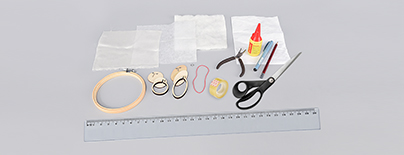
Thin fabric (white, ivory or cream); thin fusible interlining; sewing scissors; pliers; a transparent sheet of paper; a regular pencil; a dark felt tip; a 10-15 cm wide sewing frame; a decorative wooden frame – a pendant with an internal wooden disc (a ring – a diameter of 40 mm, oval – 31 x 67 mm); thermal interlining; dispersive glue; a rubber band; an 8 – 10 mm ring; sticky tape, a ruler

Procedure

Step 1

Iron the fusible interlining onto the fabric (the shiny side is placed on the rear of the fabric). Warm the iron for synthetic materials. The piece of fabric must be bigger than the embroidery frame.

1 / a

Step 2

Place the embroidery frame's internal ring under the fabric. Press the outer ring over the inner ring from the front of the fabric. Tighten the screw (if you have a frame with a screw). Use the pliers. The fabric must be taut.

2 / a

Step 3

Adhere the internal wooden circle from the decorative frame to the thermal interlining. Once dried, cut off the interlining around the circle.

3 / a

Step 4

Trace the drawing with the placement of the PB and TC onto the fabric. The grey circumference corresponds to the size of the internal wooden disc from the used decorative frame (a 33 mm circle, 27 x 55 mm oval). Trace the black points and lines onto the paper (using the transparent sheet of paper and the felt tip). Or cut it out from the printed tutorial. Use a regular pencil to do so. Attach it to the rear of the fabric using sticky tape. Place the frame against a window and trace around the sketch on the rear. The transition of daylight will help you.

The actual size of the drawing when printed

4 / a

Step 5

Sew on the PB (the rocaille stitch). Cut off about 50 cm of white thread. Cut it off diagonally. String it into the eye of the needle. Poke through the 1st point in the drawing from the rear. Leave about 15 cm of thread free. String 1x PB and 1x R onto the longer part of the thread at the front of the fabric. Thread the line back through the PB to the rear. Continue to the next points and add the PB and R. Sew the ends of the thread in once all the points have been filled. Thread the line under the stitches at the other points. Create a loop in the thread and thread it through it twice. Create a knot. Cut it off.

5 / a

Step 5

5 / a

Step 6

Embroider the trunk (tacking stitch). Start at the double line. Cut off about 40 cm of thread. Tie a double knot about 10 cm from the start of the thread. Thread through the start of the outer line at the PB from the rear. String about 2.4 cm of TC on the front (adapt them to the current situation). Thread the other end of the line through from the front. The difference between the length of the line and the length of the strung TC should be within 1 mm. Return to the start of the line from the rear and the 1 mm of free thread will be used up. Pull the TC to the end of the line. Poke the needle through the fabric from behind in the gap after every 2 TC and between each TC. Clasp the thread and once again poke the needle through the same place from the front. Maintain the line and continue in the same way. After completing the external line, move to the internal one. This time, string about 1.7 mm of TC (adapt them to the current situation). Slack of about 0.5 mm is sufficient. Once this line has been completed, tie off both ends of the thread with two knots. Cut them off. Sew the last simple line using a new thread with a length of about 30 cm. String about 2.1 cm of TC (adjust them to the current situation).

6 / a

Step 7

Remove the embroidered picture from the frame. Underlay it with the circle prepared with the interlining (Step 3). Press on the outer decorative frame. Tighten the nut on the screw. Cut the fabric off about 0.5 – 1 cm from the frame.

7 / a

Step 8

Pull the fabric to the centre of the circle using the thread. Sew through the adjacent edges and pull them together.

8 / a

Step 9

Apply glue to the rear of the frame. Also apply it to the fabric. This will definitively secure the picture in the frame. Put on the larger wooden circle. Secure it with the rubber band until the glue dries.

9 / a

Step 10

Release the screw once the glue has dried. Insert a ring with a prepared cord or hanger. Replace the screw.

10 / a

Downloads