Christmas expectation

Difficulty: 3
Technique: Brick Stitch, Square Stitch, Linking

Christmas inspiration from PRECIOSA rocailles and PRECIOSA Pip™

A handmade gift for your nearest and dearest will always bring the greatest joy. Take inspiration from this Preciosa Ornela tutorial and use the beads and seed beads from the PRECIOSA Traditional Czech Beads™ brand to create a cute pendant in the shape of a Christmas tree. Use the square and brick stitches to make these small trees. The Christmas decorations made here use PRECIOSA Pip™ beads.
Assemble the pendant using imitation pearls according to what you have available and to your imagination. 

We wish you happy Christmas beadworking.

Ambassadors

Helena Chmelíková

She is able to switch from luxurious and extravagant fashion show pieces to the preparation of hobby projects,

Learn More

Procedure

Step 1

The tree
You need three trees for a pendant.

Secure the base row using the „square“ stitch. String 5x R8 and 1x P. Thread the line through the strung rocailles again, one after the other. String a new 1x P. Tie off the end of the line.

1 / a

Step 2

Continue with the „brick“ stitch in the following rows. Thread the line through the P. String 1x R8. Thread the needle under the line in the gap between the P and the R8 from the first row. Return to the R8. String a new 1x R8. Thread the needle under the line in the next gap. Return to the R8. Repeat this 4x.

2 / a

Step 3

The third row

String 1x R8. Thread the needle under the line in the gap between the R8 and the R8 from the second row. Return to the R8. Repeat this 4x.

3 / a

Step 4

The fourth row

String 1x P and 1x R8. Thread the needle under the line in the gap between the R8 and the R8 from the third row. Return to the R8. Repeat the stringing of the R8, the under-threading of the line and the re-threading of the R8 3x. String 1x P. Thread the line under the line on the side of the outer R8 from the third row.

4 / a

Step 5

Create the fifth, sixth and seventh rows. 

Proceed according to steps 2, 3 and 4. However, string one less R8 in the rows.

5 / a

Step 6

Create the eighth, ninth and tenth rows.

Proceed according to steps 2, 3 and 4. However, string two less R8 in the rows.

6 / a

Step 7

Create the eleventh, twelfth and thirteenth rows.

Proceed according to steps 2, 3 and 4. However, string three less R8 in the rows.

7 / a

Step 8

Create the fourteenth row from 2x R8

You need 1x R8 to sew the fifteenth row.

8 / a

Step 9

String 8x R10. Thread the line through them one more time. Thread the line through the R8 in the fifteenth row. Sew in the end of the line.

9

Step 10

Assembly

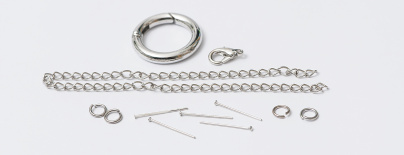
Cut off 8 – 9 cm of chain. Attach it to the closing mechanism. Attach the first tree just below the mechanism using the first ring. Place the second tree at the end of the chain. Place the third tree in the middle of the chain. Place the IP on the eye pins. Link the IP in the free chain links; 8 IP directly in the links. Attach the remaining 6 IP using rings.

10 / a

Downloads