Like a clown

Difficulty: 1
TECHNIQUE: KNOTTING

Necklace made from wooden beads

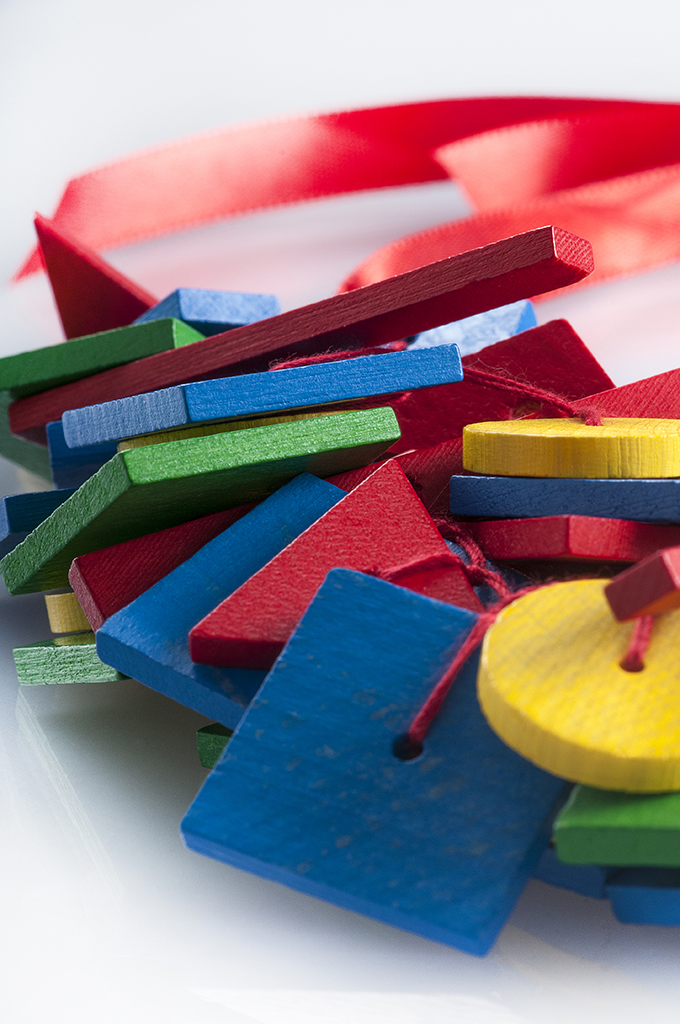
Necklace made from wooden beads The various shapes of wooden beads with a colorful surface finish simply cry out for us to create a tasselled necklace which is sure to become a favourite accessory.

Ambassadors

Helena Chmelíková

She is able to switch from luxurious and extravagant fashion show pieces to the preparation of hobby projects,
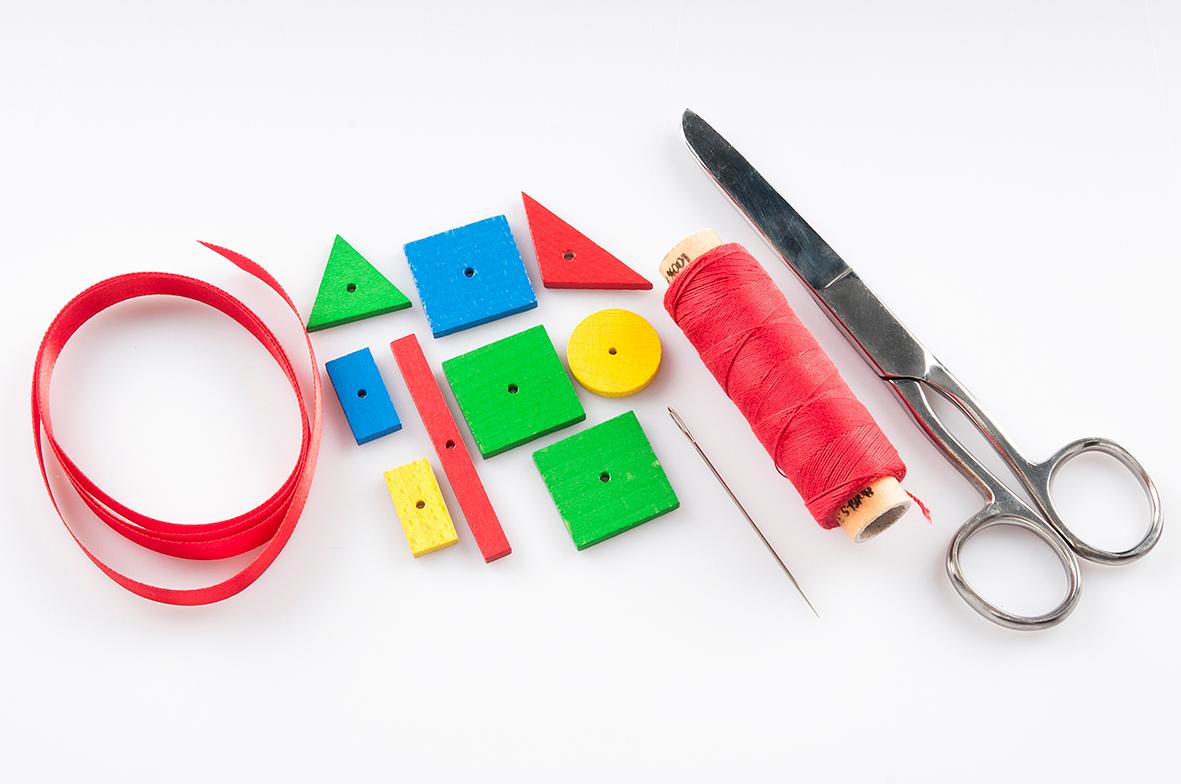
Learn More

Materials & Tools

PRECIOSA wooden beads

A mixture of wooden geometric shapes in red, yellow, blue and green (squares, circles, rectangles, semicircles and so on);

Thick shoemaker's thread or a thin waxed thread in the used colors of the shapes; a 1 cm wide and 2 m long ribbon in the color of the used shapes; a thick needle with a large eye; scissors

Procedure

The individual shapes in this tasselled necklace are bound to threaded loops. The threaded loops are tied onto a long thread. This is how the row is created. The necklace consists of five rows. Each of them is slightly longer than the one before. They are then all tied together at the sides and bound with the ribbon. It is also possible to use more or less rows.

Step 1

Tying the shapes

String the first shape in the row. Create a loop above it in the thread. Thread the shape through it. Tighten the knot (see fig. nos. 1a, 1b, 1c, 1d).

1 / a

Step 2

String the other shapes in the row. Twist the front thread around the rear one. Create a loop on the front side of the shape and thread the thread through it (see fig. no. 2a, 2b and 2c).

2 / a

Step 3

The rows

Cut about 2 m of thread for each row and thread it through the eye of the needle. Join the ends of the thread. String the wooden shapes in the doubled thread and tie it. Leave about 20 cm of thread free at the beginning of the row. The beads are placed approximately 1-2 cm from each other. Also leave about 20 cm of thread free at the other end of the row. Cut the needle off. Tie the smaller shapes at the beginning and end of the row and the larger ones in the centre (see fig. nos. 3a, 3b, 3c and 3d).

row 1 – a length of about 15 cm, 11x shapes

row 2 – a length of about 16 cm, 12x shapes

row 3 – a length of about 17 cm, 13x shapes

row 4 – a length of about 18 cm, 14x shapes

row 5 – a length of about 19 cm, 15x shapes

3 / a

Step 4

Completion

Lay the left-hand outer shapes from all the rows on top of each other. Take all of the threads. Create a loop from them. Thread the end of the thread through it. This is similar to the tying of the first shape in the row. Try to put the knot about 2 cm from the shapes. Tighten it. Proceed in the same manner on the right-hand side (see fig. no. 4a, 4b, 4c, 4d and 4e).

4 / a

Step 5

Cut off about 1 m of the ribbon. Fold it in half. Pass the fold between the threads under the common knot. Push both ends of the ribbon through the folded loop. Tighten it. Cut off the excess threads from the rows (see fig. nos. 5a, 5b, 5c, 5d, 5e, 5f and 5g).

Now, all that remains is to simply tie it in a bow behind your neck.

5 / a

Downloads