Plaited necklace

Difficulty: 3
Technique: stringing, braiding

Plaited triple braid necklace

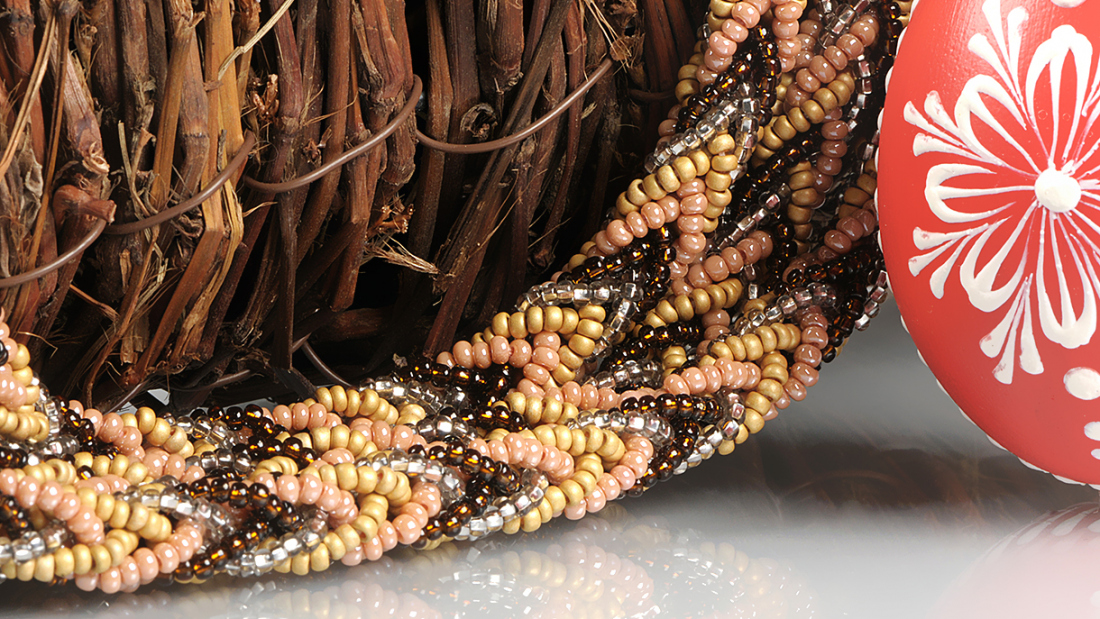
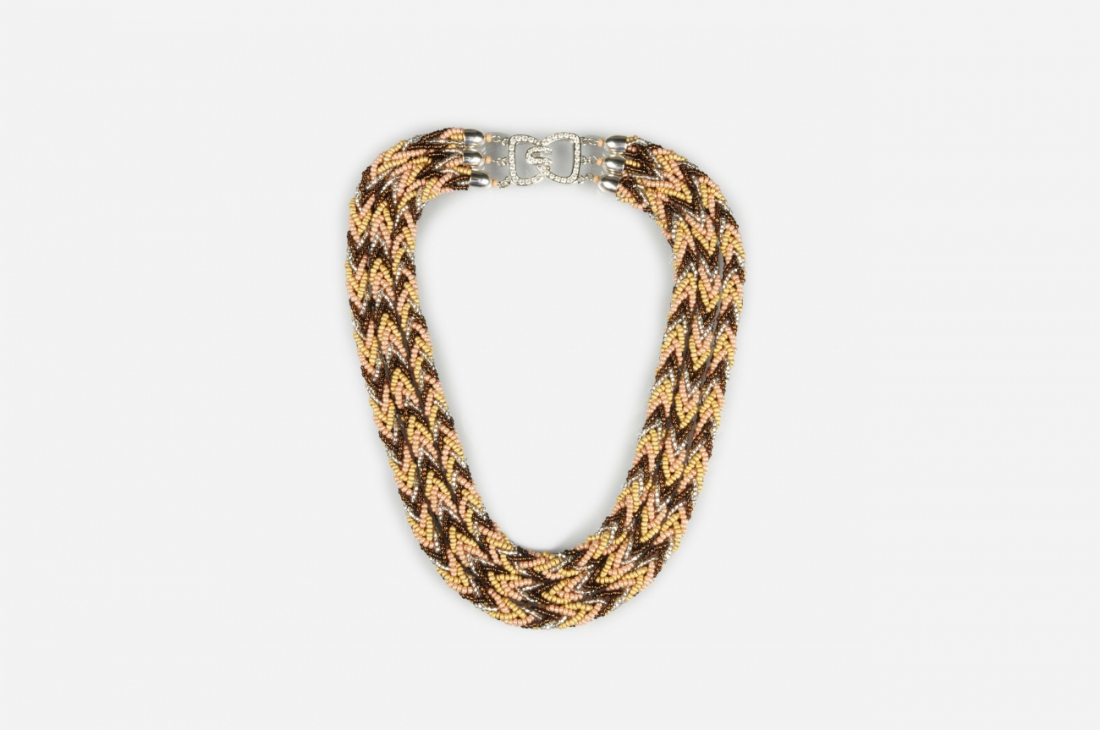
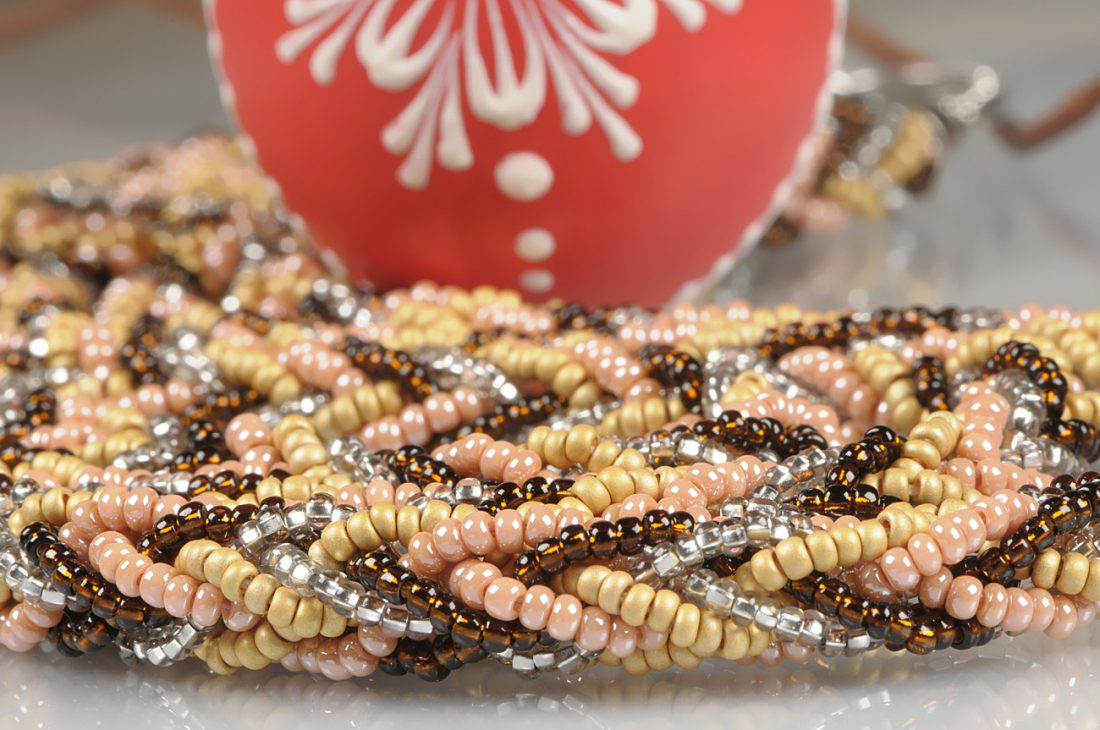
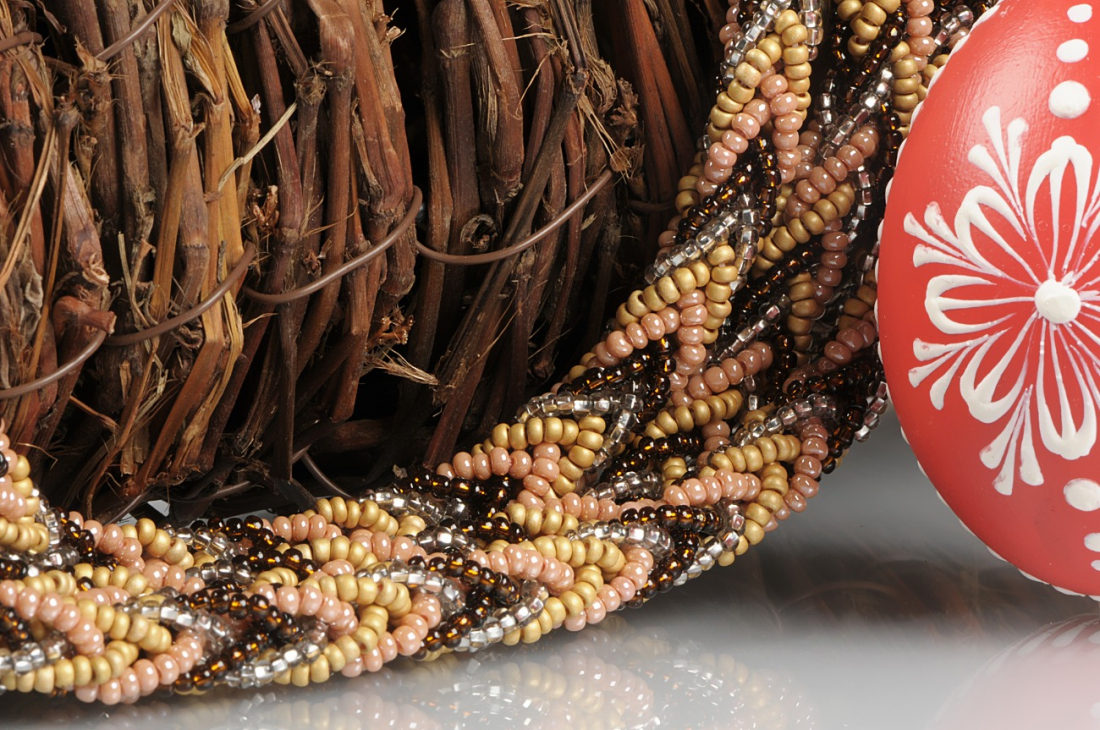
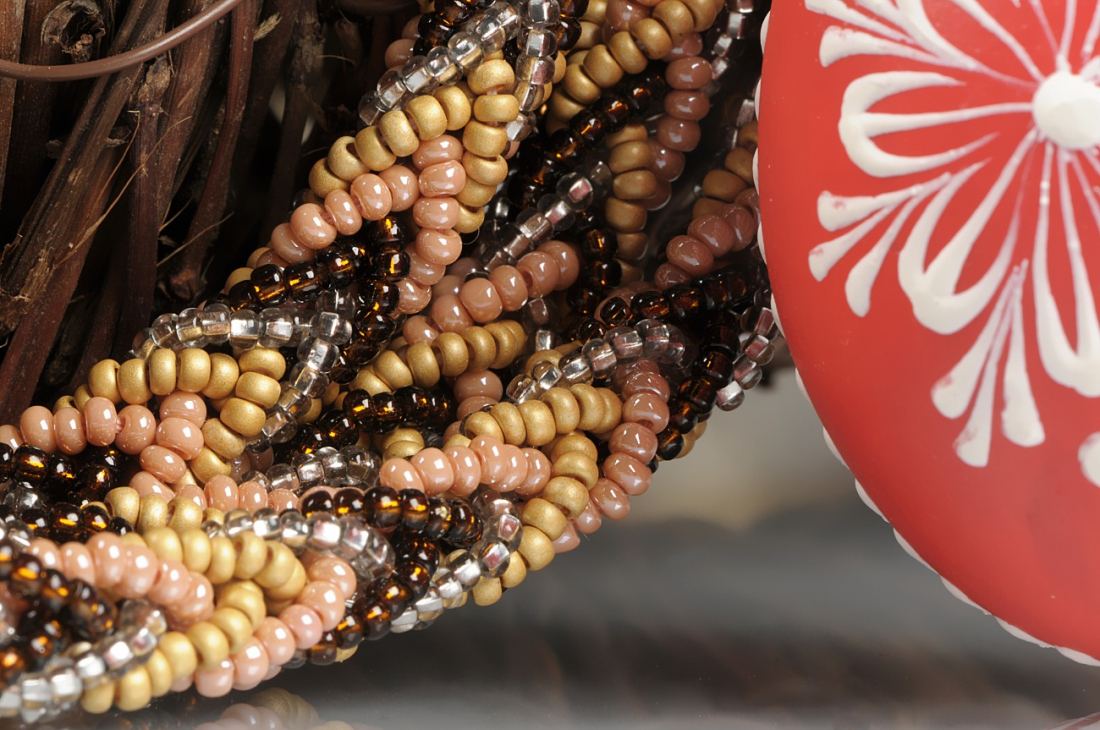
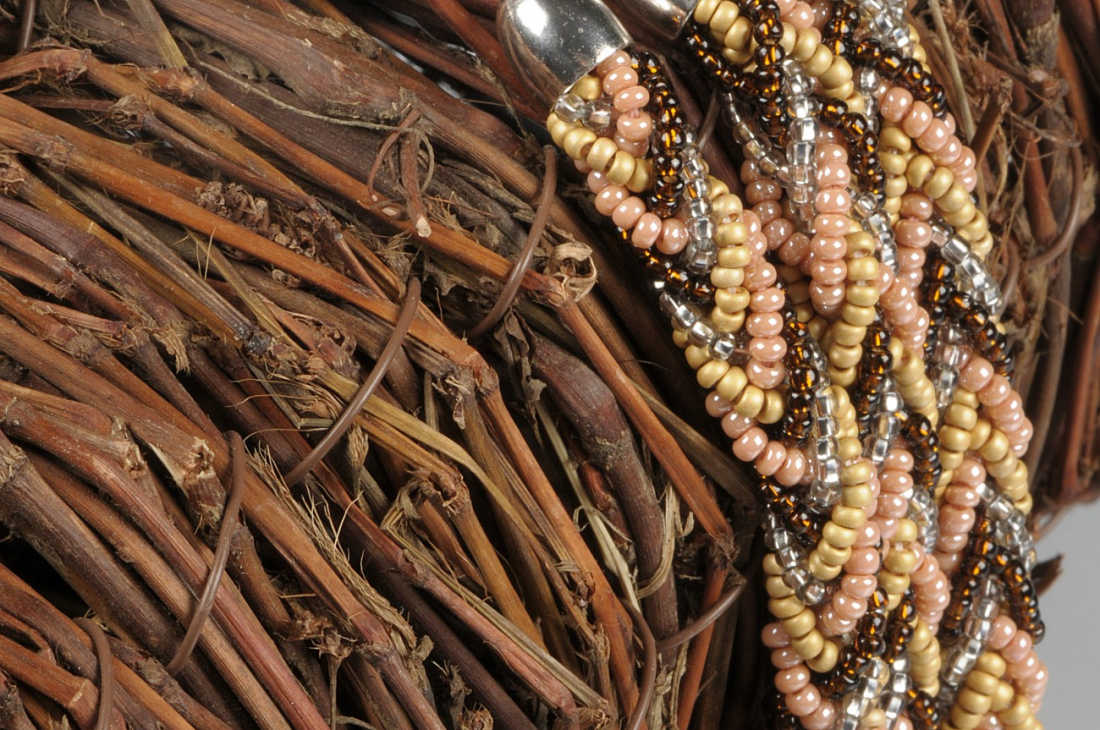
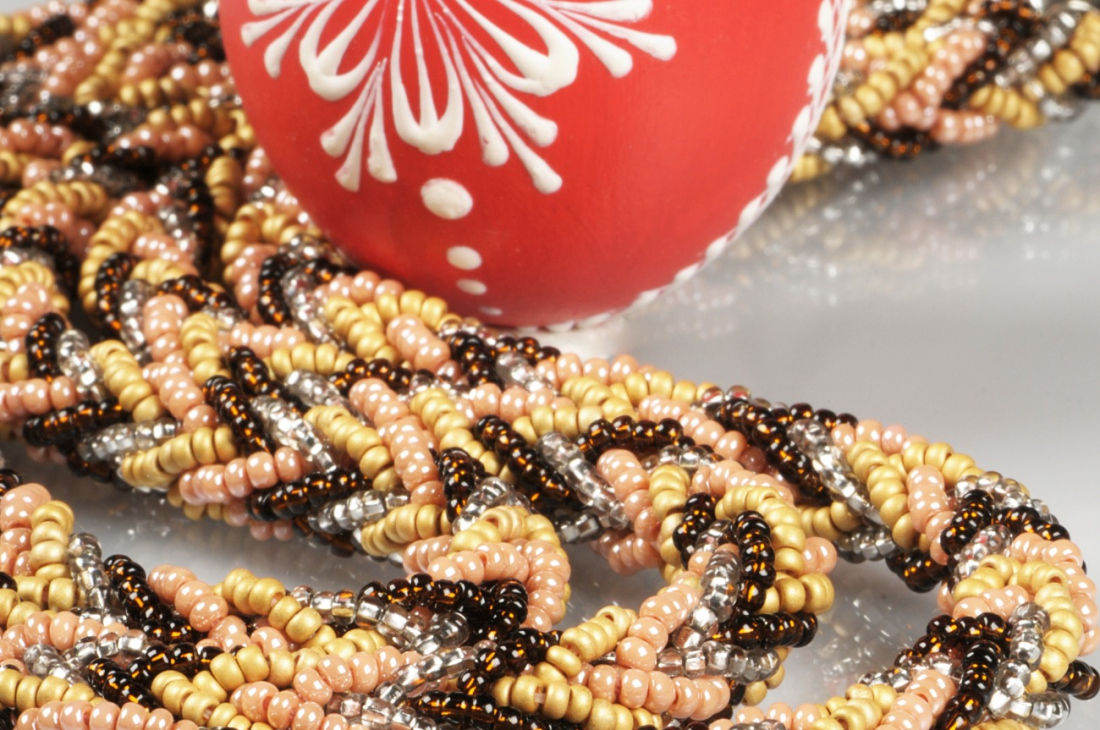
This triple-braid necklace made using seed beads from the PRECIOSA Traditional Czech BeadsTM can be worn as a must-have, popular accessory for daily use, but it is also sure to impress when worn with eveningwear. Preciosa Ornela presents a tutorial on the use of the effective plaiting of seed bead strings.

Ambassadors

Helena Chmelíková

She is able to switch from luxurious and extravagant fashion show pieces to the preparation of hobby projects,
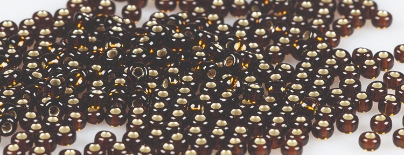
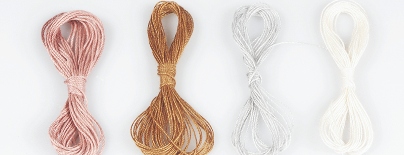
Learn More

Materials & Tools

PRECIOSA Rocailles

331 29 001; 10/0; 17140 brown; 25 g
(R)

PRECIOSA Rocailles

331 19 001; 10/0; 78141 grey; 25 g
(R)

PRECIOSA Rocailles

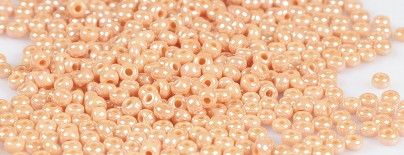
331 19 001; 10/0; 07631 pink; 25 g
(R)

PRECIOSA Rocailles

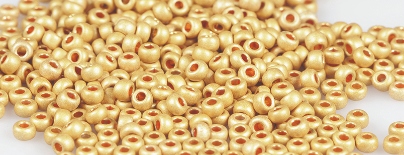
331 39 001; 10/0; 18581 gold matt; 25 g
(R)

PRECIOSA Rocailles

You can use a larger amount (for example rocailles in 50 g bags) for faster and simpler stringing

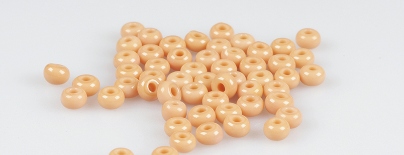
331 19 001; 8/0; 07631 pink; 6x

Other materials

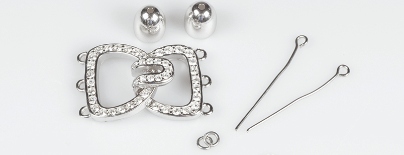
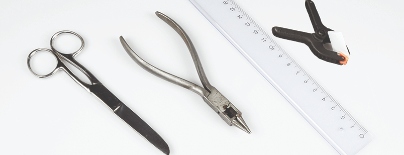
Metal parts: any metal finish, long eye pins, caps, a large triple fastening or a triple frame with a car-abiner and an adjusting chain, small rings or ovals

Other materials

Textiles: medium strength thread, a similar shade to the used materials (for example, grey, pink, yellow, brown)

Tools

Scissors, needle nose pliers, a ruler, 8x clips, small pieces of paper

Procedure

The necklace consists of three rows, each of which has been plaited from 8 strung rocaille strings. Use four rocaille colours. Always string two strings in one colour onto a long thread with free ends. Small spaces appear between the rows when the necklace is hung on the neck.

Step 1

Use one of the plaiting techniques for plaiting together eight strands. 
The shortest row – the stringing is 50 cm long, but it is only 37 cm after plaiting (it depends on the tightening)
The central row – the stringing is 56 cm long, but it is only 41.5 cm after plaiting (it depends on the tightening)
The longest row – the stringing is 62 cm long, but it is only 46.6 cm after plaiting (it depends on the tightening)
The final 3 centimetres from the row are pulled back after plaiting. They are used to enable the better completion and handling of the plait.

Step 2

Tie the 8 strings together. Tie a large knot. Twist the thread into a loop and pass all the ends through it (fig. 2). Pull the rocailles up to the knot. Hang the entire bundle using the strings so that the individual rows can be plaited. It is a good idea for the rows to be almost fully tightened. As such, twist the other ends of the threads around the small pieces of paper and secure them with a clip. Leave about 2 mm of free thread between the clip and the rocaille in order to enable simple plaiting. After tightening the rocailles, renew the 2 mm gap again.

2

Step 3

Halve the strings (4 + 4). Both halves should be arranged in the same way: from four consecutive colours (for example, pink, grey, gold and brown). Take the outer string from one half and place it in the middle of the second half; between two and two. Return to the original half from the bottom side. Place the string by the inside edge. Do the same with the second half. Take the outer string. Place it in the middle of the first half. Place it by the inside edge. Plait the entire row in this way. The beginning may confuse you slightly, as the pattern starts to appear after about 2 cm of plaiting (fig. 3a - 3d).

3 / a

Step 4

Do not plait the strings all the way to the end. The clips and pieces of paper will now be in your way, so pull about the last 3 cm of rocailles from the strings without plaiting them. Tie off the thread just behind the plait with the same knot as at the beginning. You can measure the length of the row before tying it off with the knot and adjust it, if necessary. Tie the eye from the eye pin under the knot. String a cap and a larger seed bead. Connect the eye. Hang the eye on a pin clip or you can place another ring or oval in it.

4

Downloads